

Let’s be real for a second: there’s something magical about biting into a sweet, chewy, and satisfying snack that hits all the right notes. These Homemade Apricot Jam Chocolate Fruit and Nut Bars are just that. Think luscious dark chocolate wrapped around a nutty, fruity blend, with a touch of apricot jam to bring it all together in perfect harmony. You’re going to feel like a snack wizard after making these!
Why You’ll Love Homemade Apricot Jam Chocolate Fruit and Nut Bars
This recipe isn’t just about the ingredients—it’s about creating moments of pure bliss. Whether you’re treating yourself after a long day, sharing them with friends at a gathering, or simply indulging in a little comfort food, these bars are so versatile. Here’s why they’re destined to become your new favorite:
- Versatile: Perfect for any occasion! Imagine snacking on one of these while curled up with a good book or handing them out at a party—either way, they’re a hit.
- Budget-Friendly: With just a few simple pantry staples, these bars are delicious without breaking the bank.
- Quick and Easy: No baking required, just a little melting, mixing, and chilling. You don’t need to be a kitchen pro to whip these up.
- Customizable: Feel free to switch out the nuts, fruits, or jams depending on what you have or love best!
- Crowd-Pleasing: Whether you’re making them for the family or sharing them with friends, everyone’s going to ask for the recipe. They’re a guaranteed winner!
Ingredients
Here’s the magic behind these bars—they’re made with pantry staples, but the result is so much more than the sum of their parts. Let’s break it down:
Dark Chocolate
The heart of these bars. Dark chocolate brings that smooth, slightly bitter flavor that perfectly balances the sweetness of the jam and the crunch of the nuts.
Apricot Jam
This adds a sweet and slightly tangy twist, infusing each bite with a burst of apricot flavor. It’s the secret ingredient that pulls everything together beautifully.
Nuts
A mix of your favorite nuts—almonds, walnuts, cashews—gives the bars a satisfying crunch and a little extra richness. It’s the texture that makes every bite delightful.
Dried Fruit
Cranberries, raisins, or apricots—whatever dried fruit you prefer. The chewy sweetness complements the crunch of the nuts and the richness of the chocolate.
Honey
Natural, sticky, and sweet, honey brings a touch of sweetness that’s just enough to balance the dark chocolate without overwhelming it.
Oats
These add a hearty, chewy texture to the bars, making them filling and satisfying—perfect for a mid-day snack or a quick breakfast on the go.
Vanilla Extract
A little splash of vanilla adds warmth and depth to the overall flavor, making the chocolate and fruit flavors shine.
(Note: The full ingredients list, including measurements, is provided in the recipe card directly below.)
Instructions
Let’s dive into these simple steps to create these delicious bars:
Melt the Chocolate
Begin by melting the dark chocolate. You can either use a double boiler or microwave it in short bursts, stirring every 30 seconds to ensure it doesn’t burn.
Mix the Dry Ingredients
In a large bowl, combine the oats, dried fruit, and nuts. This is where the texture of your bars comes together, so feel free to customize the mix to your liking!
Add the Apricot Jam and Honey
Stir in the apricot jam and honey, making sure everything gets evenly coated and combined. This adds that sweet, sticky goodness that holds everything together.
Combine with the Melted Chocolate
Pour the melted chocolate over the dry ingredients and stir until it’s all evenly mixed. The chocolate will coat the oats, nuts, and fruit beautifully, creating a rich, decadent texture.
Press into a Pan
Line a baking dish with parchment paper and pour the mixture in. Press it down gently to compact everything into an even layer. This ensures the bars will hold together once set.
Chill to Set
Place the dish in the fridge and let the bars chill for about 15-20 minutes, until they firm up.
Cut and Enjoy
Once the bars have set, remove them from the fridge and cut them into squares. Enjoy the sweet, nutty, chocolatey goodness!
Nutrition Facts
Servings: 12 bars
Calories per serving: 180 calories
Preparation Time
Prep Time: 10 minutes
Chill Time: 20 minutes
Total Time: 30 minutes
How to Serve Homemade Apricot Jam Chocolate Fruit and Nut Bars
These bars are perfect on their own, but here are a few ideas for enjoying them even more:
- With a Warm Drink: Pair these bars with a hot cup of tea, coffee, or even warm milk. The rich chocolate and sweet apricot jam make them the perfect companion to a cozy beverage.
- For Breakfast or Snack: These bars are hearty enough for a quick breakfast or as an afternoon pick-me-up. They’re portable, so you can enjoy them anywhere!
- At a Party: Cut them into bite-sized pieces and serve them at your next gathering. Trust me, guests will be asking for the recipe.
- With Ice Cream: Crumble them over a scoop of vanilla ice cream for a treat that takes dessert to the next level.
- Standalone: Sometimes, a bar is all you need. Enjoy one by itself as a satisfying snack!
Additional Tips
Here are some extra tips to help you get the most out of this recipe:
- Prep Ahead: You can prepare the dry ingredients the night before to save time. Just store them in an airtight container.
- Spice It Up: If you like a little heat, try adding a pinch of cayenne pepper or smoked paprika for an unexpected twist.
- Dietary Adjustments: Make it vegan by using maple syrup instead of honey and dairy-free chocolate.
- Storage Tips: Store any leftover bars in an airtight container in the fridge for up to a week—or freeze them for longer storage!
- Double the Batch: These bars freeze well, so consider doubling the recipe and storing them in the freezer for an easy snack anytime.
FAQ Section
Q1: Can I substitute apricot jam with other flavors?
A1: Absolutely! You can use raspberry, strawberry, or even peach jam. The flavors will vary, but they’ll still be delicious!
Q2: Can I make these bars vegan?
A2: Yes! Just swap the honey for maple syrup and use dairy-free chocolate to make them vegan-friendly.
Q3: How do I store leftovers?
A3: Store the bars in an airtight container in the fridge for up to a week. They also freeze well for longer storage.
Q4: Can I add other fruits or nuts?
A4: Yes! Feel free to mix in your favorite nuts or dried fruits like raisins, cherries, or even chopped apricots for extra texture.
Q5: How do I make these bars less sweet?
A5: If you prefer less sweetness, you can reduce the amount of honey or use a dark chocolate with a higher cocoa content.
Q6: Can I double the recipe?
A6: Yes! You can double the recipe and store any extras in the fridge or freezer. It’s great for making a bigger batch when you have a crowd.
Q7: Can I use instant oats instead of rolled oats?
A7: Yes, instant oats will work, but rolled oats provide a chewier texture that adds more bite to the bars.
Q8: How long do these bars last in the fridge?
A8: These bars will last in the fridge for about a week if stored in an airtight container.
Q9: Can I skip the chilling step?
A9: I wouldn’t recommend it, as chilling helps the bars firm up and hold together better. But if you’re really in a hurry, you can freeze them for about 10 minutes to speed things up!
Q10: Can I use different types of jam?
A10: Yes! You can experiment with different fruit jams like strawberry, raspberry, or blueberry for a twist on the flavor.
Conclusion
These Homemade Apricot Jam Chocolate Fruit and Nut Bars are your new go-to snack for any occasion! With just a few simple ingredients and minimal effort, you’ll have a batch of delicious, satisfying bars that everyone will love. Whether you’re making them for yourself or sharing them with others, they’re sure to become a favorite in your recipe collection. Trust me, once you make these, you’ll wonder how you ever lived without them. Enjoy!
PrintHomemade Apricot Jam Chocolate Fruit and Nut Bars

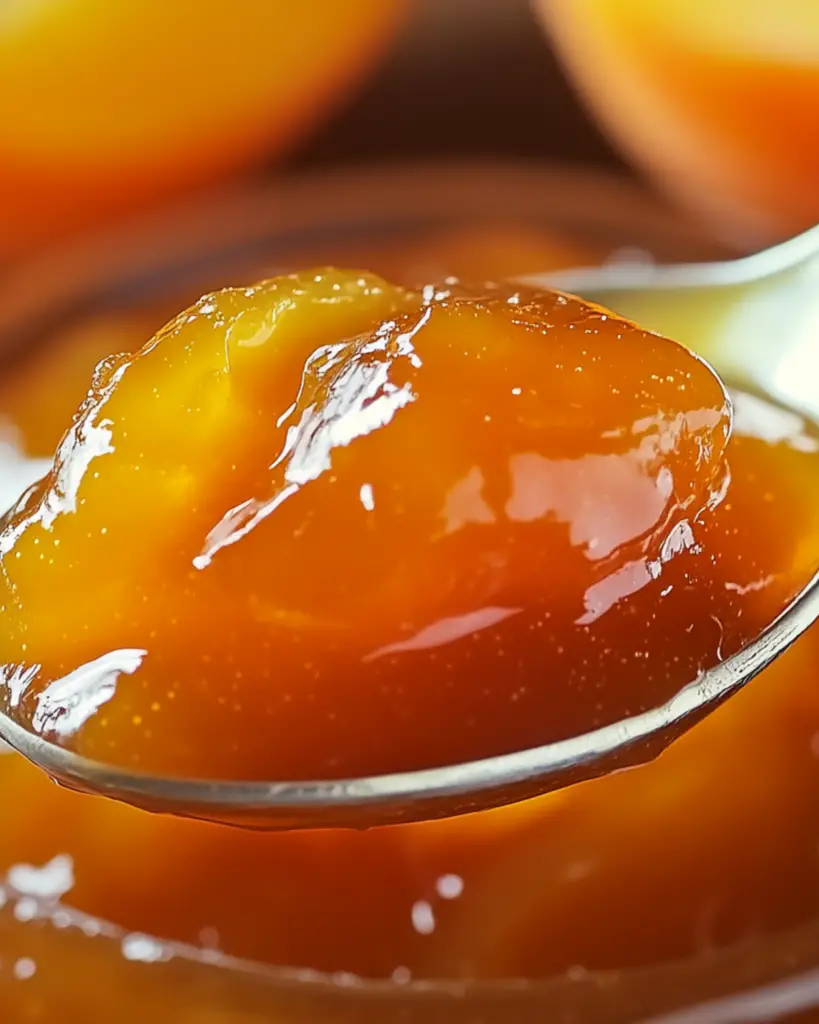
This homemade apricot jam is sweet, tangy, and incredibly simple to make, using just three ingredients. It’s perfect for preserving apricots from your garden or local market, and can be enjoyed on toast, in desserts, or as a filling for pastries.
- Prep Time: 30minutes
- Cook Time: 30minutes
- Total Time: 1 hour
- Yield: 9 small jars (8 oz each) 1x
- Category: Condiments
- Method: Stovetop
- Cuisine: American
- Diet: Vegetarian
Ingredients
- 4.8 lb apricots (about 12 cups; use “just ripe” and ripe fruit; a few underripe ones will add more pectin and acidity)
- 3.3 lb sugar (7.5 cups)
- 1/3 cup lemon juice (from 2 small lemons; bottled works fine too)
Equipment:
- 9 small jars (8 oz each, 250 ml)
- Large, shallow heavy-based saucepan
- Silicone spatula or wooden spoon
- Food thermometer
- Canning funnel (optional)
- Bubble remover (optional)
- Magnetic lid wand (optional)
- Water bath canner
- Canning tongs
- 2–3 small plates (for testing)
Instructions
- Prepare the Jars:
- Sterilize your jars, lids, and bands by washing them in hot, soapy water and rinsing them well. Let them drain and dry.
- Place 2-3 small plates in the freezer for testing the jam later.
- If you plan to can the jam, prepare your canner by adding the trivet/rack and filling it with enough water to submerge the jars by 2 inches.
- Make the Jam:
- Wash, dry, and pit the apricots (slice them in half and remove the pit). Juice the lemons.
- In a large, deep, heavy-based stainless steel saucepan, combine the halved apricots, lemon juice, and sugar. Bring to a boil over medium heat, stirring constantly to dissolve the sugar.
- Boil the mixture for about 25-30 minutes, stirring constantly to prevent burning and scooping off any foam that forms. The mixture should thicken and coat the spoon.
- Test the Jam:
- Using a Candy Thermometer: Insert the thermometer into the center of the jam. It should reach 220ºF (104ºC).
- Using the Frozen Plate Method: Remove the saucepan from heat, place a teaspoon of jam on one of the frozen plates, and return it to the freezer for 1 minute. Press the edge of the jam with your fingertip; it should wrinkle and be set.
- Fill the Jars:
- Heat the jars in the water bath canner (with lids) or in the oven (without lids) to prevent cracking when hot jam is added.
- Ladle the hot jam into the jars, leaving about ¼ inch (0.5 cm) of headspace. Tap the jar to remove air bubbles and wipe the rims with a clean towel.
- Seal the jars with lids and screw the bands on until fingertip-tight (if canning) or fully sealed if not canning.
- Can the Jam (Optional):
- Place the filled jars in the prepared canner, ensuring they are submerged by at least 1 inch of water.
- Bring to a boil over medium-high heat, cover, and process for 10 minutes (adjust for altitude if needed).
- Remove the lid and let the jars sit for 5 minutes before using canning tongs to transfer them to a clean towel to cool for 24 hours.
- Check the seal (the lid should not pop up and down when pressed). Unsealed jars can be reprocessed or refrigerated for immediate use.
Storage:
- Fridge: If not water-bath canned, store in the fridge and use within a month.
- Freezer: Store in freezer-safe jars or bags for 4-6 months.
- Canned: Store in a cool, dark place for up to a year. Once opened, refrigerate and use within 3-4 weeks.
Enjoy your homemade apricot jam on toast, in desserts, or as a filling for pastries!
Notes
- If you prefer a chunkier jam, pulse the apricots in a food processor for a rougher texture before cooking.
- For added flavor, you can add a pinch of cinnamon or vanilla extract during the cooking process.
Nutrition
- Serving Size: 1 tablespoon (about 20g)
- Calories: 60kcal
- Sugar: 15g
- Sodium: 0mg
- Fat: 0g
- Saturated Fat: 0g
- Unsaturated Fat: 0g
- Trans Fat: 0g
- Carbohydrates: 16g
- Fiber: 1g
- Protein: 0g
- Cholesterol: 0mg