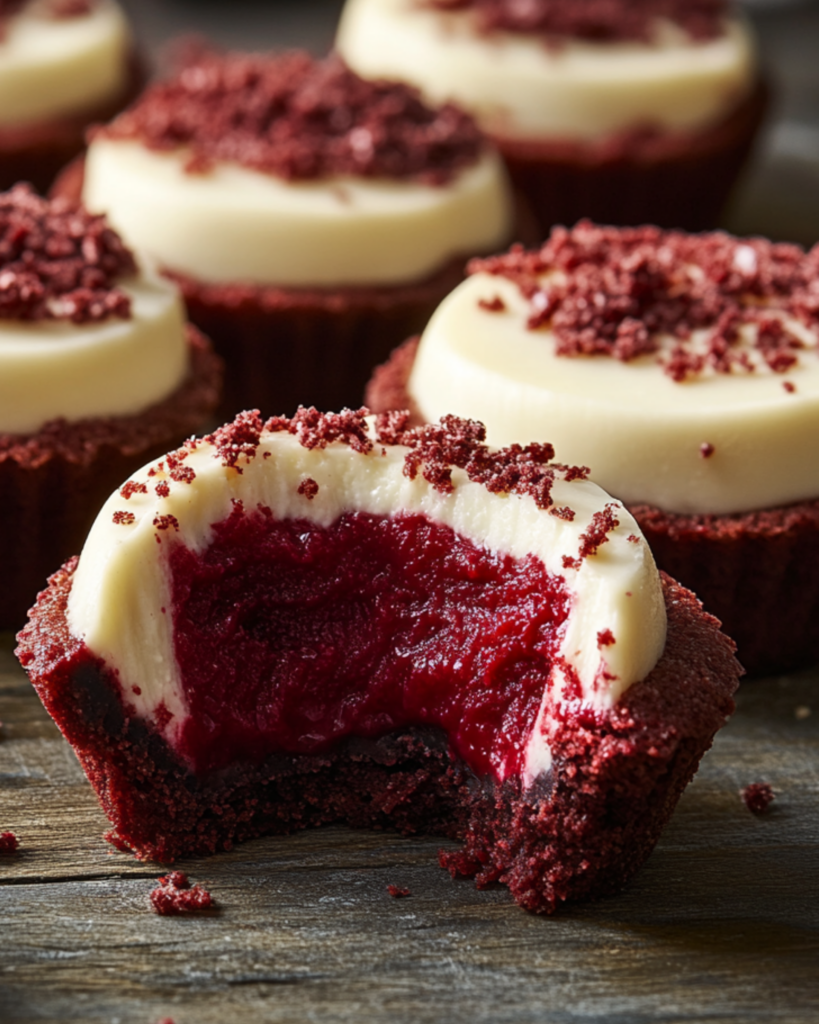
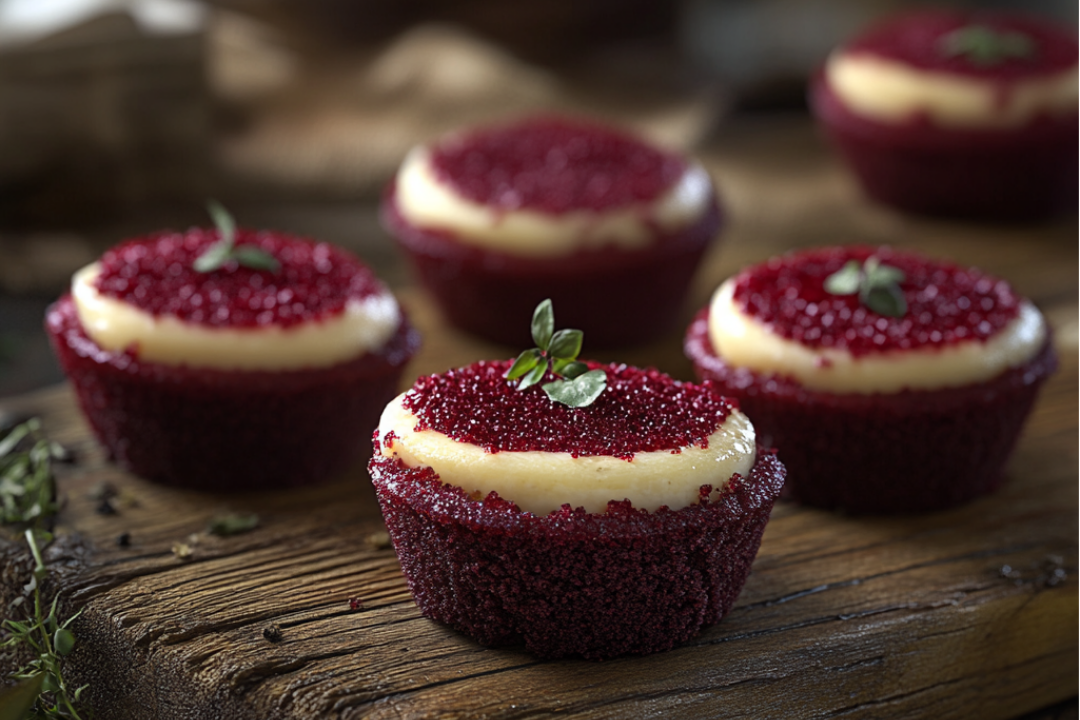
If you’re ready for a dessert that’s as beautiful as it is delicious, these Red Velvet Cheesecake Mini Pies are calling your name! Imagine buttery, flaky pie crusts filled with creamy, tangy cheesecake and swirled with rich red velvet goodness. The color is gorgeous, the flavor is perfectly balanced, and the texture? Heavenly. Trust me, these mini pies will steal the show at any occasion, and I bet you won’t be able to stop at just one!
Why You’ll Love Red Velvet Cheesecake Mini Pies
This isn’t just a dessert—it’s an experience. Whether you’re celebrating a special occasion, treating yourself on a cozy weekend, or looking for a show-stopping dessert for a gathering, these Red Velvet Cheesecake Mini Pies will win hearts (and taste buds). Here’s why they’re so irresistible:
Versatile: Perfect for everything from a date night to a holiday gathering or just because you want something amazing to treat yourself with. They’re the perfect mix of festive and everyday indulgence.
Budget-Friendly: You don’t need to break the bank for a dessert that looks and tastes luxurious. With just a few simple ingredients, you can create something totally show-stopping.
Quick and Easy: Despite looking fancy, these mini pies are simple to make. Even if you’re not a pro in the kitchen, you’ll feel like one after making these. It’s practically foolproof!
Customizable: You can make them even more fun by topping them with whipped cream, berries, or even a little chocolate drizzle. Let your creativity run wild!
Crowd-Pleasing: With their gorgeous red color and creamy, tangy filling, these mini pies are guaranteed to be a hit with both adults and kids. Every bite will be met with “wow!”

Ingredients
Here’s what you’ll need to create these dreamy little pies:
Pie Crusts: The buttery, flaky base is what holds it all together. The crust adds just the right amount of crunch and texture to complement the creamy cheesecake filling.
Cream Cheese: This is the heart of the cheesecake filling, giving it that smooth, creamy, tangy flavor. It’s the perfect balance to the rich red velvet layers.
Sugar: A touch of sweetness in the cheesecake filling helps balance the tanginess of the cream cheese, making every bite a delightful contrast of flavors.
Eggs: Eggs give the cheesecake filling its structure and smooth consistency. They help the filling set to that perfect creamy texture.
Sour Cream: A little sour cream adds that signature cheesecake tang, making the filling even creamier and more indulgent.
Red Velvet Cake Mix: This is where the red velvet magic happens! You’ll be using the cake mix to create the red velvet swirl in the cheesecake, infusing it with all the rich flavor and color that makes red velvet so special.
Vanilla Extract: A dash of vanilla gives the cheesecake filling a warm, subtle flavor that enhances the other ingredients perfectly.
(Note: the full ingredients list, including measurements, is provided in the recipe card directly below.)
Instructions
Here’s how to create these gorgeous mini pies, step by step:
Prepare the Pie Crusts: Preheat your oven to the temperature specified in your recipe card. While it’s heating up, lightly grease your mini pie tins and press your pie crusts into the tins. Use a fork to prick the bottoms to prevent bubbling.
Make the Red Velvet Cheesecake Filling: In a large bowl, beat the cream cheese, sugar, and eggs until smooth and creamy. Add the sour cream and vanilla extract, and mix until fully incorporated. This filling should be rich and velvety in texture.
Add the Red Velvet Swirl: Take about 1/4 of the cheesecake filling and mix in the red velvet cake mix. You want to swirl it into the cheesecake filling for that gorgeous, vibrant red color. Then, spoon the red velvet mixture into each mini pie crust and swirl with the plain cheesecake filling. Don’t be afraid to mix it up a little—it’s okay if the red velvet gets a little mixed in with the white filling. That’s where the magic happens!
Bake: Place the mini pies in the preheated oven and bake for the time specified in your recipe card. The pies are done when the edges are set but the centers are still a little jiggly. Be careful not to overbake—they’ll set as they cool.
Cool and Serve: Once they’re out of the oven, let the mini pies cool in the tins for about 15 minutes. Then, transfer them to a wire rack to cool completely. Once cool, you can top them with whipped cream, berries, or even a sprinkle of chocolate shavings for that extra touch.
Enjoy: Serve your mini pies chilled or at room temperature. Each bite is an explosion of creamy cheesecake and rich red velvet goodness.
Nutrition Facts
Servings: 12
Calories per serving: 350 (approximately)
Preparation Time
Prep Time: 15 minutes
Cook Time: 25-30 minutes
Total Time: 45 minutes
How to Serve Red Velvet Cheesecake Mini Pies
These little pies are perfect for all sorts of occasions. Here are a few ideas on how to serve them:
Topped with Whipped Cream: A dollop of whipped cream on top adds a light, fluffy contrast to the rich and creamy mini pies. It’s the perfect finishing touch!
Pair with Fresh Berries: Add a handful of fresh berries on the side for a pop of color and a refreshing, slightly tart contrast to the sweetness of the pies.
Perfect for Parties: These mini pies are a great addition to any dessert table. Serve them alongside other treats like cookies, brownies, or fruit tarts for a full dessert spread.
For a Cozy Treat: Enjoy them with a hot cup of coffee or a cozy cup of tea. The creamy, tangy filling paired with a warm beverage makes for the perfect cozy snack.
Additional Tips
Here are some extra tips to make sure your Red Velvet Cheesecake Mini Pies turn out perfectly:
Chill the Pies: For the best texture, chill your mini pies in the fridge for at least an hour after they cool. This will help the cheesecake set and make them easier to serve.
Customize the Swirl: If you want more vibrant color, you can add more cake mix to the red velvet layer. Just be sure to swirl it gently so you get that beautiful marble effect!
Store Leftovers: Store any leftover pies in an airtight container in the fridge for up to 3 days. They’ll still taste delicious, and they get even better after chilling overnight.
Make Ahead: You can make these mini pies ahead of time. Simply follow the recipe, and once they’re baked and cooled, store them in the fridge until you’re ready to serve.
Use a Store-Bought Crust: If you’re short on time, feel free to use a pre-made pie crust! It’s a total time-saver while still giving you that delicious buttery base.
FAQ Section
Q1: Can I make these mini pies in advance?
A1: Yes! These mini pies can be made up to a day ahead of time. Just store them in the fridge until you’re ready to serve.
Q2: Can I use a different flavor of cake mix?
A2: Absolutely! While red velvet is the classic choice, you can swap in other cake flavors like chocolate or vanilla for a fun twist.
Q3: Can I make these in a regular pie dish instead of mini pies?
A3: You can! Just be sure to adjust the baking time accordingly, as a larger pie will take longer to cook through.
Q4: How do I store leftovers?
A4: Store leftover pies in an airtight container in the fridge for up to 3 days. They’ll stay fresh and delicious!
Q5: Can I freeze these pies?
A5: Yes, you can freeze them! Just place the cooled pies in an airtight container or wrap them tightly in plastic wrap and foil. Freeze for up to 1 month, then thaw in the fridge before serving.
Q6: Can I add chocolate chips to the filling?
A6: Absolutely! Chocolate chips would make a delicious addition to the filling. Just sprinkle a few into the mixture before swirling in the red velvet layer.
Q7: Can I use a homemade pie crust?
A7: Yes! If you prefer homemade pie crust, go ahead and make it from scratch. It’ll add a personal touch to the mini pies.
Q8: How can I make the pies less sweet?
A8: You can reduce the sugar in the cheesecake filling to suit your taste. Just keep in mind that it will slightly alter the flavor balance.
Q9: Can I use a different filling, like chocolate cheesecake?
A9: Yes! You can easily swap the cheesecake filling for a different flavor, like chocolate or strawberry, to make these mini pies your own.
Q10: How do I reheat leftover pies?
A10: You can enjoy them cold, but if you prefer them warm, reheat them gently in the microwave for 20-30 seconds. Be careful not to overheat!
Conclusion
There you have it—Red Velvet Cheesecake Mini Pies that are as delightful to make as they are to eat. They’re sweet, creamy, and full of that perfect red velvet flavor that’ll have everyone coming back for more. Whether you’re serving them at a gathering or enjoying them on your own, these mini pies are sure to be a hit. So go ahead, treat yourself to these indulgent bites of joy, and let the deliciousness unfold!
PrintRed Velvet Cheesecake Mini Pies
These Red Velvet Cheesecake Mini Pies are rich, velvety, and the perfect individual-sized indulgence for Valentine’s Day or any special occasion!
- Prep Time: 20 minutes
- Cook Time: 20 minutes
- Total Time: 2 hours 40 minutes
- Yield: 12 mini pies 1x
- Category: Dessert
- Method: baking
- Cuisine: American
- Diet: Vegetarian
Ingredients
Crust:
- 3 chocolate wafer cookies, crushed
- 2 tablespoons butter, melted
Filling:
- 8 oz cream cheese, softened
- 1/3 cup granulated sugar
- 1 teaspoon vanilla extract
- Red food coloring (as needed for a vibrant hue)
- 2 large eggs
- 1 tablespoon unsweetened baking cocoa
- 1/4 cup baking mix (like Bisquick)
- 2 tablespoons milk
Toppings:
- 1 cup whipping cream
- 2 tablespoons powdered sugar
- Chocolate shavings
Instructions
- Prepare the Crust: Preheat your oven to 325°F (163°C). Grease or line a 12-cup muffin tin with cupcake liners. In a small bowl, mix the crushed chocolate wafer cookies with the melted butter until well combined. Press about 1 tablespoon of the mixture into the bottom of each muffin cup, forming an even crust.
- Prepare the Filling: In a large mixing bowl, beat the softened cream cheese and granulated sugar until smooth and creamy. Add the vanilla extract and red food coloring, mixing until the desired shade of red is achieved. Beat in the eggs one at a time until fully incorporated. Add the unsweetened cocoa, baking mix, and milk, mixing until smooth and lump-free.
- Assemble the Mini Pies: Pour the filling evenly over the crusts, filling each muffin cup about 3/4 full.
- Bake: Bake in the preheated oven for 18-20 minutes, or until the centers are just set. Remove from the oven and let the pies cool in the pan for 10 minutes before transferring to a wire rack to cool completely. Chill in the refrigerator for at least 2 hours or until firm.
- Prepare the Whipped Cream Topping: In a chilled bowl, whip the heavy cream and powdered sugar together until soft peaks form.
- Decorate: Pipe or dollop the whipped cream onto the chilled mini pies. Garnish with chocolate shavings for a finishing touch.
Notes
- You can add a bit more red food coloring if you’d like a deeper red color.
- For extra flavor, add a splash of almond extract to the whipped cream topping.
Nutrition
- Serving Size: 1 mini pie
- Calories: 210kcal
- Sugar: 17g
- Sodium: 150mg
- Fat: 15g
- Saturated Fat: 8g
- Unsaturated Fat: 5g
- Trans Fat: 0g
- Carbohydrates: 20g
- Fiber: 1g
- Protein: 3g
- Cholesterol: 60mg


