

If you’re looking for a fun, festive, and super easy treat to make this Easter, these Cornflakes Easter Nests are the answer! Imagine crunchy cornflakes coated in rich chocolate, shaped into cute little nests, and topped with colorful candy eggs. Perfect for kids and adults alike, these little nests are not only adorable but also delicious and super simple to make. Trust me, once you take a bite, you’ll want to make them every year!
Why You’ll Love Cornflakes Easter Nests
These Cornflakes Easter Nests are everything you could want in a seasonal treat. Here’s why they’re a hit:
- Fun to Make and Eat: This recipe is perfect for involving little helpers in the kitchen. The process of forming the nests is just as fun as eating them!
- No-Bake: That’s right—no oven required. Just a few minutes of prep, and these nests set in the fridge while you go about your day.
- Customizable: You can make them as colorful and creative as you like. Switch up the candy eggs with jellybeans or mini chocolate eggs, or even sprinkle some shredded coconut for an extra touch.
- Perfect for Easter: These nests are the ideal Easter treat. They’re festive, fun, and have that nostalgic feel that makes them a seasonal favorite.
- Kid-Friendly: This recipe is simple enough for kids to join in on the fun. Get them involved in stirring the mixture or decorating the nests!
Ingredients
Here’s what you’ll need to make these fun and festive Easter treats:
- Cornflakes: The base of these nests. They add a delightful crunch and texture that pairs perfectly with the sweet chocolate coating.
- Milk Chocolate: Rich and creamy, milk chocolate is the perfect match for the cornflakes, binding them together into crunchy, chocolatey nests.
- Butter: Adds a smooth, velvety texture to the chocolate and helps bind the cornflakes.
- Golden Syrup or Honey: Adds a touch of sweetness and helps everything stick together.
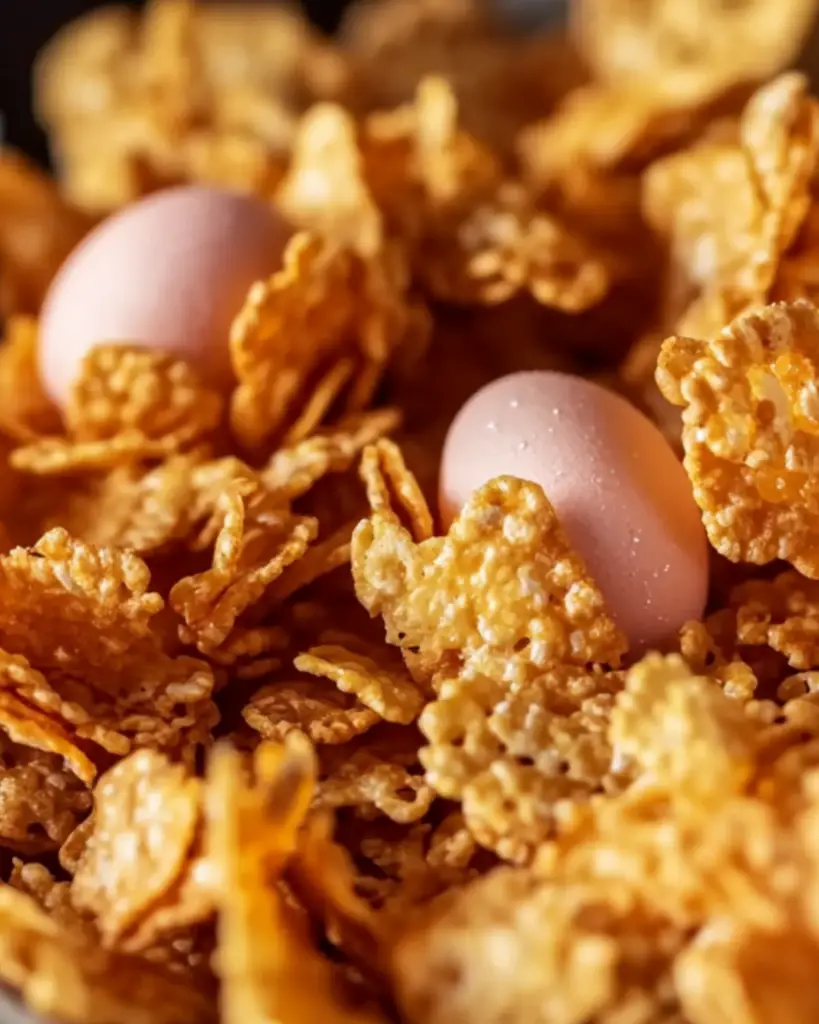
- Mini Chocolate Eggs or Candy Eggs: These are the ‘eggs’ that sit in the center of each nest, making them look extra adorable and Easter-appropriate.
- Shredded Coconut (Optional): For a more “nest-like” texture, sprinkle some shredded coconut on top for a nice finish.
(Note: The full ingredient list, including measurements, is provided in the recipe card directly below.)
Instructions
Making these nests is a breeze. Here’s how you do it:
- Melt the Chocolate: In a heatproof bowl, melt the milk chocolate, butter, and golden syrup or honey. You can do this in the microwave, stirring every 20 seconds until melted and smooth, or melt it gently over a double boiler.
- Combine with Cornflakes: Once the chocolate is melted, pour it over the cornflakes in a large bowl. Gently stir to coat the cornflakes evenly with the chocolate.
- Form the Nests: Using a spoon, carefully spoon out the chocolate-covered cornflake mixture into muffin tin cups or cupcake liners. Shape the mixture into a nest by gently pressing down in the center to form a small indent.
- Add the Eggs: Once all the nests are shaped, place a few mini chocolate eggs or candy eggs in the center of each nest.
- Chill to Set: Place the nests in the fridge for about 1 hour, or until they are set and firm.
- Serve & Enjoy: Once the nests are set, they’re ready to be served! Enjoy them with family and friends, or pack them up for an Easter gift!
Nutrition Facts
Servings: 12
Calories per serving: 180
Preparation Time
Prep Time: 10 minutes
Chill Time: 1 hour
Total Time: 1 hour 10 minutes
How to Serve Cornflakes Easter Nests
These adorable nests are perfect for Easter celebrations, but they also make a fun snack for any time of year. Here’s how you can enjoy them:
- Easter Treats: Serve them as part of your Easter spread, whether it’s an Easter brunch or a fun family gathering.
- Gift Them: Package them in little gift boxes or cellophane bags to give as Easter gifts to friends, family, or neighbors.
- Perfect for Kids: These are ideal for Easter egg hunts or school parties. The kids will love making and eating them!
Presentation matters too! Place the nests in a cute basket or on a festive tray with some additional Easter-themed decorations for the ultimate presentation.
Additional Tips
Here are some extra tips to make your Cornflakes Easter Nests even more special:
- Make It Extra Sweet: If you want to add an extra layer of sweetness, drizzle a little white chocolate over the nests once they’ve set.
- Add Flavor: For a twist, you could stir in a handful of mini marshmallows or dried fruit into the cornflakes before adding the chocolate.
- Storage Tips: Store these nests in an airtight container at room temperature for up to 5 days, or refrigerate them for a longer shelf life.
FAQ Section
Q1: Can I use dark chocolate instead of milk chocolate?
A1: Absolutely! Dark chocolate will give a richer, less sweet flavor, but it pairs wonderfully with the cornflakes.
Q2: How long do these Cornflakes Easter Nests last?
A2: These nests will last up to 5 days at room temperature. Just store them in an airtight container to keep them fresh.
Q3: Can I make these nests in advance?
A3: Yes! These nests are a great make-ahead treat. Make them a day or two before Easter, and they’ll be ready to go!
Q4: Can I use a different type of cereal?
A4: Definitely! You can use any crunchy cereal, such as Rice Krispies or even Cheerios, in place of cornflakes.
Q5: Can I use different candy eggs?
A5: Yes! You can swap out the mini chocolate eggs for jellybeans, sugar-coated candies, or any Easter-themed candy you prefer.
Q6: Can I freeze these Cornflakes Easter Nests?
A6: While freezing may alter the texture of the chocolate slightly, you can freeze them for up to 2 months. Just make sure to store them in an airtight container.
Q7: Can I make a bigger batch?
A7: Yes! This recipe can easily be doubled or tripled to make more nests for larger gatherings.
Q8: Can I use maple syrup instead of golden syrup?
A8: Yes, you can substitute maple syrup, but it will give a slightly different flavor profile, though still delicious!
Q9: How do I remove the nests from the muffin tin?
A9: If you’re using cupcake liners, simply peel them off once they’ve set. If you’re using a muffin tin without liners, use a spoon to gently loosen the edges.
Q10: Can I make these nests without any sweeteners?
A10: You can omit the golden syrup or honey, but the mixture might be a bit drier. You could try using a sugar-free syrup instead, if desired.
Conclusion
These Cornflakes Easter Nests are an absolute treat for both kids and adults. They’re quick to make, fun to eat, and just the right amount of sweetness. Plus, they make the perfect addition to your Easter celebrations or any occasion where you want to spread some joy. Grab those cornflakes, melt some chocolate, and get ready to create a batch of these irresistible nests! Happy Easter!
PrintCornflakes Easter Nests

These adorable Cornflakes Easter Nests are a fun, no-bake treat that’s crunchy, chocolatey, and perfect for Easter! Made with just a few ingredients, they’re easy to make and a hit with kids and adults alike. Ideal for sharing during the holiday season or as a sweet, festive snack.
- Prep Time: 10 minutes
- Cook Time: 0 minutes
- Total Time: 30 minutes
- Yield: 12 nests (varies based on size) 1x
- Category: Dessert
- Method: No-bake
- Cuisine: American
Ingredients
- 2 ½ cups cornflakes cereal
- 6 oz (170g) milk chocolate (or white/dark chocolate), melted
- 1 tbsp peanut butter (optional for extra creaminess)
- Mini chocolate eggs or jelly beans for decoration
Instructions
- Melt the Chocolate: In a microwave-safe bowl, melt the chocolate in 30-second intervals, stirring in between, until smooth. Stir in the peanut butter (if using) for extra richness.
- Coat the Cornflakes: Add the cornflakes to the melted chocolate and gently stir until fully coated.
- Shape the Nests: Line a baking sheet with parchment paper. Spoon the mixture into small nest-shaped piles on the parchment paper. Use the back of a spoon to create a small indent in the center of each nest.
- Add the Eggs & Set: Place mini chocolate eggs or jelly beans into the center of each nest. Let the nests set at room temperature or chill in the refrigerator for about 30 minutes until firm.
Notes
- For a twist, try using white or dark chocolate for a different flavor.
- These nests can be made in advance and stored in an airtight container for up to a week.
- You can also try adding a drizzle of melted chocolate over the top for a decorative finish.
Nutrition
- Serving Size: 1 nest
- Calories: 150mg
- Sugar: 14g
- Sodium: 30mg
- Fat: 8g
- Saturated Fat: 4g
- Unsaturated Fat: 3g
- Trans Fat: 0g
- Carbohydrates: 19g
- Fiber: 1g
- Protein: 1g
- Cholesterol: 5mg