

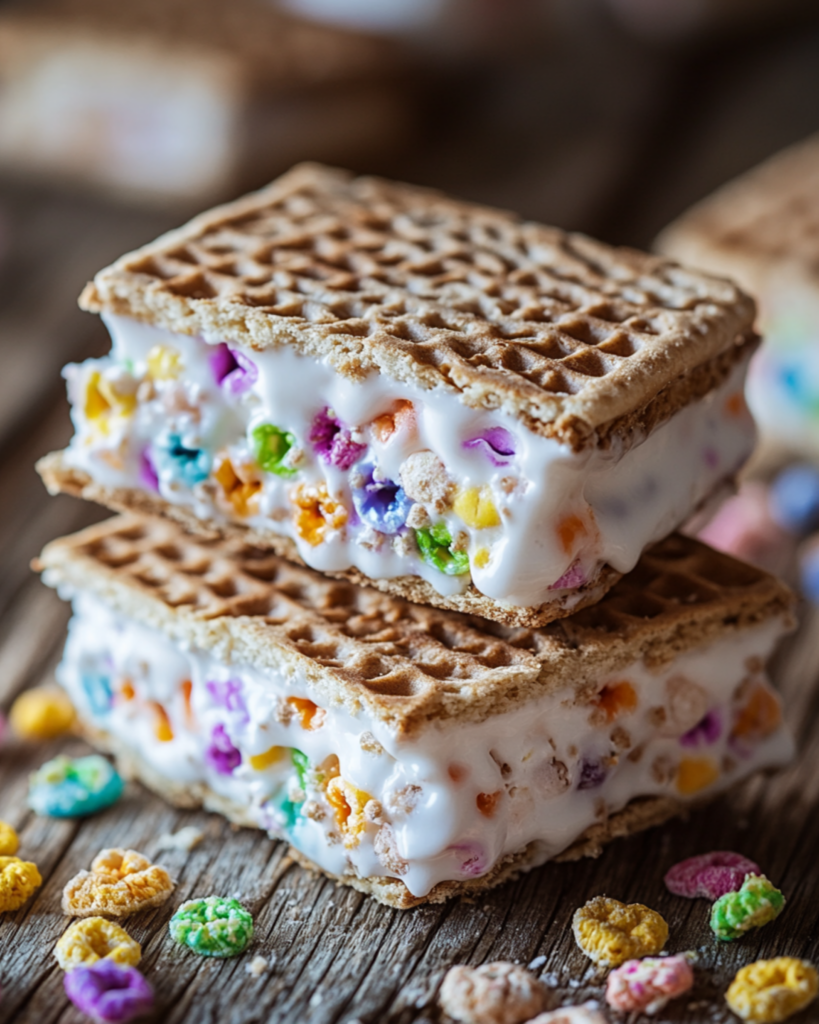
Looking for a fun and creative way to beat the heat this summer? Or maybe you want a treat that combines your favorite childhood snacks with a little grown-up flair? Look no further than Cereal Ice Cream Sandwiches! Imagine this: two crispy, crunchy cereal bars loaded with your favorite ice cream flavor in the middle, creating a sweet, cold, and chewy bite of happiness. Whether you’re a fan of fruity cereals, chocolatey crunches, or something in between, these ice cream sandwiches are a total game-changer. Trust me, you won’t be able to stop at just one!
Why You’ll Love Cereal Ice Cream Sandwiches
Here’s why these ice cream sandwiches are bound to become your new favorite treat:
- Totally Customizable: Pick your favorite cereal and ice cream flavors, and you’ve got a personalized dessert that’s all you. Want to try Cocoa Pebbles with chocolate ice cream? Go for it! Or how about Fruity Pebbles with vanilla? You can’t go wrong.
- Fun to Make: These are as fun to make as they are to eat! You get to press the cereal into bar shapes and get creative with your ice cream fillings. It’s a perfect treat for the whole family to help with.
- No-Bake: That’s right—no need to turn on the oven! This no-bake treat is as simple as pressing cereal into a pan and adding ice cream. Easy, right?
- Crunch + Creamy: The texture combo is a win! You get the crispy crunch of the cereal and the smooth, creamy ice cream—two bites and you’re hooked.
- Kid-Friendly: If you’re looking for something to keep the kids (or the inner kid in you) entertained, this is the treat. It’s a perfect summer dessert for family gatherings, parties, or just a fun afternoon snack.
Ingredients
Let’s dive into what you’ll need to make these irresistible Cereal Ice Cream Sandwiches:
For the Cereal Bars:
Cereal of Your Choice: This is where the fun starts! Choose from fruity cereals like Fruit Loops or Fruity Pebbles, or go chocolatey with Cocoa Pebbles or Cocoa Krispies.
Marshmallows: These help bind the cereal together to create a gooey, chewy texture.
Butter: Adds richness and helps to melt the marshmallows to create that gooey base.
Vanilla Extract: Just a little bit for extra flavor in the bars.
For the Ice Cream Filling:
Ice Cream: Any flavor you love! Vanilla, chocolate, strawberry, or even something more adventurous like cookies and cream or mint chocolate chip.
(Note: the full ingredients list, including measurements, is provided in the recipe card directly below.)
Instructions
Ready to make these fun and delicious treats? Here’s how to do it:
1. Prepare the Cereal Bars
In a large pot, melt the butter over medium heat. Once melted, add the marshmallows and stir constantly until they are completely melted and smooth. Remove from heat and stir in the vanilla extract.
2. Mix in the Cereal
Add the cereal to the melted marshmallow mixture, stirring gently until the cereal is fully coated. You want to make sure every piece gets that marshmallow goodness, but don’t crush the cereal while mixing!
3. Form the Bars
Lightly grease a baking dish or line it with parchment paper. Pour the cereal mixture into the dish and press it down with a spatula to form a compact, even layer. Let it cool for about 30 minutes or until set.
4. Prepare the Ice Cream
While the cereal bars are cooling, take the ice cream out of the freezer to soften slightly for easier scooping. Scoop out the ice cream and spread it over the cooled cereal bars. You can make it as thick or thin as you like!
5. Cut the Sandwiches
Once the ice cream is spread evenly, place the dish back into the freezer for at least 2 hours to firm up. Once the ice cream is solid, remove the dish from the freezer and cut the bars into squares or rectangles, depending on how big you want your sandwiches.
6. Assemble the Ice Cream Sandwiches
Take one cereal bar square and sandwich it with another on top, ice cream side facing in. Press gently to help them stick together. For extra fun, you can roll the edges of the sandwich in sprinkles, mini chocolate chips, or more crushed cereal for added crunch.
7. Serve & Enjoy
Serve the sandwiches immediately, or keep them in the freezer until you’re ready to enjoy them. Either way, they’re sure to be a hit!
Nutrition Facts
Servings: 12
Calories per serving: 220
Preparation Time
Prep Time: 20 minutes
Freeze Time: 2 hours
Total Time: 2 hours 20 minutes
How to Serve Cereal Ice Cream Sandwiches
These ice cream sandwiches are perfect for all kinds of occasions. Here’s how to serve them:
- At a Party: Serve them on a platter or set up a fun ice cream sandwich bar where guests can make their own!
- Summer Picnics: Pack them in a cooler and bring them to your next picnic or BBQ for a fun and easy dessert.
- For Movie Night: These are great for a movie marathon with family or friends. Everyone will love the fun twist on traditional ice cream sandwiches.
- As a Quick Treat: Keep them in the freezer for whenever you need a sweet fix. Just pull one out and enjoy!
Additional Tips
- Get Creative with Cereal: Feel free to try different cereals based on your preferences—cinnamon cereals, chocolate cereals, or even savory options if you’re feeling adventurous.
- Add a Layer of Chocolate: If you want to elevate the flavor, melt some chocolate and drizzle it over the ice cream before sandwiching. You can also dip the finished sandwiches in melted chocolate for extra decadence.
- Keep It Chilled: If you’re serving these at a party or picnic, make sure to keep them cold! They’re best when they’re firm, so store them in the freezer until you’re ready to serve.
- Use a Larger Pan: For thinner bars, use a larger pan. The larger the pan, the thinner the bars will be—perfect for smaller bites!
FAQ Section
Q1: Can I use dairy-free ice cream?
A1: Yes, you can absolutely use dairy-free ice cream if you prefer. The recipe works just as well with plant-based ice cream options!
Q2: Can I make the cereal bars ahead of time?
A2: Yes! You can make the cereal bars a day or two ahead. Just store them in an airtight container until you’re ready to assemble the ice cream sandwiches.
Q3: Can I use marshmallow fluff instead of marshmallows?
A3: Yes, you can! If you want a smoother texture, marshmallow fluff works just as well as melted marshmallows.
Q4: How do I store leftovers?
A4: Store leftover ice cream sandwiches in an airtight container in the freezer for up to a week (if they last that long!). Just make sure they’re properly sealed to prevent freezer burn.
Q5: Can I freeze the assembled ice cream sandwiches?
A5: Yes! Once assembled, these sandwiches can be frozen for up to 2 weeks. Just wrap each one individually in plastic wrap or store them in a freezer bag.
Q6: Can I use gluten-free cereal?
A6: Definitely! Use your favorite gluten-free cereal for this recipe to make it suitable for those with dietary restrictions.
Q7: Can I add other toppings to the ice cream?
A7: Absolutely! You can add mini chocolate chips, crushed cookies, sprinkles, or even crushed nuts to the ice cream layer for extra texture and flavor.
Q8: Can I make these in a large batch?
A8: Yes, you can! Just adjust the size of the pan to make a larger batch and cut the sandwiches into smaller pieces.
Q9: How do I soften the ice cream quickly?
A9: Let the ice cream sit at room temperature for about 10-15 minutes to soften. You can also microwave it for 15 seconds in the container if you’re in a hurry.
Q10: What’s the best way to cut the ice cream sandwiches?
A10: Use a sharp knife to cut the sandwiches once they’re firm. If needed, warm the knife under hot water to make cutting through the frozen ice cream easier.
Conclusion
These Cereal Ice Cream Sandwiches are the perfect combination of nostalgia and deliciousness. They’re super customizable, incredibly fun to make, and, of course, irresistibly tasty. Whether you’re serving them at a party, packing them for a picnic, or just craving a sweet treat, these ice cream sandwiches are sure to hit the spot. Get creative, have fun with the toppings, and enjoy a crunchy, creamy dessert that’s sure to bring a smile to anyone’s face!
PrintCereal Ice Cream Sandwiches

These fun and crunchy Cereal Ice Cream Sandwiches combine the crispy crunch of cereal with creamy strawberry ice cream, making them the perfect summer treat or sweet snack!
- Prep Time: 15 minutes
- Cook Time: 20 minutes
- Total Time: 5 minutes
- Yield: 12–16 sandwiches 1x
- Category: Dessert
- Method: No-bake
- Cuisine: American
- Diet: Vegetarian
Ingredients
- 2 tbsp unsalted butter, plus more for greasing the pan
- 4 cups miniature marshmallows
- 1/2 cup smooth peanut butter
- 5 cups rice cereal
- 2 cups strawberry ice cream, softened
- 1/4 cup chopped freeze-dried strawberries, for coating
Instructions
- To make the sandwiches even more fun, try experimenting with other ice cream flavors or different types of cereal.
- If you prefer a firmer texture, freeze the sandwiches for about 30 minutes before serving.
Notes
- To make the sandwiches even more fun, try experimenting with other ice cream flavors or different types of cereal.
- If you prefer a firmer texture, freeze the sandwiches for about 30 minutes before serving.
Nutrition
- Serving Size: 1 sandwich
- Calories: 200kcal
- Sugar: 20g
- Sodium: 100mg
- Fat: 8g
- Saturated Fat: 3g
- Unsaturated Fat: 3g
- Trans Fat: 0g
- Carbohydrates: 30g
- Fiber: 1g
- Protein: 2g
- Cholesterol: 5mg