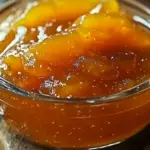
Homemade Apricot Jam Chocolate Fruit and Nut Bars
This homemade apricot jam is sweet, tangy, and incredibly simple to make, using just three ingredients. It’s perfect for preserving apricots from your garden or local market, and can be enjoyed on toast, in desserts, or as a filling for pastries.
- Prep Time: 30minutes
- Cook Time: 30minutes
- Total Time: 1 hour
- Yield: 9 small jars (8 oz each) 1x
- Category: Condiments
- Method: Stovetop
- Cuisine: American
- Diet: Vegetarian
Ingredients
Scale
- 4.8 lb apricots (about 12 cups; use “just ripe” and ripe fruit; a few underripe ones will add more pectin and acidity)
- 3.3 lb sugar (7.5 cups)
- 1/3 cup lemon juice (from 2 small lemons; bottled works fine too)
Equipment:
- 9 small jars (8 oz each, 250 ml)
- Large, shallow heavy-based saucepan
- Silicone spatula or wooden spoon
- Food thermometer
- Canning funnel (optional)
- Bubble remover (optional)
- Magnetic lid wand (optional)
- Water bath canner
- Canning tongs
- 2–3 small plates (for testing)
Instructions
- Prepare the Jars:
- Sterilize your jars, lids, and bands by washing them in hot, soapy water and rinsing them well. Let them drain and dry.
- Place 2-3 small plates in the freezer for testing the jam later.
- If you plan to can the jam, prepare your canner by adding the trivet/rack and filling it with enough water to submerge the jars by 2 inches.
- Make the Jam:
- Wash, dry, and pit the apricots (slice them in half and remove the pit). Juice the lemons.
- In a large, deep, heavy-based stainless steel saucepan, combine the halved apricots, lemon juice, and sugar. Bring to a boil over medium heat, stirring constantly to dissolve the sugar.
- Boil the mixture for about 25-30 minutes, stirring constantly to prevent burning and scooping off any foam that forms. The mixture should thicken and coat the spoon.
- Test the Jam:
- Using a Candy Thermometer: Insert the thermometer into the center of the jam. It should reach 220ºF (104ºC).
- Using the Frozen Plate Method: Remove the saucepan from heat, place a teaspoon of jam on one of the frozen plates, and return it to the freezer for 1 minute. Press the edge of the jam with your fingertip; it should wrinkle and be set.
- Fill the Jars:
- Heat the jars in the water bath canner (with lids) or in the oven (without lids) to prevent cracking when hot jam is added.
- Ladle the hot jam into the jars, leaving about ¼ inch (0.5 cm) of headspace. Tap the jar to remove air bubbles and wipe the rims with a clean towel.
- Seal the jars with lids and screw the bands on until fingertip-tight (if canning) or fully sealed if not canning.
- Can the Jam (Optional):
- Place the filled jars in the prepared canner, ensuring they are submerged by at least 1 inch of water.
- Bring to a boil over medium-high heat, cover, and process for 10 minutes (adjust for altitude if needed).
- Remove the lid and let the jars sit for 5 minutes before using canning tongs to transfer them to a clean towel to cool for 24 hours.
- Check the seal (the lid should not pop up and down when pressed). Unsealed jars can be reprocessed or refrigerated for immediate use.
Storage:
- Fridge: If not water-bath canned, store in the fridge and use within a month.
- Freezer: Store in freezer-safe jars or bags for 4-6 months.
- Canned: Store in a cool, dark place for up to a year. Once opened, refrigerate and use within 3-4 weeks.
Enjoy your homemade apricot jam on toast, in desserts, or as a filling for pastries!
Notes
- If you prefer a chunkier jam, pulse the apricots in a food processor for a rougher texture before cooking.
- For added flavor, you can add a pinch of cinnamon or vanilla extract during the cooking process.
Nutrition
- Serving Size: 1 tablespoon (about 20g)
- Calories: 60kcal
- Sugar: 15g
- Sodium: 0mg
- Fat: 0g
- Saturated Fat: 0g
- Unsaturated Fat: 0g
- Trans Fat: 0g
- Carbohydrates: 16g
- Fiber: 1g
- Protein: 0g
- Cholesterol: 0mg
