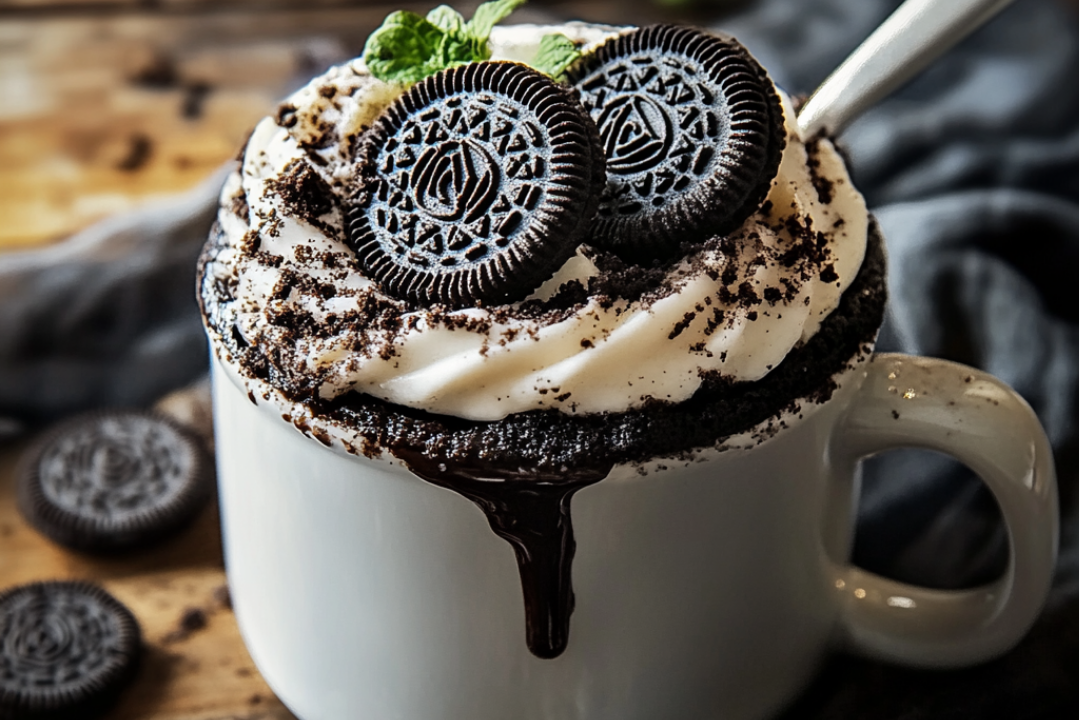
There’s something magical about making a cake in a mug, and when you throw Oreos into the mix, well, it’s a whole new level of dessert bliss! This Oreo Mug Cake is perfect for those moments when you’re craving something sweet, but you don’t want to deal with the hassle of baking a full cake. All it takes is a few simple ingredients, a microwave, and just a couple of minutes. Trust me, you’re going to love this!
Why You’ll Love Oreo Mug Cake
This Oreo Mug Cake isn’t just about satisfying your sweet tooth—it’s about making your dessert dreams come true in a flash! Whether you’re indulging by yourself or sharing it with a friend, here’s why this mug cake is a favorite:
- Versatile: It’s the perfect treat for any occasion, whether you’re craving a quick dessert or surprising a guest with a delicious, personalized cake.
- Budget-Friendly: You don’t need fancy ingredients to make this masterpiece. Most of the stuff you’ll need is probably sitting in your pantry right now.
- Quick and Easy: You don’t even need to preheat the oven! A few simple steps, a mug, and your microwave are all you need to create the perfect sweet treat.
- Customizable: Want to take it up a notch? Add some chocolate chips, a sprinkle of cinnamon, or even a dollop of whipped cream on top. Make it your own!
- Crowd-Pleasing: Kids and adults alike will love the Oreo-filled goodness of this cake. Everyone’s a winner when Oreos are involved!

Ingredients
The magic of this cake is in the simplicity of its ingredients. You’re about to create something that feels indulgent, yet it’s made from just a handful of pantry staples. Let’s break it down:
Oreo Cookies: The heart and soul of this cake. Crushed Oreos provide that familiar crunch and rich chocolate flavor that will have you coming back for more.
Flour: All-purpose flour gives the cake structure and a soft texture when it bakes.
Sugar: Just a little bit of sugar adds that sweet sweetness we all crave.
Baking Powder: This little leavening agent helps your mug cake rise to perfection, creating that light, fluffy texture.
Milk: Milk helps combine everything and gives the cake that moist, tender crumb. You can use any kind of milk you prefer—dairy or plant-based!
Butter: A touch of melted butter gives this cake its rich, indulgent flavor.
Vanilla Extract: A dash of vanilla brings everything together and rounds out the flavors.
Instructions
Let’s dive into how easy it is to make this Oreo Mug Cake:
Prep Your Mug: Grab a microwave-safe mug and lightly grease the inside with a bit of butter or cooking spray to make sure your cake doesn’t stick.
Crush the Oreos: In a small bowl, crush a few Oreos into fine crumbs. You want to have some texture, so don’t make them too fine, but enough so that they blend easily into the cake batter.
Mix the Ingredients: Add the crushed Oreos, flour, sugar, baking powder, milk, melted butter, and vanilla extract into your mug. Stir everything together until the batter is smooth and combined.
Microwave Time: Pop your mug in the microwave and cook on high for 1 to 1.5 minutes. Keep an eye on it—every microwave is a little different, so stop when the cake has risen and is set in the middle. You want it soft and a little gooey, not dry.
Let It Cool: Allow the mug cake to cool for a minute or two (if you can wait that long!). The cake will finish cooking as it cools down a bit.
Serve and Enjoy: Dig in right away while it’s still warm and enjoy the delicious, Oreo-filled goodness. Add whipped cream, a scoop of ice cream, or extra Oreo pieces for a fun topping!
Nutrition Facts
Servings: 1
Calories per serving: 400
Preparation Time
Prep Time: 5 minutes
Cook Time: 1 to 1.5 minutes
Total Time: 6 to 7 minutes
How to Serve Oreo Mug Cake
This mug cake is perfect on its own, but if you’re looking to elevate the experience, here are a few ways to serve it up:
- With Ice Cream: A scoop of vanilla or chocolate ice cream on top makes the warm cake even more decadent.
- Topped with Whipped Cream: Add a dollop of whipped cream for that light, fluffy texture that complements the richness of the cake.
- Extra Oreos: Crushed Oreos sprinkled on top add an extra crunch and more of that beloved Oreo flavor.
- As a Side to Coffee: Pair your mug cake with a steaming cup of coffee or hot cocoa for the ultimate cozy treat.
Additional Tips
Here are a few tips to make sure your Oreo Mug Cake turns out perfectly:
- Don’t Overcook: Microwave times vary, so keep an eye on your cake. Overcooking can lead to a dry mug cake, and nobody wants that.
- Customize Your Cake: Experiment with add-ins like chocolate chips, peanut butter, or marshmallows. The possibilities are endless!
- Use a Larger Mug: If you prefer a fluffier, less dense cake, use a slightly larger mug so the batter has more room to rise.
- Storage: If you happen to have leftovers (lucky you!), store them in the fridge for up to a day. Reheat gently in the microwave for 10-20 seconds.
FAQ Section
Q1: Can I use gluten-free flour in this recipe?
A1: Yes! You can substitute gluten-free flour for the all-purpose flour. Just keep in mind that the texture might be a little different, but still delicious.
Q2: How do I know when my cake is done?
A2: The cake should rise and be set in the middle. If you press gently on the center and it springs back, it’s ready!
Q3: Can I make this ahead of time?
A3: Mug cakes are best enjoyed fresh, but if you want to prep ahead, you can mix the dry ingredients in the mug and store it. When you’re ready, just add the wet ingredients and microwave.
Q4: What kind of milk can I use?
A4: You can use regular milk, almond milk, oat milk, or whatever your preferred type is. It’ll work just as well!
Q5: Can I make a bigger batch?
A5: Absolutely! Just multiply the ingredients by the number of servings you want, and use a larger microwave-safe bowl. The cooking time will need to be adjusted.
Q6: How do I store leftovers?
A6: If you have any leftover cake (which is rare), store it in an airtight container in the fridge. Reheat in the microwave for a few seconds to enjoy it again!
Q7: Can I freeze this mug cake?
A7: Mug cakes are best fresh, but you can freeze the batter in a freezer-safe container. When you’re ready to enjoy, thaw and microwave!
Q8: What toppings would go well with this?
A8: You can top it with whipped cream, ice cream, more Oreos, or even drizzle some chocolate or caramel sauce on top. Get creative!
Q9: Can I add other mix-ins, like chocolate chips?
A9: Absolutely! Feel free to add chocolate chips, marshmallows, or even peanut butter for a fun twist on the classic.
Q10: How can I make this more decadent?
A10: Try adding a drizzle of hot fudge or a scoop of ice cream right on top of the warm cake. You could also sprinkle extra crushed Oreos for that double Oreo delight.
Conclusion
There you have it—the perfect Oreo Mug Cake recipe for when you’re craving something quick, indulgent, and oh-so-delicious. It’s as simple as it gets but tastes like a gourmet dessert! So the next time the sweet tooth strikes, just grab a mug, throw in a few ingredients, and you’re minutes away from dessert heaven. Happy baking (or microwaving, really)! Enjoy!
PrintOreo Mug Cake Recipe
This quick and indulgent mug cake is made with just a few simple ingredients, perfect for satisfying your sweet tooth in minutes. The Oreo Mug Cake is easy to make and can be customized with toppings for an extra treat.
- Prep Time: 5 minutes
- Cook Time: 1 minute 30 seconds
- Total Time: 6 hours
- Yield: 1 serving 1x
- Category: Dessert
- Method: Microwave
- Cuisine: American
- Diet: Vegetarian
Ingredients
- 6 Oreo cookies (any flavor)
- 1/4 cup milk (dairy or non-dairy)
- 1/4 tsp baking powder
- 1/8 tsp salt (optional, adjust to taste)
Instructions
- Crush the Oreos: Place the Oreos in a microwave-safe mug or small bowl. Crush them into chunks or fine crumbs, depending on your texture preference.
- Add Milk: Pour the milk over the crushed Oreos. Use a fork to mix the milk into the cookie crumbs, forming a paste.
- Mix in Baking Powder and Salt: Stir in the baking powder and salt until the mixture is well combined and smooth.
- Microwave: Microwave the mug cake on HIGH for 90 seconds. The cake should be just set but still soft. Microwave times may vary depending on the wattage of your microwave, so you may need to adjust the time by ±10 seconds.
- Rest and Enjoy: Let the mug cake rest for 1 minute before enjoying. It will continue to cook slightly as it cools.
Notes
- Adjustable Cooking Time: Depending on the power of your microwave, you may need to adjust the cooking time slightly (±10 seconds).
- Customization: Feel free to experiment with different Oreo flavors (like mint, golden, or peanut butter) to suit your taste.
- Texture: The texture of the cake will vary based on the level of crushing you do with the Oreos. Crushing them into fine crumbs will result in a smoother texture, while chunks will provide a bit more texture.
Nutrition
- Serving Size: 1 mug cake
- Calories: 220 kcal
- Sugar: 18g
- Sodium: 130mg
- Fat: 10g
- Saturated Fat: 4g
- Unsaturated Fat: 6g
- Trans Fat: 0g
- Carbohydrates: 30g
- Fiber: 2g
- Protein: 3g
- Cholesterol: 20mg


