

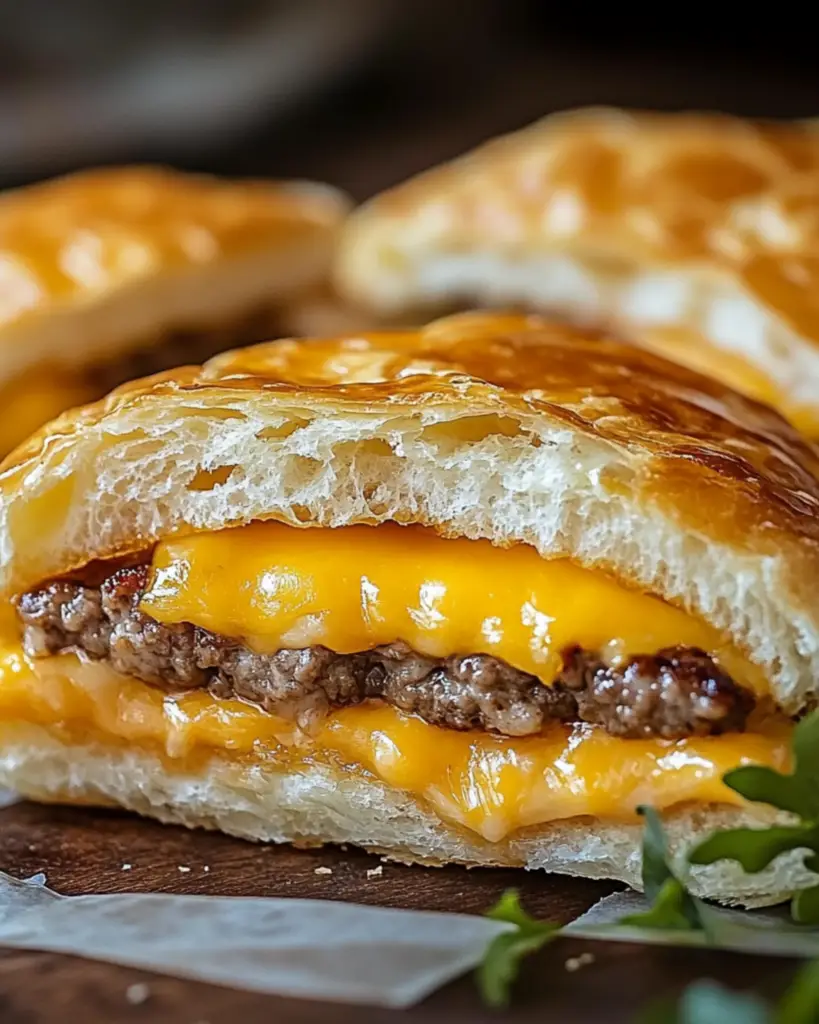
Okay, picture this: a warm, golden, buttery pocket filled with everything you love about a cheeseburger—tender seasoned beef, melted cheese, and all the classic toppings, all wrapped up in a flaky, pillowy dough. These Cheeseburger Pockets are a total game-changer! Whether you’re craving a fun dinner, a quick snack, or something to feed a crowd, this recipe is here to save the day. The best part? It’s super easy to make, and the pockets are perfectly portable, so you can take the cheeseburger goodness with you wherever you go. Trust me, you’re going to fall in love with these!
Why You’ll Love Cheeseburger Pockets
Here’s why these cheeseburger pockets are destined to become your new favorite recipe:
Portable & Convenient: These pockets are handheld, making them perfect for busy days when you want something tasty on the go. No fork and knife needed!
Cheeseburger Comfort: All the flavors of a cheeseburger, but in a fun, pocket form. Think juicy beef, melty cheese, pickles, and ketchup—everything you love about a cheeseburger, tucked neatly inside.
Customizable: Make them your own! Add extra toppings like sautéed onions, bacon, or even lettuce if you’re feeling adventurous.
Perfect for Meal Prep: These pockets are great for prepping ahead of time. You can make a batch, freeze them, and have a delicious meal ready to go whenever you need it.
Kid-Friendly: It’s hard to find a kid who doesn’t love cheeseburgers, so these pockets are sure to be a hit with the little ones.
Ingredients
Let’s talk about the simple, but oh-so-delicious ingredients that come together to make these pockets a must-try:
Ground Beef: The star of the show. Seasoned to perfection, this beef is juicy, flavorful, and forms the heart of your cheeseburger pocket.
Cheese: Classic American cheese (or cheddar, if you prefer!) brings that perfect melty, gooey cheeseburger goodness.
Dough: Pre-made biscuit dough makes these pockets quick and easy. If you’re feeling adventurous, you can use pizza dough for an even chewier texture!
Pickles: For that essential cheeseburger tang! Add a few sliced pickles to bring the right amount of crunch and zest.
Ketchup & Mustard: The classic cheeseburger condiments. A little ketchup and mustard give these pockets all the flavor of a backyard burger.
Onion Powder & Garlic Powder: For seasoning the beef and making the flavor pop without any fuss.
Salt & Pepper: To taste, of course! Perfectly seasoning the beef ensures these pockets are packed with flavor.
(Note: the full ingredients list, including measurements, is provided in the recipe card directly below.)
Instructions
Ready to get those cheeseburger pockets in the oven? Let’s go!
Brown the Beef: In a skillet over medium heat, cook the ground beef until browned and fully cooked. Drain any excess fat, then add the onion powder, garlic powder, salt, and pepper. Stir in the ketchup and mustard, and cook for another 2-3 minutes until everything is well combined and flavorful.
Prepare the Dough: While the beef is cooking, preheat your oven according to the biscuit dough package instructions. Then, unroll the biscuit dough and separate the individual biscuits.
Assemble the Pockets: Flatten each biscuit with your fingers or a rolling pin to form a small circle. Place a spoonful of the cooked beef mixture in the center of each dough circle. Top with a slice of cheese and a few pickle slices.
Seal the Pockets: Fold the dough over the filling, creating a half-moon shape. Pinch the edges together tightly to seal the pocket. If needed, crimp the edges with a fork to make sure they stay closed.
Bake: Place the pockets on a greased baking sheet, then bake according to the biscuit dough package instructions (usually about 12-15 minutes), or until golden brown and puffed up.
Serve & Enjoy: Let them cool for a couple of minutes before biting into these warm, cheesy, juicy pockets. They’re perfect on their own or served with extra ketchup and mustard for dipping!
Nutrition Facts
Servings: 6
Calories per serving: 320
Preparation Time
Prep Time: 10 minutes
Cook Time: 15 minutes
Total Time: 25 minutes
How to Serve Cheeseburger Pockets
These cheeseburger pockets are perfect on their own, but here are some ideas to make them even more delicious:
Fries: Serve with a side of crispy, golden French fries or sweet potato fries for that classic burger-and-fries experience.
Salads: Pair with a fresh, crunchy salad to balance out the richness of the pockets. A simple green salad or a tangy coleslaw works beautifully.
Dipping Sauces: Serve with extra ketchup, mustard, or even a creamy ranch dressing for dipping.
Pickled Vegetables: If you love pickles, serve your pockets with a side of tangy, crunchy pickled veggies for that extra zing.
Cheese Sauce: Feeling extra cheesy? Serve the pockets with a side of warm cheese sauce for dipping. It’s like a cheesy cheeseburger dream come true.
Additional Tips
- Make Ahead: If you want to get a head start, you can prep the pockets ahead of time and store them in the fridge for up to a day. Just pop them in the oven when you’re ready to bake!
- Add Bacon: For an extra indulgent twist, throw some crumbled bacon into the filling. It’ll add a smoky, salty flavor that’s totally irresistible.
- Vegetarian Version: If you want to go meatless, you can use crumbled veggie burger patties or even a mix of sautéed mushrooms and onions for a delicious vegetarian alternative.
- Freezing: These pockets freeze well! Freeze the assembled, unbaked pockets on a baking sheet. Once frozen, transfer them to a freezer-safe bag and bake straight from the freezer when you’re ready to enjoy.
- Cheese Variety: Try different cheese options like cheddar, Swiss, or provolone for a fun twist on the classic.
FAQ Section
Q1: Can I use turkey or chicken instead of beef?
A1: Absolutely! Ground turkey or chicken will work just fine. Just be sure to season it well since it’s a leaner meat.
Q2: Can I use pizza dough instead of biscuit dough?
A2: Yes! Pizza dough will give your pockets a chewier texture, which is delicious too. Just make sure to roll it out thinner for easy folding.
Q3: Can I add more veggies?
A3: Definitely! Try adding sautéed onions, bell peppers, or mushrooms to the beef mixture for extra flavor and texture.
Q4: Can I make these ahead of time?
A4: Yes! You can assemble the pockets ahead of time, store them in the fridge, and bake them when you’re ready to eat.
Q5: Can I freeze these pockets?
A5: Yes! Assemble the pockets, freeze them on a baking sheet, and then transfer them to a freezer bag. Bake them straight from the freezer, adding a couple of extra minutes to the cooking time.
Q6: Can I use a different kind of cheese?
A6: Of course! Cheddar, provolone, or Swiss cheese are all great options to change things up. Just make sure the cheese melts well.
Q7: How do I store leftovers?
A7: Store leftover pockets in an airtight container in the fridge for up to 3 days. Reheat them in the oven to keep the dough crispy.
Q8: Can I use a gluten-free dough?
A8: Yes, if you need a gluten-free version, look for gluten-free biscuit or pizza dough. The result will be just as delicious!
Q9: Can I make these spicy?
A9: Absolutely! Add some diced jalapeños to the beef mixture or sprinkle some chili flakes in with the seasoning for a spicy kick.
Q10: Can I make a larger batch?
A10: Yes, you can double or triple the recipe to serve more people. Just adjust the baking time if needed, and make sure the pockets are fully cooked through.
Conclusion
These Cheeseburger Pockets are a fun, portable, and absolutely mouthwatering twist on the classic cheeseburger. Whether you’re making them for a family dinner, a casual get-together, or just craving something comforting, these pockets are sure to hit the spot. They’re easy to make, packed with flavor, and customizable to your tastes. So go ahead—whip up a batch and enjoy these cheesy, savory little pockets of joy!
PrintCheeseburger Pockets

Cheeseburger Pockets are the perfect handheld version of a classic cheeseburger! Made with ground beef, onions, and gooey cheddar cheese, all wrapped in crescent dough, these savory pockets are quick, easy, and a hit at any gathering.
- Prep Time: 10 minutes
- Cook Time: 15 minutes
- Total Time: 25 minutes
- Yield: 8 pockets 1x
- Category: Main Course
- Method: baking
- Cuisine: American
Ingredients
- 1 lb ground beef
- 1 small onion, chopped
- 1 cup shredded cheddar cheese
- 1 (8 oz) can crescent roll dough
- 2 tbsp ketchup
- 1 tbsp mustard
- 1 tbsp Worcestershire sauce
- 1 tbsp olive oil
- Salt & pepper to taste
Instructions
- Preheat the Oven: Preheat your oven to 375°F (190°C).
- Cook the Beef & Onions: In a large skillet, sauté the chopped onions in olive oil until soft. Add the ground beef and cook until browned, then drain any excess fat.
- Season the Beef: Stir in ketchup, mustard, Worcestershire sauce, salt, and pepper. Cook for 2-3 minutes, allowing the flavors to blend.
- Assemble the Pockets: Unroll the crescent dough and separate it into individual triangles. Spoon the beef mixture onto the wide end of each triangle, then top with shredded cheddar cheese. Fold the dough over and seal the edges.
- Bake: Place the pockets on a baking sheet and bake for 12-15 minutes, or until golden brown.
- Cool & Serve: Allow the pockets to cool slightly before serving. Enjoy with your favorite dipping sauces!
Notes
- These can be made ahead of time and stored in the refrigerator for up to 2 days.
- Feel free to add pickles or bacon to the filling for extra flavor!
- Serve with a side of fries or a salad for a complete meal.
Nutrition
- Serving Size: 1 pocket
- Calories: 270kcal
- Sugar: 3g
- Sodium: 600mg
- Fat: 18g
- Saturated Fat: 7g
- Unsaturated Fat: 10g
- Trans Fat: 0g
- Carbohydrates: 10g
- Fiber: 1g
- Protein: 17g
- Cholesterol: 40mg