

There’s something truly magical about the smell of freshly baked bread filling your kitchen. It’s the kind of smell that pulls you in, makes you feel cozy, and promises deliciousness with every bite. And when it comes to bread, there’s just nothing like a warm, crusty Italian loaf to make a meal feel extra special. Picture the golden, crispy exterior with a soft, airy interior—each slice perfect for dipping in olive oil or layering with your favorite sandwich fillings. Trust me, this recipe is going to become your go-to for homemade bread!
Why You’ll Love Crusty Italian Bread
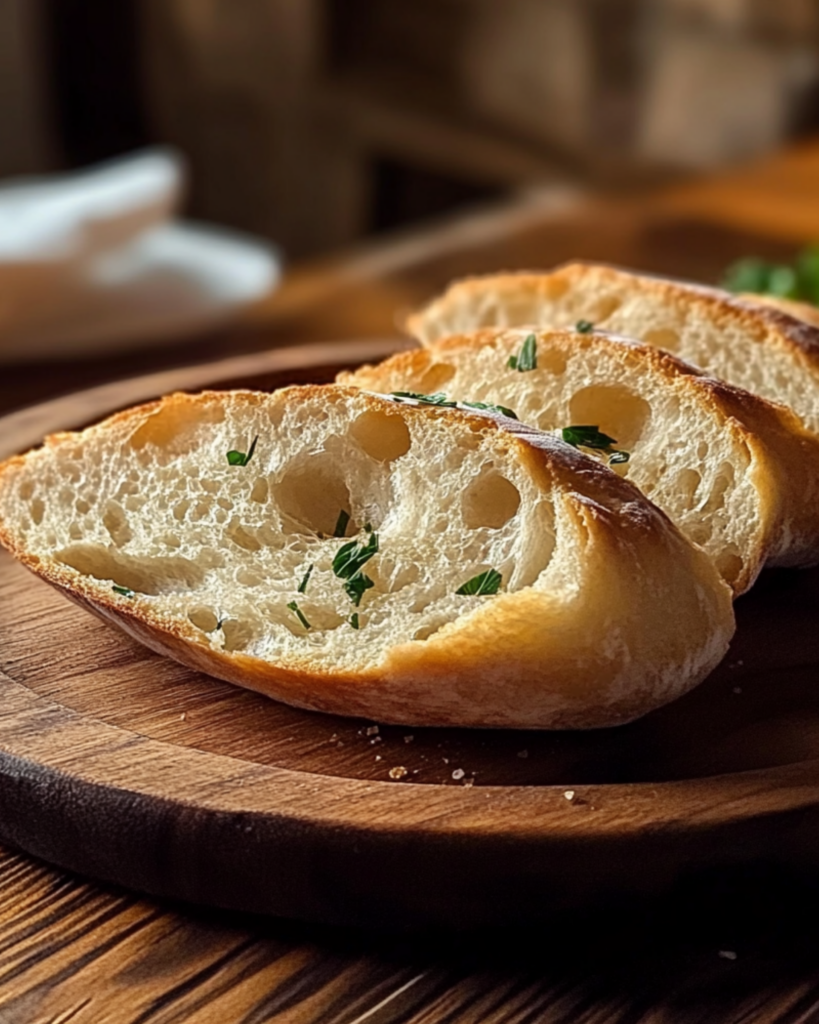
Making homemade bread is a bit like creating a little masterpiece. This crusty Italian bread has that perfect balance of chewy interior and crispy crust that makes it the best thing to serve at any meal. Here’s why it’s a winner:
- Satisfying Texture: The contrast between the soft, airy inside and the crisp, golden crust is absolutely irresistible.
- Simple Ingredients: You don’t need fancy ingredients for this bread. Just basic pantry staples, and you’ll have bakery-worthy results.
- Versatile: Whether you’re serving it with pasta, using it for sandwiches, or just enjoying it with a smear of butter, this bread goes with anything.
- Fun to Make: There’s something so rewarding about kneading dough and watching it rise. It’s an experience that makes the end result feel even more delicious.
- Impressive & Homemade: You’ll be amazed at how easy it is to make your own bread, and everyone at the table will be impressed when you tell them it’s homemade.
Ingredients
Let’s take a look at what you’ll need to make this delicious crusty Italian bread:
All-Purpose Flour: The foundation of this bread. It gives the dough structure and a light texture.
Active Dry Yeast: This little packet of magic is what helps your bread rise and become light and airy.
Warm Water: Yeast loves warm water—it helps activate it and get things rising!
Olive Oil: Adds a touch of richness to the dough and a slight fruity flavor that pairs beautifully with the bread’s crust.
Salt: A pinch of salt enhances all the flavors and helps control the rise.
Sugar: Just a teaspoon of sugar helps the yeast bloom and adds a touch of sweetness to balance the savory flavors.
(Note: the full ingredients list, including measurements, is provided in the recipe card directly below.)
Instructions
Making this crusty Italian bread is simpler than you think! Follow these easy steps:
Activate the Yeast: In a bowl, combine the warm water and sugar. Stir to dissolve. Sprinkle the active dry yeast over the top and let it sit for 5-10 minutes until it becomes bubbly and foamy. This is how you know the yeast is ready to work its magic!
Mix the Dough: In a large bowl, mix together the flour and salt. Add the yeast mixture and olive oil to the flour and stir until a dough starts to form. The dough should be slightly sticky but manageable.
Knead the Dough: Turn the dough out onto a lightly floured surface and knead it for about 8-10 minutes. You want it to become smooth and elastic. If it’s too sticky, sprinkle a little more flour, but be careful not to add too much. Kneading is key to developing that beautiful chewy texture!
Let it Rise: Place the dough in a lightly oiled bowl, cover it with a clean towel, and let it rise in a warm spot for about 1 to 1.5 hours, or until it’s doubled in size. Patience is key—this is where the magic happens!
Shape the Dough: Once the dough has risen, punch it down to release the air. Then, shape the dough into a round or oval loaf (whatever you prefer). Place it on a parchment-lined baking sheet or a greased baking pan.
Second Rise: Let the shaped dough rise for another 30 minutes to 1 hour, until it puffs up a bit more. You’ll see it get even bigger and fluffier.
Preheat the Oven: While the dough is rising, preheat your oven to 450°F (230°C). You want it hot and ready to give the bread that perfect golden crust.
Bake to Perfection: Just before baking, use a sharp knife to make a few shallow slashes across the top of the dough. This allows the bread to expand evenly while baking. Place the loaf in the oven and bake for about 25-30 minutes, or until the crust is golden brown and sounds hollow when tapped on the bottom.
Cool & Enjoy: Once your bread is baked, let it cool on a wire rack for at least 15 minutes before slicing into it. This waiting time is tough, but trust me, it’s worth it!
Nutrition Facts
Servings: 10
Calories per serving: 180
Preparation Time
Prep Time: 20 minutes
Cook Time: 30 minutes
Total Time: 1 hour 50 minutes (including rising time)
How to Serve Crusty Italian Bread
This bread is delicious all on its own, but here are a few serving ideas to elevate your meal:
- Olive Oil & Balsamic Vinegar: Dip warm slices of bread in some good-quality olive oil and balsamic vinegar for a simple, flavorful appetizer.
- With Pasta: Serve alongside your favorite pasta dish—whether it’s a rich tomato sauce or a creamy Alfredo, this bread will soak up every last drop.
- Sandwiches: Use slices of this crusty bread to make a hearty sandwich. Try it with deli meats, cheese, or even grilled veggies for a satisfying meal.
- Soup Companion: Serve it alongside a bowl of your favorite soup, like minestrone or tomato basil, for a classic pairing that can’t be beat.
Additional Tips
Here are a few extra tips to help you perfect your Italian bread:
- For Extra Crustiness: If you want an even crispier crust, you can add a shallow pan of water to the oven while the bread bakes. The steam will help create a beautiful, thick crust.
- Add Herbs: For extra flavor, knead some dried oregano or rosemary into the dough. It adds a lovely herby note that’s perfect for serving with pasta.
- Let It Cool: After baking, let the bread cool completely before slicing to get the best texture and prevent it from being too doughy.
- Storing: Store any leftover bread in a paper bag at room temperature for up to 2-3 days. For longer storage, freeze slices of bread to keep them fresh for weeks.
- Make it in a Dutch Oven: For an even more rustic look, you can bake the bread in a preheated Dutch oven. This creates a mini steam chamber that results in a crunchy, golden crust.
FAQ Section
Q1: Can I use bread flour instead of all-purpose flour?
A1: Yes, you can! Bread flour will give the bread a slightly chewier texture and a little more structure.
Q2: What if my dough is too sticky?
A2: If your dough is too sticky, you can add a little extra flour, but be sure not to overdo it. The dough should be slightly sticky to the touch.
Q3: Can I make this bread without a stand mixer?
A3: Absolutely! You can knead the dough by hand on a floured surface. It may take a little longer, but it’s totally doable.
Q4: How do I get the bread to rise faster?
A4: If you’re in a hurry, you can place the dough in a warm spot (like an oven with the light on) to speed up the rising process.
Q5: Can I make this bread in a bread machine?
A5: Yes, you can! Follow your bread machine’s instructions for dough and then bake it in the oven for that perfect crust.
Q6: How do I store leftover bread?
A6: Store leftover bread in a paper bag at room temperature for a couple of days. For longer storage, freeze slices and toast them as needed.
Q7: Can I add garlic to the bread?
A7: Absolutely! You can knead garlic into the dough for a delicious garlic bread flavor.
Q8: Can I double the recipe?
A8: Yes! Just make sure to use a larger bowl and baking dish, and adjust the baking time slightly if needed.
Q9: How can I tell if the bread is done baking?
A9: Tap the bottom of the loaf with your knuckles—if it sounds hollow, it’s done. You can also use a thermometer; the internal temperature should reach 190°F (88°C).
Q10: Can I freeze the dough before baking?
A10: Yes, you can! After the first rise, shape the dough, wrap it tightly, and freeze it. Let it thaw and rise again before baking.
Conclusion
Making your own crusty Italian bread is easier than you might think, and the result is totally worth it. With its irresistible crunch and soft, airy interior, it’s the kind of bread that makes any meal feel special. Whether you’re dipping it in olive oil, pairing it with a hearty pasta, or just enjoying a slice on its own, this homemade Italian bread is sure to become a staple in your kitchen. Enjoy every warm, delicious bite!
Crusty Italian Bread

A classic homemade Italian bread with a crispy golden crust and soft, airy interior—perfect for dipping, sandwiches, or just enjoying with butter! This easy-to-make bread is a must-try for any bread lover.
- Prep Time: 15 minutes
- Cook Time: 20-25 minutes
- Total Time: 1 hour 40 minutes
- Yield: 1 loaf 1x
- Category: bread
- Method: baking
- Cuisine: italian
- Diet: Vegetarian
Ingredients
- 4 cups all-purpose or bread flour (plus extra for dusting)
- 1 packet (2 ¼ teaspoons) active dry yeast
- 1 ½ cups warm water (about 110°F)
- 2 teaspoons sugar
- 2 teaspoons salt
- 1 tablespoon olive oil
Instructions
-
Activate the Yeast:
In a small bowl, combine warm water, sugar, and yeast. Stir and let sit for 5-10 minutes until foamy. -
Mix the Dough:
In a large mixing bowl, combine flour and salt.
Add the yeast mixture and olive oil.
Stir with a wooden spoon or use a stand mixer with a dough hook until a shaggy dough forms. -
Knead the Dough:
Turn the dough onto a floured surface and knead for 8-10 minutes until smooth and elastic. (If using a mixer, knead for about 5 minutes on medium speed.)
Shape into a ball and place in a lightly greased bowl. Cover with a towel and let it rise for 1-1.5 hours, or until doubled in size. -
Shape the Bread:
Punch down the dough and turn it onto a floured surface.
Shape into a long loaf or divide into two smaller loaves.
Place on a parchment-lined baking sheet, cover loosely with a towel, and let rise for 30 minutes. -
Prepare for Baking:
Preheat oven to 425°F (220°C).
Use a sharp knife to make 3-4 diagonal slashes across the top of the dough.
For a crispy crust, place a pan of hot water on the bottom rack of the oven to create steam. -
Bake:
Bake for 20-25 minutes, or until golden brown and crusty.
The bread should sound hollow when tapped on the bottom. -
Cool & Enjoy:
Let cool on a wire rack for at least 15 minutes before slicing.
Serve with olive oil and balsamic vinegar, butter, or alongside your favorite pasta dish!
Notes
- To keep the bread fresh, wrap it in a clean kitchen towel once it’s cooled.
- You can make the dough in advance and refrigerate it overnight for a more flavorful loaf.
- For an even crispier crust, you can spritz the dough with water just before placing it in the oven.
Nutrition
- Serving Size: 1 slice (based on 10 slices per loaf
- Calories: 150 kcal
- Sugar: 1g
- Sodium: 300mg
- Fat: 2g
- Saturated Fat: 0g
- Unsaturated Fat: 2g
- Trans Fat: 0g
- Carbohydrates: 30g
- Fiber: 1g
- Protein: 4g
- Cholesterol: 0mg