

If you’ve ever craved something that’s a little bit crazy, totally indulgent, and just downright delicious, then Mexican Fried Ice Cream is about to become your new favorite treat! Imagine the warm, crispy crunch of a perfectly fried coating paired with the cold, creamy ice cream that’s so smooth and decadent, your taste buds will be dancing. It’s a sweet and salty dream come true, with just the right amount of cinnamon-spiced magic to make it extra special. Trust me, this is a dessert that will have everyone at your table coming back for more.
Why You’ll Love Mexican Fried Ice Cream
Okay, let me tell you why this dish is the ultimate dessert game-changer!
- Versatile: Whether you’re celebrating a special occasion or just want to treat yourself after a long week, Mexican Fried Ice Cream fits the bill. It’s that perfect balance of indulgence and comfort.
- Budget-Friendly: No need to splurge on fancy ingredients. You probably already have most of what you need in your pantry and freezer. Bonus points for making something so impressive without breaking the bank!
- Quick and Easy: The steps are simple enough that even beginner cooks can master it with ease. If you’re worried about making something fancy, fear not—this recipe is all about keeping it fun and delicious.
- Customizable: Want to mix things up? You can swap out the ice cream flavor, change the topping, or even drizzle it with a bit of chocolate sauce or caramel for an extra touch of sweetness.
- Crowd-Pleasing: Kids, adults, and even dessert skeptics will fall in love with this crispy, creamy delight. It’s the kind of dessert that steals the spotlight at any party!
Ingredients
Here’s what you need to bring this dessert to life:
Ice Cream
The star of the show! Pick your favorite flavor (vanilla or cinnamon work great) and make sure it’s nice and firm before you start working with it.
Cornflakes
These are what give your fried ice cream that crispy, golden crust. You’ll want to crush them up a bit to make a nice crumbly texture that sticks well.
Cinnamon
A little sprinkle of cinnamon gives the fried coating its warm, spiced kick—this really brings that authentic Mexican fried ice cream vibe.
Sugar
For sweetness! The sugar helps caramelize the cornflakes and add that lovely sweetness to the crispy coating.
Eggs
The egg mixture helps bind everything together. It’s the glue that holds the cornflake crust in place.
Butter
A little butter goes a long way in making that crispy coating golden brown and extra delicious.
Honey
For drizzling on top and adding a bit of sticky sweetness to every bite.
(Note: the full ingredients list, including measurements, is provided in the recipe card directly below.)
Instructions
Let’s dive into the steps to create this mouthwatering dessert:
Preheat Your Pan
Start by preheating a large frying pan with a bit of butter on medium-high heat. You want it hot enough to crisp up the coating but not burn it.
Prepare the Ice Cream Balls
Scoop out generous portions of ice cream and roll them into balls. Place them on a baking sheet and pop them in the freezer for about 30 minutes to firm up. Trust me, this step is essential to keeping your ice cream intact when frying!
Make the Coating
While the ice cream is chilling, crush your cornflakes in a bowl (a ziploc bag and rolling pin work wonders here!). Then mix in the sugar and cinnamon for that sweet, spiced crunch.
Dip in the Egg Mixture
Beat the eggs in a separate bowl. Take each ice cream ball and dip it into the egg mixture, making sure it’s completely coated.
Coat with Cornflakes
Roll the egg-coated ice cream ball into your cornflake mixture, pressing gently to make sure the crumbs stick.
Fry the Ice Cream
Carefully place the coated ice cream balls into the hot pan. Fry for about 2-3 minutes, turning to get an even golden brown on all sides. Don’t walk away; you want to watch the magic happen!
Serve and Drizzle with Honey
Once the ice cream is beautifully golden, remove it from the pan and drizzle with a generous amount of honey. For extra flair, top it off with a sprinkle of cinnamon.
Nutrition Facts
Servings: 4
Calories per serving: 280
Preparation Time
Prep Time: 20 minutes
Cook Time: 5 minutes
Total Time: 25 minutes
How to Serve Mexican Fried Ice Cream
You could serve this just as it is, or get a little extra with these fun ideas:
- Fresh Fruit: Pair your fried ice cream with some fresh strawberries or a few slices of mango to cut through the sweetness and add a refreshing touch.
- Chocolate Sauce: For an added indulgence, drizzle some chocolate syrup over the top. It’ll give it a little extra richness.
- Toppings: Add a sprinkle of chopped nuts like pecans or almonds for a bit of crunch, or even a dollop of whipped cream for that creamy contrast.
- As a Party Centerpiece: Plating these fried ice cream balls on a large platter can make a gorgeous dessert spread that’ll wow your guests.
Additional Tips
Here are some extra tips to make this recipe even better:
- Keep Ice Cream Firm: The key to perfect fried ice cream is making sure the ice cream is very firm before frying. If it starts to melt in the frying pan, it won’t hold its shape!
- Get Creative: Feel free to mix up the flavors of ice cream! Chocolate, caramel, or even coffee ice cream would be amazing in this recipe.
- Cook in Batches: If you’re making more than one batch, fry them in small batches to avoid overcrowding the pan and ensure that each ball gets that perfect crispy crunch.
- Storage: Leftovers? Store them in an airtight container in the freezer. When you’re ready to eat, you can reheat them for a few minutes in the oven to crisp them up again.
FAQ Section
Q1: Can I substitute the cornflakes with something else?
A1: Sure! If you don’t have cornflakes, you can try using crushed graham crackers or even rice krispies for a slightly different texture.
Q2: Can I make the ice cream balls ahead of time?
A2: Absolutely! You can roll the ice cream into balls and store them in the freezer for up to 24 hours before frying.
Q3: How do I store leftovers?
A3: Store the fried ice cream in an airtight container in the freezer. When you’re ready to eat, you can reheat them for a few minutes in the oven to crisp them up again.
Q4: Can I freeze the fried ice cream?
A4: Yes! If you want to freeze it after frying, place it on a baking sheet and freeze until solid. Then, store in an airtight container for up to a month.
Q5: How do I reheat the fried ice cream?
A5: To reheat, place the fried ice cream on a baking sheet and warm it in the oven at 350°F for about 5 minutes. You can also microwave it for about 30 seconds, but the crispy coating may soften.
Q6: Can I double this recipe?
A6: Definitely! If you’re serving a crowd, feel free to double the ingredients and fry in batches.
Q7: Can I use different toppings?
A7: Of course! Feel free to top your fried ice cream with chocolate syrup, caramel, or even fresh fruit like strawberries or bananas.
Q8: What if I don’t have cinnamon?
A8: No worries! You can skip the cinnamon or try substituting with a pinch of nutmeg or allspice for a warm, spiced flavor.
Q9: What kind of ice cream is best for this recipe?
A9: I recommend using a rich, creamy ice cream like vanilla, cinnamon, or chocolate. Avoid using too-soft or low-fat ice cream, as it may melt too quickly.
Q10: Can I make this dessert in advance?
A10: Yes, you can prep the ice cream balls and even coat them with the cornflakes ahead of time. Just freeze them until you’re ready to fry!
Conclusion
Mexican Fried Ice Cream is that ultimate sweet indulgence that’s crispy, creamy, and oh-so-satisfying. Whether you’re whipping it up for a special occasion or just treating yourself on a regular day, this dessert will absolutely steal the show. It’s fun, easy to make, and totally customizable to your taste. So go ahead—get frying and treat yourself to something extra sweet!
PrintMexican Fried Ice Cream

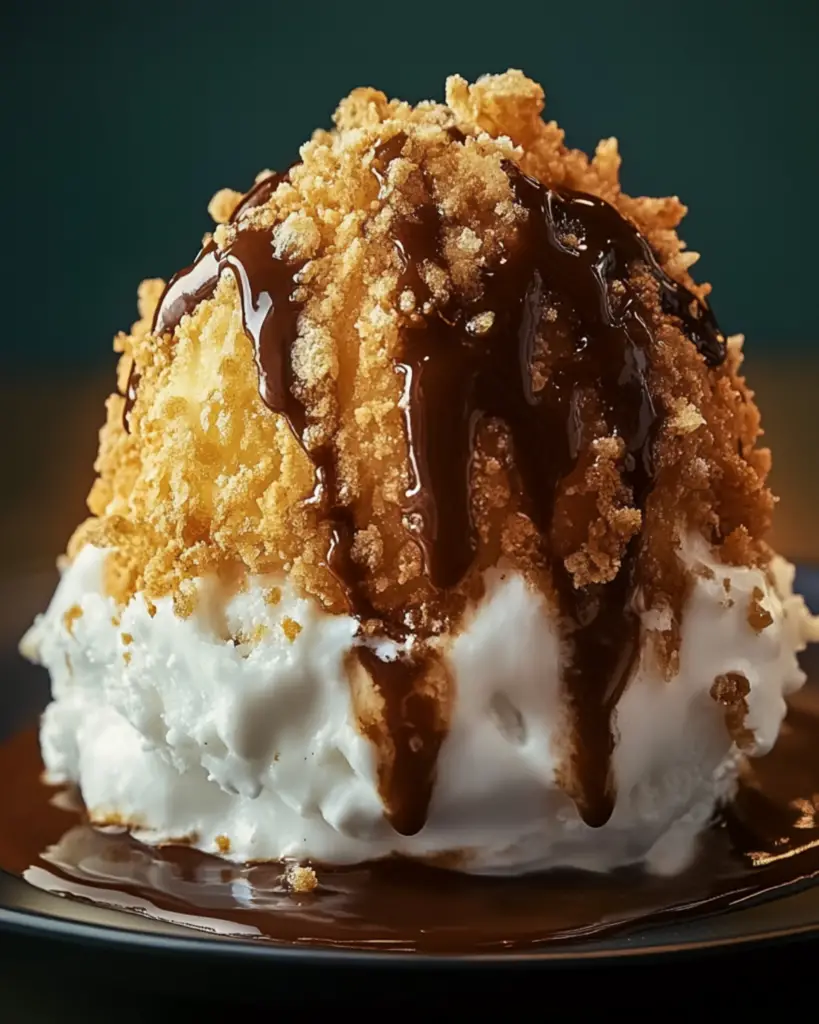
A crunchy cinnamon-coated Mexican ice cream delight featuring vanilla ice cream, frosted cornflakes, and a sweet drizzle of honey. It’s the perfect fusion of crispy and creamy textures!
- Prep Time: 15 minutes
- Total Time: 3 hours 15 minutes
- Yield: 4 servings 1x
- Category: Dessert
- Method: No-bake
- Cuisine: Mexican
- Diet: Vegetarian
Ingredients
- 4 (1 cup) scoops of vanilla ice cream
- 3 cups of crushed frosted cornflakes
- 1 teaspoon of ground cinnamon
- 3 tablespoons of honey (optional drizzle)
- Canned whipped topping (optional topping)
- Chocolate syrup (optional drizzle)
- 4 maraschino cherries (optional topping)
Instructions
- Line a baking sheet with parchment paper and set aside.
- Scoop four 1-cup scoops of vanilla ice cream and place them on the prepared baking sheet.
- Freeze the scooped ice cream for 1 hour.
- Add ground cinnamon to crushed frosted flakes and stir to combine.
- After 1 hour, remove the scooped ice cream from the freezer.
- Roll each scoop of ice cream in the frosted flakes mixture, shaping the ice cream into a solid ball while coating it evenly.
- Place the coated ice cream back on the parchment paper and repeat with the remaining scoops.
- Freeze the coated ice cream for 2 more hours.
- Just before serving, drizzle honey over each scoop, garnish with whipped topping, drizzle with chocolate syrup, and top with a maraschino cherry. Serve immediately.
Notes
- You can adjust the toppings and drizzles according to your preference.
- The freezing time is essential for shaping the ice cream into solid balls, so don’t skip that step!
Nutrition
- Serving Size: 1 scoop (1/4 of the recipe)
- Calories: 827kcal
- Sugar: 27g
- Sodium: 85mg
- Fat: 45g
- Saturated Fat: 13g
- Unsaturated Fat: 22g
- Trans Fat: 0g
- Carbohydrates: 104g
- Fiber: 2g
- Protein: 6g
- Cholesterol: 85mg