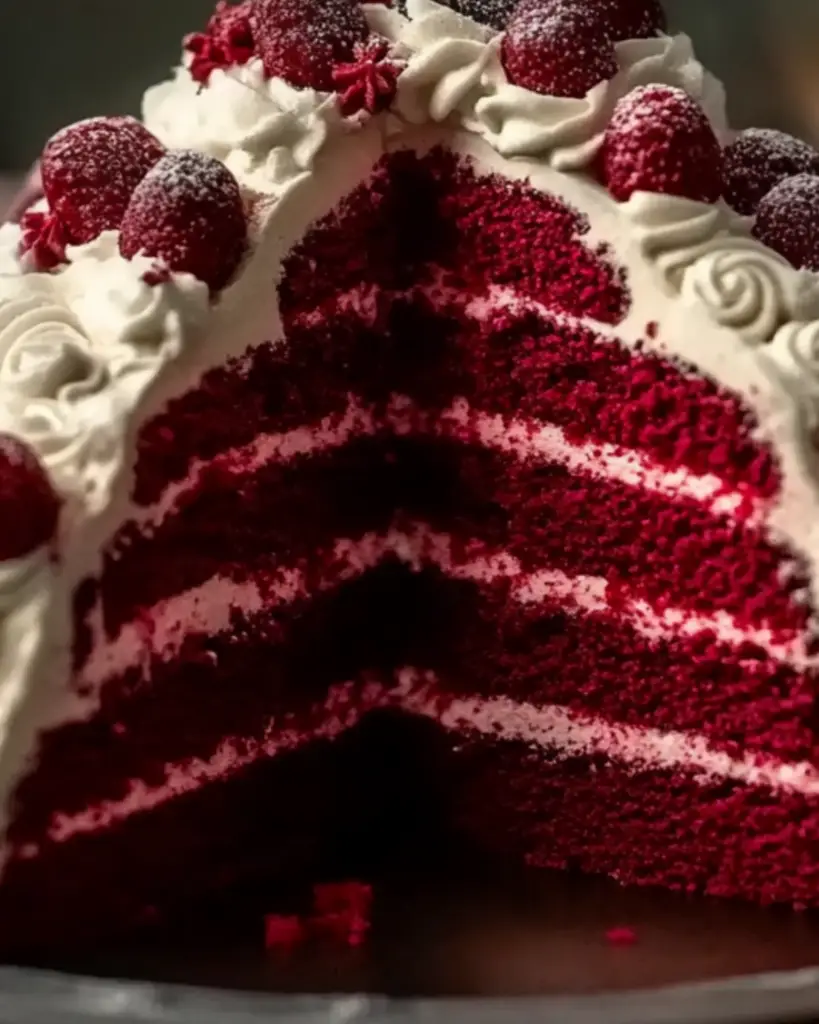
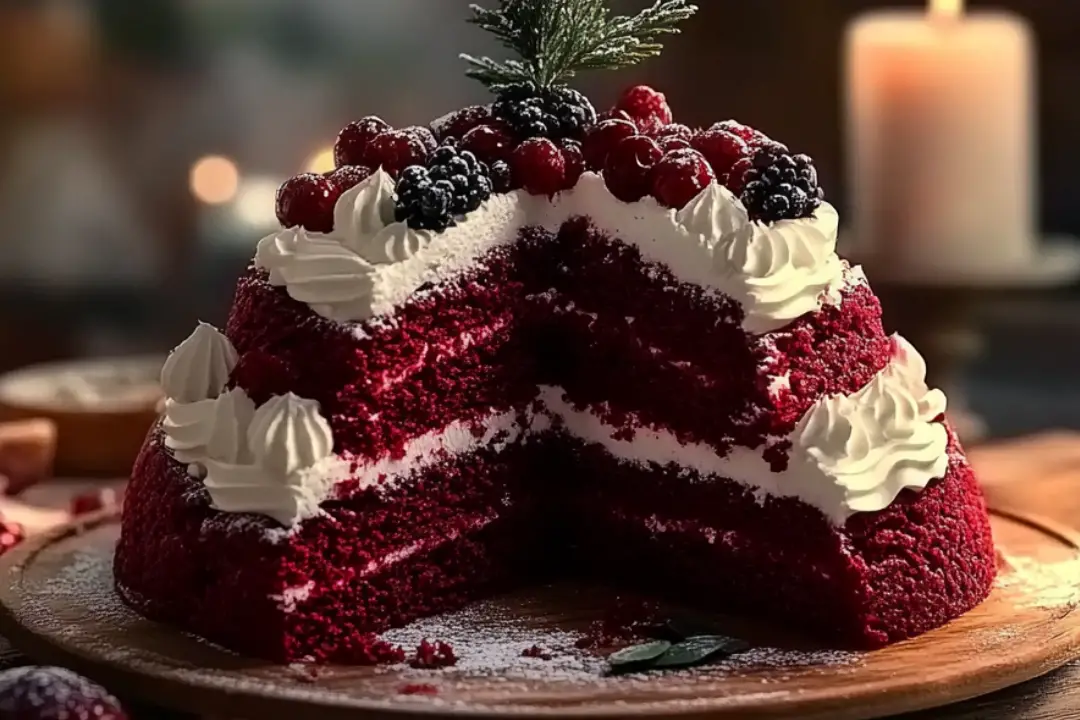
If you’re ready to impress your friends and family with a dessert that is as festive as it is delicious, the Red Velvet Tree Cake is exactly what you need! Picture a soft, velvety cake with that signature red hue, topped with a decadent cream cheese frosting, all shaped into a stunning tree design. It’s like a Christmas miracle in every slice, but honestly, this cake can steal the spotlight any time of year. Trust me, once you taste this, you’ll want to make it for every holiday and celebration—it’s just that good!
Why You’ll Love Red Velvet Tree Cake
This cake isn’t just about a fun design—it’s about bringing joy and flavor into your life. Here’s why it’s a total showstopper:
- Festive and Fun: This cake is perfect for the holidays or any special occasion. Its tree shape alone is sure to be the conversation starter, and its rich red velvet flavor is just the cherry on top.
- Satisfying Flavor: The tender, moist layers of red velvet are complemented by the tangy cream cheese frosting, creating that perfect sweet and slightly tart balance. Every bite is a little bit of heaven.
- Impresses Without Stress: Even though this cake looks fancy, the process is simpler than it seems. It’s a great way to impress without feeling overwhelmed in the kitchen.
- Perfect for Sharing: It’s large enough to serve a crowd, making it a fantastic dessert for parties, gatherings, or family dinners. And trust me, everyone will be asking for seconds!
- Customizable: While it’s already festive with its vibrant red color and tree shape, you can easily customize the cake to fit your theme—add sprinkles, edible glitter, or even candy decorations to make it your own!

Ingredients
Let’s take a look at what makes this cake so irresistible. It’s a combination of simple ingredients that come together to create something extraordinary:
Cake Flour: The secret to that light and fluffy red velvet cake! It gives the cake its melt-in-your-mouth texture.
Granulated Sugar: This adds the perfect amount of sweetness to balance the tangy flavor of the cream cheese frosting.
Baking Powder and Baking Soda: The dynamic duo that helps the cake rise, making each bite soft and airy.
Cocoa Powder: Just a bit of cocoa powder adds that subtle depth of flavor and helps give the cake its iconic red velvet color.
Buttermilk: The buttermilk helps keep the cake moist and tender, and also enhances the tangy richness of the frosting.
Eggs: Eggs bring structure and moisture to the cake, creating the perfect crumb.
Vegetable Oil: For that extra richness and moisture, vegetable oil makes this cake soft and luscious.
Vanilla Extract: A dash of vanilla adds a lovely depth of flavor that complements the tangy cream cheese frosting perfectly.
Red Food Coloring: Of course, we can’t forget the red food coloring that gives this cake its signature color.
For the Cream Cheese Frosting:
Cream Cheese: The base of the frosting, bringing that creamy tanginess that perfectly balances the sweetness of the cake.
Butter: Adds a smooth richness to the frosting, making it both creamy and luxurious.
Powdered Sugar: The sweetness factor—powdered sugar helps make the frosting perfectly smooth and easy to spread.
Vanilla Extract: A hint of vanilla rounds out the flavor, making the frosting taste just right.
(Note: The full ingredients list, including measurements, is provided in the recipe card directly below.)
Instructions
Let’s walk through the steps to bring this festive cake to life:
Preheat Your Oven: Start by preheating your oven to 350°F (175°C). This is the first step to ensure that your cake bakes evenly and perfectly.
Prepare Your Pans: Grease and flour your cake pans. You’ll need two round cake pans for this recipe. This simple step makes it much easier to remove the cakes once they’re baked, and we want to keep things as smooth as possible.
Mix the Wet Ingredients: In a large mixing bowl, whisk together the vegetable oil, sugar, eggs, vanilla extract, and buttermilk. Mix until smooth and well combined—this creates the moist base for your cake.
Add the Dry Ingredients: In a separate bowl, whisk together the flour, cocoa powder, baking powder, and baking soda. Slowly add this dry mixture into your wet ingredients, mixing gently to combine. Add the red food coloring and mix until the batter reaches a rich red hue.
Bake the Cake: Divide the batter evenly between the prepared pans and smooth the tops. Bake for 25-30 minutes, or until a toothpick inserted in the center comes out clean. Once baked, let the cakes cool in the pans for about 10 minutes before transferring them to a wire rack to cool completely.
Make the Cream Cheese Frosting: While the cakes cool, beat the cream cheese and butter together until smooth and creamy. Gradually add in the powdered sugar and vanilla extract, mixing until fluffy and well combined.
Assemble the Cake: Once the cakes are completely cool, spread a generous amount of frosting on top of the first layer. Place the second layer on top and frost the top and sides of the entire cake, smoothing it out for an elegant finish. You can decorate the cake with sprinkles or edible glitter for extra sparkle!
Nutrition Facts
Servings: 12
Calories per serving: 350
Preparation Time
Prep Time: 20 minutes
Cook Time: 30 minutes
Total Time: 1 hour
How to Serve Red Velvet Tree Cake
This cake is perfect for any holiday or gathering, but you can make it even more special by pairing it with these sides:
- Coffee or Hot Chocolate: A warm, cozy beverage complements the sweetness of the cake perfectly.
- Fresh Fruit: A light side of fresh berries, like raspberries or strawberries, balances the richness of the cake with a little freshness.
- Ice Cream: Vanilla or cinnamon ice cream would pair wonderfully with this rich cake.
- Whipped Cream: A dollop of homemade whipped cream is a perfect addition for those who want an extra indulgent treat.
Additional Tips
- Prep Ahead: You can make the cake layers ahead of time and freeze them until you’re ready to assemble the cake.
- Spice It Up: Add a pinch of cinnamon or nutmeg to the cake batter for a little warmth and spice.
- Customize the Frosting: If you want a different flavor for the frosting, try adding a bit of almond extract or a dash of lemon zest for a unique twist.
- Storage Tips: Store any leftovers in an airtight container at room temperature for up to 3 days, or refrigerate for up to 5 days.
- Make It Your Own: If you prefer a smaller or larger tree, you can adjust the recipe by using different-sized cake pans. Just keep an eye on the baking time!
FAQ Section
Q1: Can I use a box mix for this cake?
A1: Of course! If you’re short on time, a box mix can work. Just make sure to follow the instructions on the box and add the red food coloring to achieve that classic red velvet look.
Q2: Can I make the frosting ahead of time?
A2: Yes, you can make the cream cheese frosting a day ahead and store it in the refrigerator. Just make sure to let it come to room temperature before using.
Q3: How do I store leftovers?
A3: Store leftovers in an airtight container at room temperature for up to 3 days. If you need to keep it longer, refrigerate it for up to 5 days.
Q4: Can I freeze the cake?
A4: Yes! You can freeze the cake layers for up to 3 months. Just wrap them tightly in plastic wrap and aluminum foil before freezing.
Q5: What if I don’t have two round pans?
A5: No problem! You can use a single round pan and then cut the cake into a tree shape once it’s cooled, or you could use a different shaped pan and make a creative design!
Q6: Can I use a different frosting?
A6: Absolutely! If you’re not a fan of cream cheese frosting, you could use whipped cream, buttercream, or even a chocolate ganache for a different flavor profile.
Q7: Can I make this cake into cupcakes instead?
A7: Yes! Just pour the batter into lined cupcake tins and bake for about 18-20 minutes or until a toothpick comes out clean.
Q8: How can I make this cake gluten-free?
A8: You can substitute the all-purpose flour with a gluten-free flour blend, and everything else in the recipe should remain the same!
Q9: Can I use a different food coloring?
A9: You can, but red food coloring gives that classic red velvet look. If you prefer another color, just use a gel food coloring for a more vibrant hue.
Q10: Can I add chocolate chips to the cake?
A10: Sure! Fold in a small handful of chocolate chips for an extra indulgent treat, though it will slightly alter the texture.
Conclusion
There you have it—the Red Velvet Tree Cake is a showstopper that’s as delicious as it is beautiful! It’s the kind of dessert that will make you the star of any celebration, and it’s a fun, festive way to enjoy the classic flavors of red velvet cake. Whether you’re serving it at a holiday party or just making it to enjoy with family, this cake is sure to be a hit. Give it a try—you won’t regret it!
PrintRed Velvet Tree Cake Recipe
A festive, multi-layered red velvet cake with a creamy, fluffy cream cheese frosting, decorated to resemble a Christmas tree. Perfect for any holiday celebration!
- Prep Time: 30 minutes
- Cook Time: 20 minutes
- Total Time: 1.5 hours
- Yield: 1 cake (serves approximately 10-12) 1x
- Category: cake
- Method: baking
- Cuisine: American
- Diet: Vegetarian
Ingredients
For the Cake:
- 2½ cups (315g) all-purpose flour
- 1½ cups (300g) granulated sugar
- 1 tsp baking soda
- 1 tsp salt
- 1 tsp cocoa powder
- 1½ cups (360ml) vegetable oil
- 1 cup (240ml) buttermilk, at room temperature
- 2 large eggs, at room temperature
- 2 tbsp (30ml) red food coloring
- 1 tsp white vinegar
- 2 tsp vanilla extract
For the Cream Cheese Frosting:
- 8 oz (225g) cream cheese, softened
- ½ cup (115g) unsalted butter, softened
- 4 cups (500g) powdered sugar
- 2 tsp vanilla extract
For Decoration:
- Edible silver and red baubles
- Small edible glitter stars
- White chocolate shavings
- A star-shaped topper
Instructions
Prepare the Cake Batter:
- Preheat your oven to 350°F (175°C). Grease and line multiple round cake pans of decreasing sizes (e.g., 9-inch, 7-inch, 5-inch, and 3-inch pans).
- In a large bowl, sift together the flour, sugar, baking soda, salt, and cocoa powder.
- In a separate bowl, whisk together the vegetable oil, buttermilk, eggs, food coloring, vinegar, and vanilla extract.
- Gradually add the wet ingredients to the dry ingredients, mixing until smooth and well combined.
Bake the Cakes:
5. Divide the batter evenly among the prepared pans.
6. Bake each layer for 20-25 minutes or until a toothpick inserted into the center comes out clean.
7. Let the cakes cool in their pans for 10 minutes, then transfer them to a wire rack to cool completely.
Prepare the Cream Cheese Frosting:
8. In a mixing bowl, beat the cream cheese and butter until smooth.
9. Gradually add the powdered sugar, beating until the frosting is fluffy. Stir in the vanilla extract.
Assemble the Cake:
10. Place the largest cake layer on a serving plate. Spread a thin layer of cream cheese frosting over the top.
11. Stack the next largest cake layer on top and repeat with the frosting. Continue until all the layers are stacked.
12. Trim the edges if necessary to create a conical tree shape.
Decorate:
13. Using a piping bag fitted with a star tip, pipe swirls of frosting around the cake.
14. Decorate with edible baubles and glitter stars.
15. Sprinkle white chocolate shavings for a snowy effect.
16. Top with the star-shaped topper.
Serve and Enjoy:
17. Slice the cake and enjoy the festive layers of red velvet and cream cheese frosting!
Notes
- You can adjust the amount of food coloring for a deeper or lighter red hue.
- Be careful not to overbake the layers, as this may cause them to become dry.
- The cream cheese frosting can be made ahead of time and stored in the refrigerator until ready to use.
Nutrition
- Serving Size: 1 slice (based on 12 servings)
- Calories: 350kcal
- Sugar: 40g
- Sodium: 150mg
- Fat: 20g
- Saturated Fat: 10g
- Unsaturated Fat: 8g
- Trans Fat: 0g
- Carbohydrates: 40g
- Fiber: 1g
- Protein: 4g
- Cholesterol: 50mg


