

Looking for a dessert that will steal the show this Valentine’s Day? Look no further than Valentine’s Day Red Velvet Cheesecake. This cheesecake is the perfect blend of two iconic desserts: rich, creamy cheesecake and the classic red velvet cake. With a buttery, crumbly crust, a luscious cheesecake filling, and that signature red velvet color, this dessert is the ultimate way to wow your special someone (or yourself—no judgment!). The smooth cheesecake balances the slightly tangy flavor of red velvet, and that gorgeous crimson hue? Absolutely irresistible. Trust me, this dessert is going to make hearts skip a beat!
Why You’ll Love Valentine’s Day Red Velvet Cheesecake
Here’s why this cheesecake is destined to become your new favorite Valentine’s Day treat:
- Creamy & Decadent: The cheesecake filling is smooth, velvety, and indulgent, offering the perfect balance of richness with a light tang from the cream cheese.
- Red Velvet Perfection: The red velvet layer adds a subtle cocoa flavor that gives the cheesecake that iconic taste we all know and love. Plus, the stunning red color makes it perfect for the occasion!
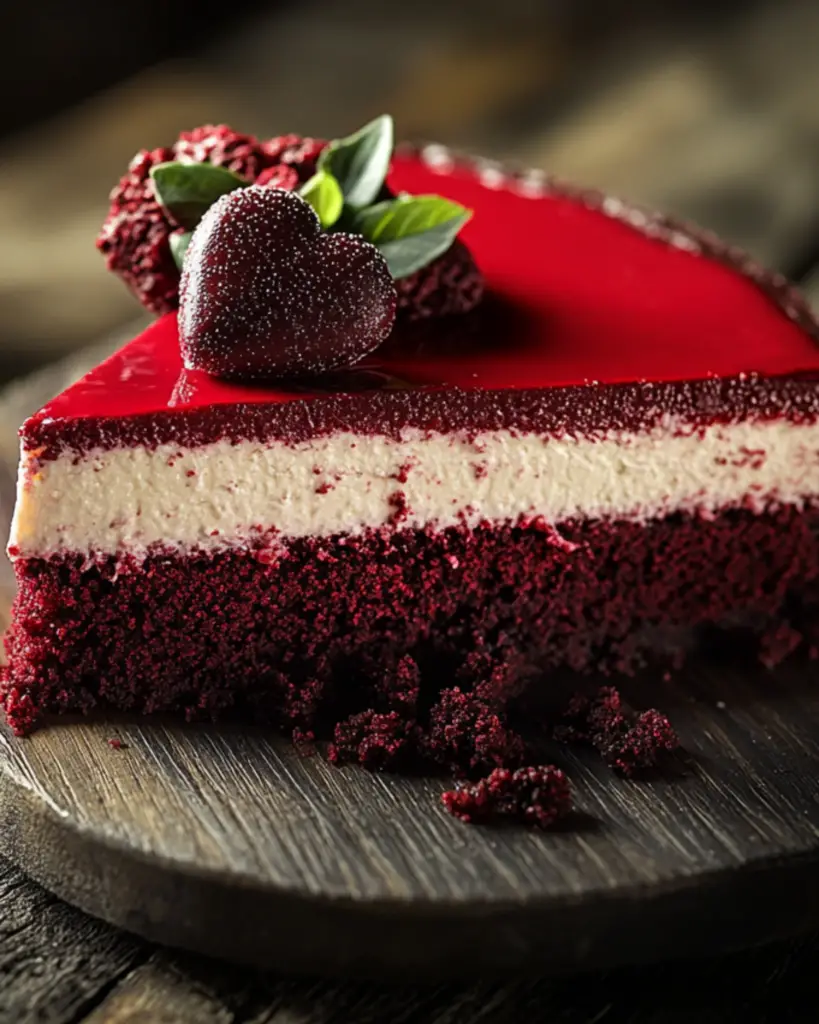
- Beautiful Presentation: Whether you’re celebrating with a special someone or hosting a get-together, this cheesecake will impress everyone. It’s beautiful, festive, and just downright delicious.
- Perfect Make-Ahead Dessert: You can make this cheesecake ahead of time, freeing you up to focus on other things. It needs time to set in the fridge anyway, so it’s a great make-ahead option.
- Elegant & Indulgent: The combination of the cheesecake and red velvet flavors makes this dessert the perfect balance of elegance and indulgence—just right for Valentine’s Day!
Ingredients
Here’s everything you’ll need to create this show-stopping Valentine’s Day Red Velvet Cheesecake:
For the Crust:
Graham Cracker Crumbs: The base for the crust, providing a buttery and slightly sweet foundation.
Sugar: Adds sweetness to the crust, balancing the flavor.
Butter: Melted butter helps bind the crumbs together and gives the crust its rich texture.
For the Red Velvet Cake Layer:
Cake Flour: For a soft and tender cake layer.
Cocoa Powder: Just a touch to add that chocolatey flavor we love in red velvet desserts.
Baking Powder: Helps the cake layer rise to the perfect height.
Salt: A pinch of salt enhances all the flavors.
Granulated Sugar: Adds the necessary sweetness to the cake batter.
Butter: Softened butter for a rich, smooth batter.
Eggs: Provides structure and helps the batter rise.
Red Food Coloring: The key to that gorgeous red hue! (Or, you can use natural alternatives like beet juice.)
Vanilla Extract: Adds a lovely aromatic flavor to the cake layer.
Buttermilk: Gives the cake its soft, tender texture.
For the Cheesecake Layer:
Cream Cheese: The creamy base for the cheesecake, giving it that luscious texture.
Granulated Sugar: Sweetens the cheesecake filling perfectly.
Sour Cream: Adds a tangy note that balances out the richness of the cheesecake.
Eggs: Provides structure and helps the filling set.
Vanilla Extract: Enhances the flavor of the cheesecake filling.
Heavy Cream: Makes the cheesecake filling rich and creamy.
(Note: the full ingredients list, including measurements, is provided in the recipe card directly below.)
Instructions
Here’s how to make this Valentine’s Day Red Velvet Cheesecake:
1. Prepare the Crust
Preheat your oven to 350°F (175°C). In a medium bowl, combine the graham cracker crumbs, sugar, and melted butter. Stir until everything is well combined. Press the mixture into the bottom of a springform pan, making sure it’s evenly spread. Bake for 8-10 minutes, then remove from the oven and set aside to cool.
2. Make the Red Velvet Cake Layer
In a medium bowl, whisk together the cake flour, cocoa powder, baking powder, and salt. In a separate large bowl, cream together the butter and sugar until light and fluffy. Add the eggs one at a time, mixing well after each. Stir in the vanilla extract and red food coloring. Gradually add the dry ingredients in three parts, alternating with the buttermilk. Mix until smooth.
3. Bake the Red Velvet Cake Layer
Pour the red velvet batter over the cooled crust. Bake in the preheated oven for about 25-30 minutes, or until a toothpick inserted into the center comes out clean. Let the cake layer cool completely in the pan.
4. Make the Cheesecake Layer
While the red velvet layer is cooling, prepare the cheesecake filling. In a large bowl, beat the cream cheese and sugar until smooth. Add the sour cream and beat again until combined. Mix in the eggs, one at a time, followed by the vanilla extract and heavy cream. Beat until smooth and creamy.
5. Assemble the Cheesecake
Once the red velvet cake layer has cooled, pour the cheesecake filling over it. Smooth it out evenly. Bake the entire cheesecake in the preheated oven at 325°F (163°C) for 55-60 minutes, or until the edges are set but the center is slightly jiggly. Turn off the oven, crack the door slightly, and let the cheesecake cool for an hour. Then, refrigerate for at least 4 hours, or overnight, to allow it to fully set.
6. Serve and Enjoy
Once the cheesecake is fully chilled and set, remove it from the springform pan. Slice and serve! You can top it with fresh berries, a drizzle of chocolate, or a sprinkle of powdered sugar for an extra touch.
Nutrition Facts
Servings: 12
Calories per serving: 450
Preparation Time
Prep Time: 30 minutes
Cook Time: 90 minutes
Total Time: 4 hours 30 minutes (including chilling time)
How to Serve Valentine’s Day Red Velvet Cheesecake
This cheesecake is perfect as-is, but here are a few ways to make it even more special:
- Top with Fresh Berries: Fresh raspberries, strawberries, or even blackberries add a pop of color and tartness that pairs beautifully with the rich cheesecake.
- Chocolate Drizzle: Drizzle some melted chocolate (white or dark) over the top of the cheesecake for a decadent touch.
- Serve with Whipped Cream: A dollop of whipped cream on top adds a light and fluffy contrast to the dense, creamy cheesecake.
- Heart-Shaped Garnish: For extra Valentine’s flair, cut the cheesecake into heart shapes with a cookie cutter, or garnish with heart-shaped sprinkles.
Additional Tips
- Use Room Temperature Ingredients: Make sure your cream cheese, eggs, and butter are at room temperature for a smooth batter and filling.
- Let the Cheesecake Set: Don’t rush the chilling process! Letting the cheesecake set in the fridge is key to getting that perfect, smooth texture.
- Prevent Cracking: If you want to avoid cracks in your cheesecake, try baking it in a water bath or placing a small bowl of water in the oven with the cheesecake.
- Use Natural Food Coloring: If you want a more natural alternative to artificial food coloring, you can use beet juice to get that gorgeous red hue—just keep in mind that the color might be a little softer.
FAQ Section
Q1: Can I make this cheesecake ahead of time?
A1: Absolutely! In fact, this cheesecake tastes even better after sitting in the fridge for a day or two. Make it ahead and let it chill overnight for the best results.
Q2: Can I freeze this cheesecake?
A2: Yes! You can freeze the cheesecake (without the toppings) for up to 2 months. Just wrap it tightly in plastic wrap and foil, then thaw in the fridge before serving.
Q3: Can I skip the red food coloring?
A3: Yes, you can! The color is what gives this cheesecake its signature red velvet look, but the flavor will still be delicious without the coloring.
Q4: Can I use a different crust?
A4: Yes! If you prefer a different crust, you can use an Oreo crust, chocolate cookie crust, or even a gluten-free crust if needed.
Q5: How do I store leftovers?
A5: Store any leftover cheesecake in an airtight container in the refrigerator for up to 3-4 days. You can also freeze it for longer storage.
Q6: Can I make this without the red velvet cake layer?
A6: Yes! You can make just a classic cheesecake and skip the red velvet layer altogether. It’ll still be a delicious treat!
Q7: Can I double the recipe for a larger cheesecake?
A7: Yes! If you want to make a larger cheesecake, just double the ingredients and bake it in a 9-inch springform pan. You may need to adjust the baking time.
Q8: How can I make this cheesecake even more festive?
A8: Top it with Valentine’s-themed decorations like edible flowers, heart-shaped sprinkles, or a dusting of cocoa powder shaped like a heart.
Q9: Can I make this in a different-sized pan?
A9: You can, but be mindful that different pan sizes may affect the cooking time. Keep an eye on it as it bakes!
**Q
10: Can I use a different type of filling for the cheesecake?**
A10: Yes! Feel free to experiment with different flavors of cheesecake filling, like adding chocolate chips for a chocolate cheesecake layer or a fruit swirl for a fruity twist.
Conclusion
This Valentine’s Day Red Velvet Cheesecake is the perfect dessert for the occasion—decadent, indulgent, and utterly stunning. Whether you’re celebrating with someone special or treating yourself, this cheesecake is sure to bring the love. It’s beautiful, rich, and absolutely delicious. So go ahead, share the love with a slice of this irresistible dessert! Happy Valentine’s Day!
PrintValentine’s Day Red Velvet Cheesecake

This decadent and creamy Red Velvet Cheesecake is the ultimate Valentine’s Day dessert—rich, smooth, and full of love! With a chocolate cookie crust, a luscious red velvet filling, and a whipped cream topping, it’s the perfect treat to celebrate with your loved ones.
- Prep Time: 25 minutes
- Cook Time: 1 hour 10 minutes
- Total Time: 7 hours 35 minutes
- Yield: 10–12 slices 1x
- Category: Dessert
- Method: baking
- Cuisine: American
- Diet: Vegetarian
Ingredients
- For the Chocolate Cookie Crust:
- 2 cups chocolate cookie crumbs
- 5 tbsp butter, melted
For the Red Velvet Cheesecake Filling:
- 24 oz (3 blocks) cream cheese, room temperature
- 1 cup sugar
- 2 tbsp cocoa powder
- 1/2 cup sour cream
- 1/4 cup buttermilk
- 3 large eggs
- 1 tsp white vinegar
- 2 tsp vanilla extract
- 1 tbsp red food coloring
For the Cream Cheese Whipped Cream:
- 4 oz cream cheese, room temperature
- 1 cup heavy whipping cream, cold
- 1/2 cup powdered sugar
- 1 tsp vanilla extract
Instructions
- Prepare the Crust:
Preheat the oven to 325°F (163°C). Grease a 9-inch springform pan and line the bottom with parchment paper.
In a bowl, mix chocolate cookie crumbs and melted butter until evenly combined.
Press the mixture firmly into the bottom of the pan. Bake for 10 minutes, then set aside to cool. - Make the Red Velvet Cheesecake Filling:
In a large bowl, beat cream cheese, sugar, and cocoa powder until smooth.
Add sour cream, buttermilk, vinegar, and vanilla extract, mixing until fully combined.
Mix in the red food coloring until evenly colored.
Add eggs one at a time, beating on low speed until just incorporated (do not overmix).
Pour the batter over the cooled crust and smooth the top. - Bake the Cheesecake:
Wrap the springform pan in foil and place it in a larger baking dish.
Pour hot water into the outer dish, about 1 inch deep, to create a water bath (this prevents cracks).
Bake for 1 hour, then turn off the oven and let the cheesecake sit inside with the door slightly open for another 30 minutes.
Remove from the oven and allow to cool completely before refrigerating for at least 6 hours or overnight. - Prepare the Cream Cheese Whipped Cream:
In a mixing bowl, beat cream cheese, powdered sugar, and vanilla extract until smooth.
Add cold heavy whipping cream and beat until stiff peaks form. - Decorate & Serve:
Remove cheesecake from the springform pan.
Pipe or spread cream cheese whipped cream on top.
Garnish with chocolate shavings, heart-shaped sprinkles, or fresh berries for a festive touch.
Notes
- Ensure the cheesecake is completely cooled and chilled before serving to get the best texture.
- You can store leftovers in the fridge for up to 3-4 days.
Nutrition
- Serving Size: 1 slice
- Calories: 350kcal
- Sugar: 28g
- Sodium: 220mg
- Fat: 28g
- Saturated Fat: 15g
- Unsaturated Fat: 10g
- Trans Fat: 0g
- Carbohydrates: 30g
- Fiber: 1g
- Protein: 5g
- Cholesterol: 90mg