BISCOFF DRIP
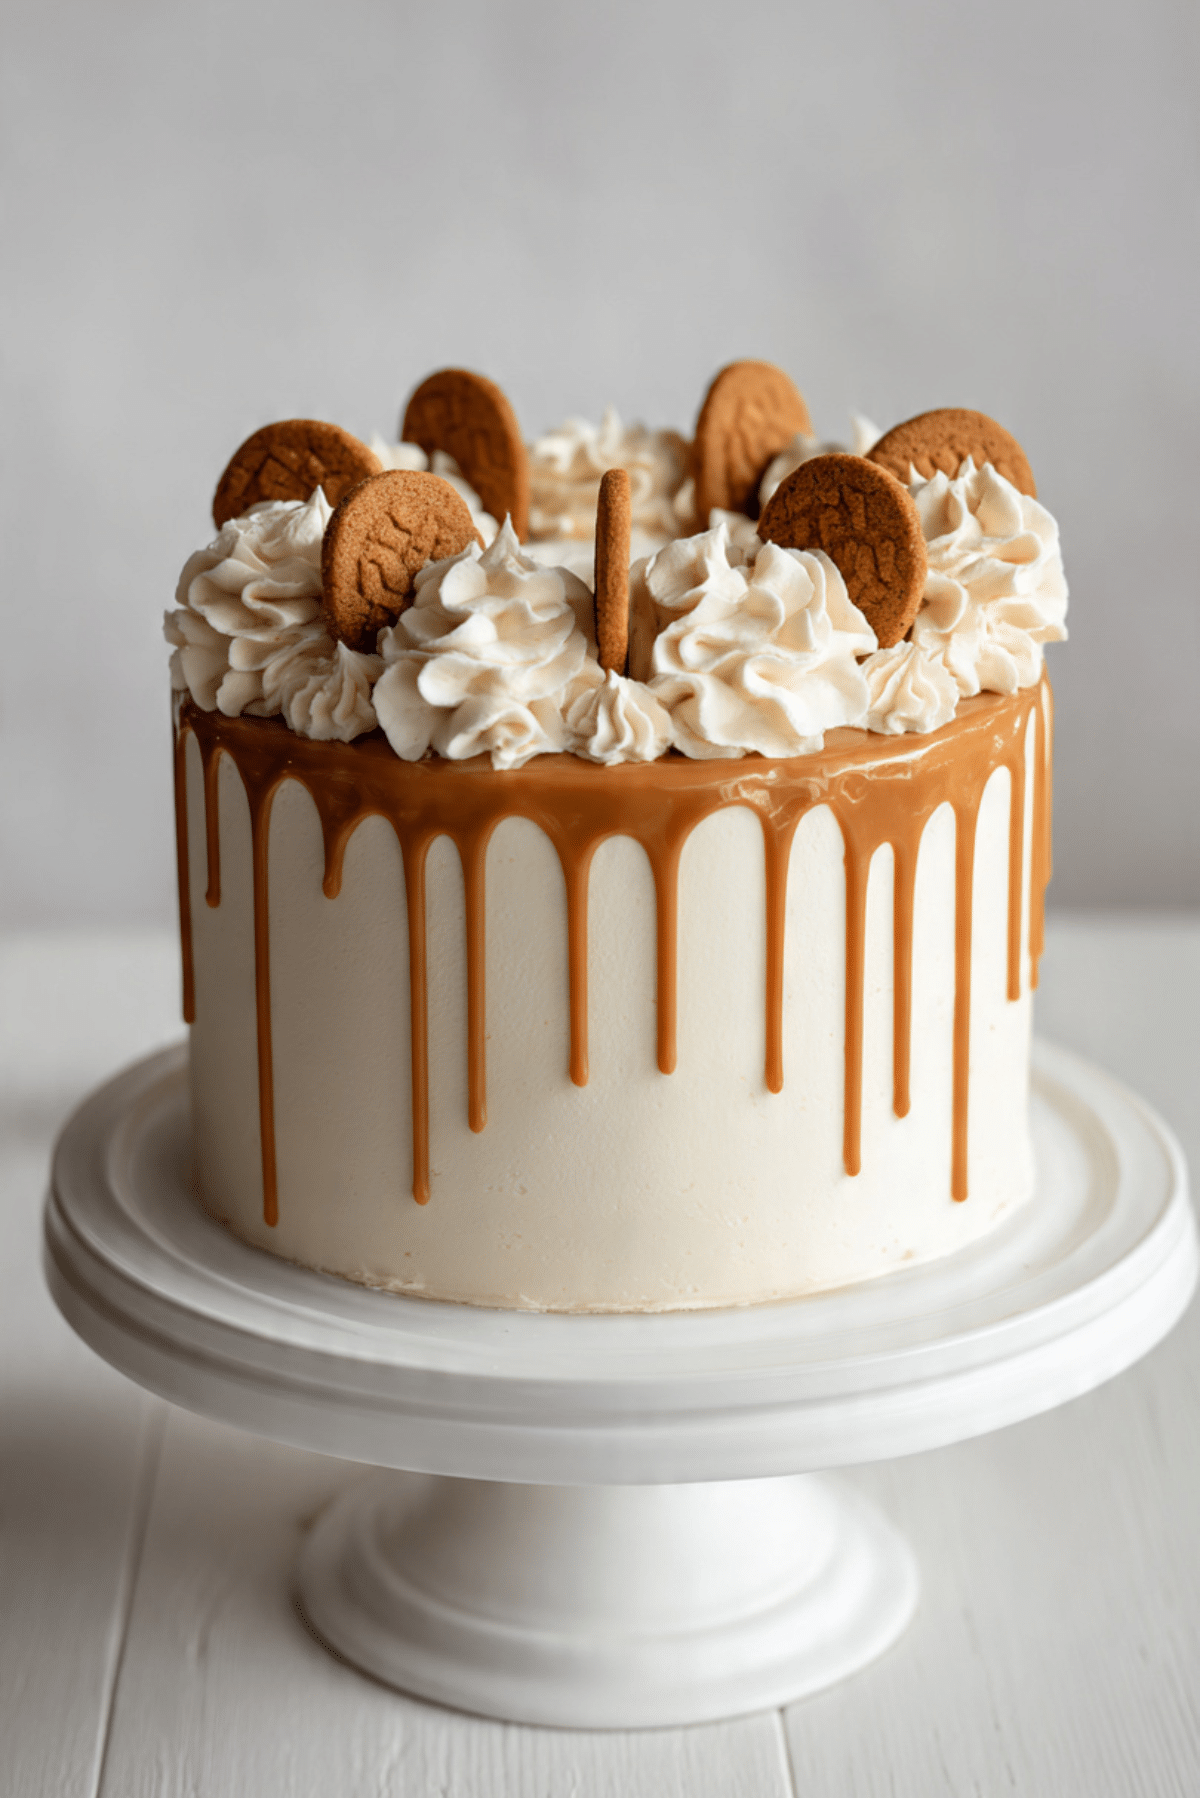
The first time you set this cake on the table, everything around it seems to pause for a second. The glossy drip slowly hugging the sides, the soft contrast between creamy white frosting and that deep caramel tone, and the familiar warm aroma that instantly makes people lean closer. Trust me, you’re going to love this. It feels like a celebration cake, yet it is surprisingly comforting and cozy, like something you would bake just because the mood felt right.
Why This Cake Always Steals the Spotlight
There is something undeniably special about the way this dessert balances elegance and indulgence. It looks bakery level impressive, yet every bite feels familiar and comforting. The contrast between fluffy sponge, creamy frosting, and that signature spiced sweetness makes it one of those desserts people remember long after the plates are cleared.
A Little Background Behind the Flavor
This cake takes its inspiration from the much loved spiced biscuit spread that originated in Europe and slowly made its way into home kitchens around the world. Bakers started folding it into frostings, fillings, and drips, turning a simple biscuit flavor into a full dessert experience. Over time, it became a favorite for birthdays, holidays, and anytime you want a dessert that feels a little extra without being complicated.
What Makes This Recipe a Keeper
This is the part where everything comes together and you realize why this cake earns a permanent spot in your rotation.
Versatile:
It works just as beautifully for birthdays as it does for casual gatherings, and you can easily dress it up or keep it simple.
Budget-Friendly:
Most ingredients are pantry staples, with the spread doing the heavy lifting in flavor.
Quick and Easy:
The steps are straightforward, even if the final look feels fancy.
Customizable:
You can adjust the sweetness, frosting thickness, or drip amount to suit your taste.
Crowd-Pleasing:
That warm spiced sweetness is almost impossible to resist.
Make-Ahead Friendly:
The cake layers can be baked in advance, which makes assembly stress free.
Great for Leftovers:
It stays moist for days, if it lasts that long.
Baker Secrets for the Best Results
Before we get our hands messy, here are a few insider tips that make all the difference.
- Let your cake layers cool completely before frosting, otherwise the buttercream will soften too much.
- Warm the spread gently for the drip, it should flow slowly, not run.
- Use an offset spatula for a smooth finish, patience here really pays off.
- Chill the cake briefly before adding the drip to control the flow.
Kitchen Tools You Will Need
Having the right tools nearby makes the process smoother and honestly more enjoyable.
Mixing Bowls:
For keeping wet and dry ingredients separate and organized.
Electric Mixer:
Helps achieve a light sponge and fluffy frosting.
Cake Pans:
Two or three round pans for even layers.
Offset Spatula:
Perfect for spreading frosting smoothly.
Squeeze Bottle or Spoon:
To control the drip neatly around the edges.
Ingredients You Will Need For This Cake
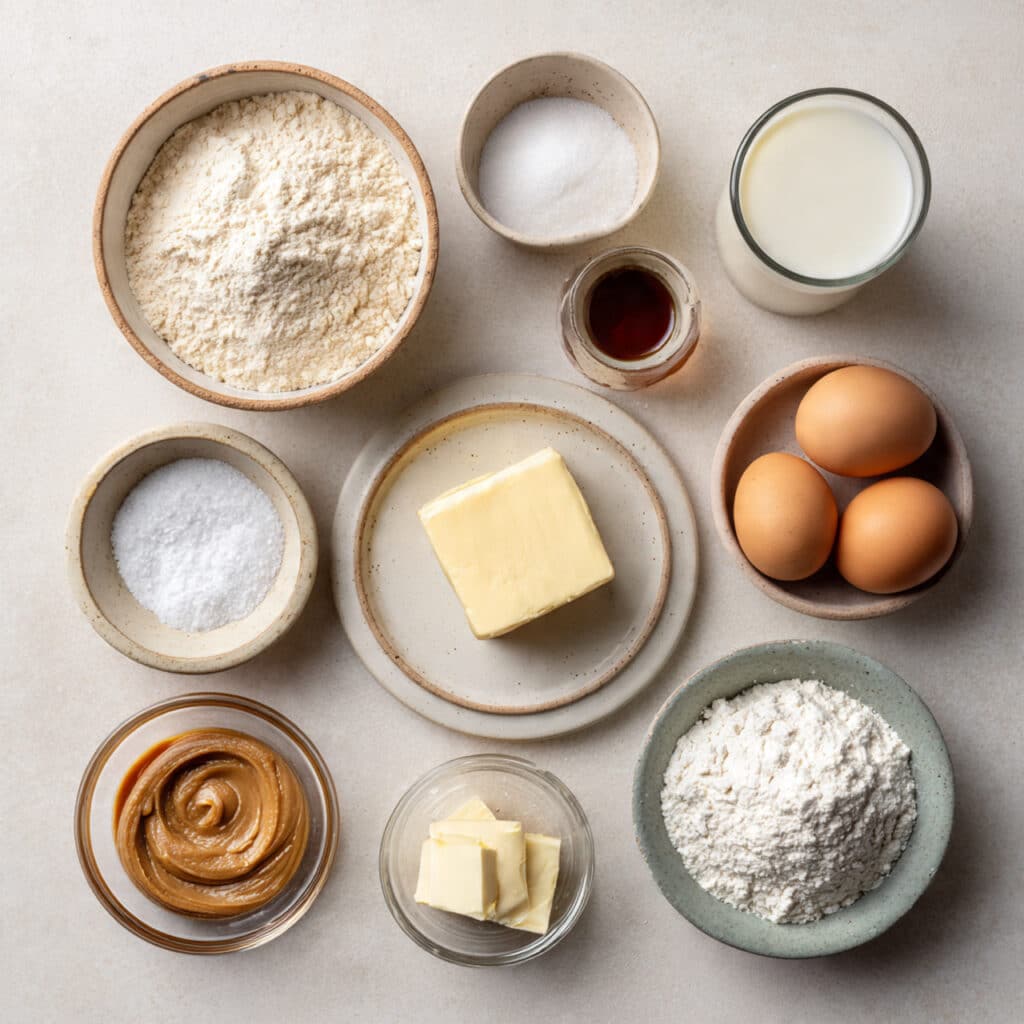
Every ingredient plays its role, and together they create that signature flavor and texture.
- All-Purpose Flour: 2 cups, forms the structure of the cake while keeping it soft.
- Granulated Sugar: 1 1/2 cups, adds sweetness and helps with moisture.
- Baking Powder: 2 teaspoons, gives the cake its lift.
- Salt: 1/2 teaspoon, balances the sweetness.
- Unsalted Butter: 1 cup, softened, adds richness and tenderness.
- Eggs: 3 large, bind the batter and add structure.
- Milk: 1 cup, keeps the crumb moist and smooth.
- Vanilla Extract: 2 teaspoons, rounds out the flavors.
- Biscoff Spread: 1 1/2 cups total, used for frosting and drip, brings the signature spiced caramel flavor.
- Powdered Sugar: 3 cups, sweetens and stabilizes the buttercream.
Smart Ingredient Swaps
Sometimes you need flexibility, and this recipe allows for it.
Milk: Use plant based milk for a dairy adjusted version.
Butter: Margarine works if needed, though flavor will be slightly lighter.
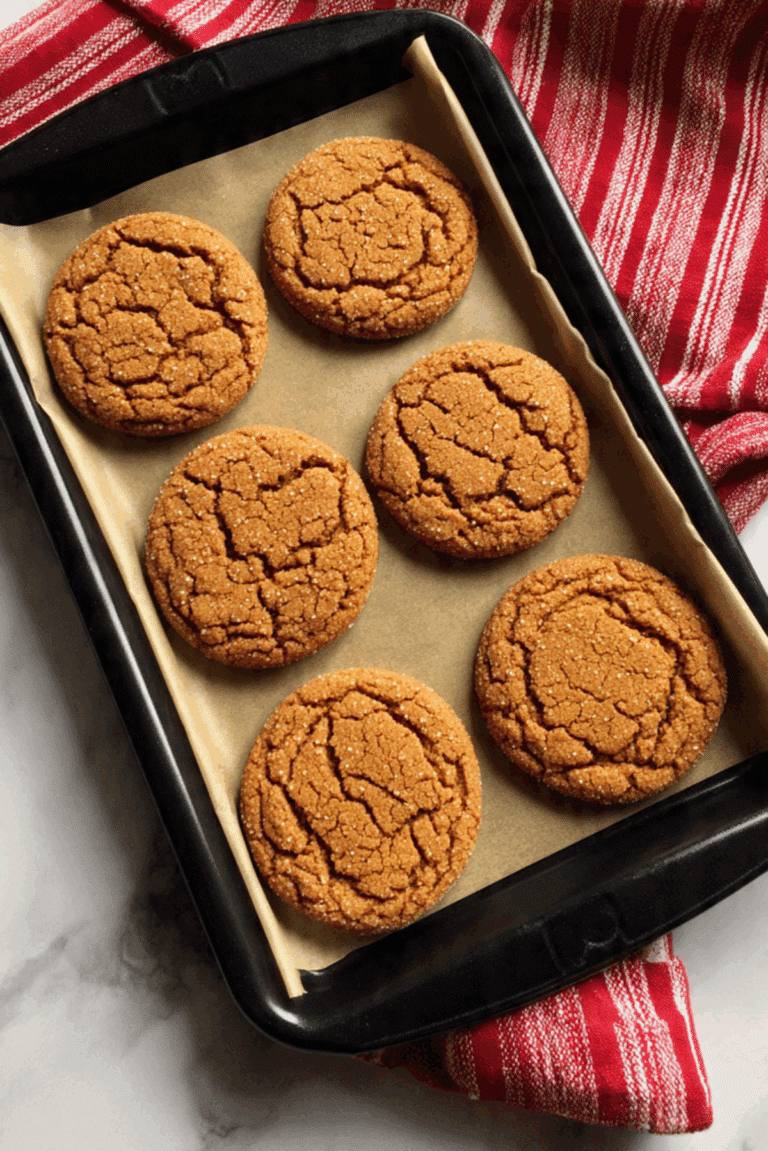
Biscoff Spread: Any similar spiced cookie spread can be used.
Spotlight on Key Ingredients
Biscoff Spread:
This is the heart of the cake, delivering that warm spiced sweetness and smooth texture.
Unsalted Butter:
Provides richness and helps create a creamy, stable frosting.
Let’s Bake Together
Now let’s dive into the process, step by step, like we are baking side by side.
- Preheat Your Equipment:
Set your oven to 350°F and grease your cake pans well. - Combine Ingredients:
Whisk flour, baking powder, and salt in one bowl. In another bowl, beat butter and sugar until light, then add eggs and vanilla. - Prepare Your Cooking Vessel:
Alternate adding dry ingredients and milk to the butter mixture until smooth. - Assemble the Dish:
Divide batter evenly between pans and smooth the tops. - Cook to Perfection:
Bake for 25 to 30 minutes, until a toothpick comes out clean. - Finishing Touches:
Cool completely, then frost with buttercream mixed with biscoff spread. - Serve and Enjoy:
Warm the remaining spread slightly and drizzle around the edges for the drip.
Texture and Flavor Harmony
What makes this cake unforgettable is the balance. The sponge is soft and tender, the frosting creamy and rich, and the drip adds a silky finish with just enough sweetness. Each bite melts together without feeling heavy.
Helpful Tips for Success
A few extra pointers can make your bake even smoother.
- Chill the cake before slicing for cleaner cuts.
- Use a turntable if you have one for easier frosting.
- Taste the frosting as you go and adjust sweetness.
Common Mistakes to Avoid
Even simple recipes have a few pitfalls.
- Overbaking the layers, which dries them out.
- Pouring the drip too hot, causing it to run too fast.
- Frosting before the cake has cooled completely.
Nutrition Facts at a Glance
Servings: 12
Calories per serving: Approximately 420
Note: These values are estimates and may vary.
Time Breakdown
Prep Time: 25 minutes
Cook Time: 30 minutes
Total Time: 55 minutes
Make-Ahead and Storage Tips
You can bake the cake layers a day ahead and wrap them tightly. Store the finished cake in the refrigerator for up to three days. Let it come to room temperature before serving for the best texture.
Serving Ideas
Serve slices with a cup of coffee or tea, or add a scoop of vanilla ice cream for an extra treat. It also pairs beautifully with fresh fruit on the side.
Creative Ways to Use Leftovers
Turn extra slices into cake pops, or crumble them into parfait glasses with whipped cream.
Extra Tips for Best Results
Keep the frosting bowl covered when not in use to prevent drying. Always use gentle heat when warming the spread.
Make It a Showstopper
Add extra cookies on top, pipe taller swirls, or use a contrasting cake board for presentation.
Variations to Try
- Add a thin layer of spread between cake layers for extra flavor.
- Mix crushed biscuits into the frosting for texture.
- Use chocolate cake layers for a deeper contrast.
- Add a hint of cinnamon to the batter.
FAQ’s
1. Can I make this cake ahead of time?
Yes, the layers can be baked in advance and assembled later.
2. How do I control the drip?
Make sure the spread is warm but not hot.
3. Can I freeze this cake?
You can freeze the unfrosted layers for up to one month.
4. What frosting consistency is best?
Smooth and spreadable, not too stiff.
5. Can I use store bought frosting?
Homemade gives the best flavor, but store bought works in a pinch.
6. How do I get clean slices?
Use a warm knife and wipe between cuts.
7. Can I reduce the sweetness?
Yes, slightly reduce powdered sugar in the frosting.
8. Does this cake need refrigeration?
Yes, but let it sit out before serving.
9. Can I make this as cupcakes?
Absolutely, adjust baking time accordingly.
10. Is this cake kid friendly?
Very much so, it is a favorite with all ages.
Conclusion
This cake is one of those desserts that feels like a reward. It looks stunning, tastes even better, and brings people together around the table. Let me tell you, it’s worth every bite, and once you make it, it might just become your go to celebration cake.
Print
BISCOFF DRIP
A soft, fluffy cake layered with creamy biscoff buttercream and finished with a smooth white frosting and a rich biscoff drip that slowly cascades down the sides. This cake balances sweetness and warmth with a bakery style look that feels comforting and indulgent.
- Total Time: 55 minutes
- Yield: 12 servings
Ingredients
- All-purpose flour – 2 cups
- Granulated sugar – 1 1/2 cups
- Baking powder – 2 teaspoons
- Salt – 1/2 teaspoon
- Unsalted butter, softened – 1 cup
- Eggs – 3 large
- Milk – 1 cup
- Vanilla extract – 2 teaspoons
- Biscoff spread – 1 1/2 cups
- Powdered sugar – 3 cups
Instructions
- Preheat the oven to 350°F and grease two round cake pans.
- In a bowl, whisk together flour, baking powder, and salt.
- In another bowl, beat butter and granulated sugar until light and fluffy.
- Add eggs one at a time, then mix in vanilla extract.
- Alternate adding the dry ingredients and milk until the batter is smooth.
- Divide batter evenly into prepared pans.
- Bake for 25 to 30 minutes until a toothpick inserted comes out clean.
- Allow cakes to cool completely before frosting.
- Mix powdered sugar with part of the biscoff spread to create the buttercream.
- Frost the cake layers evenly.
- Gently warm the remaining biscoff spread and drip it around the edges of the cake.
Notes
- Let the cake chill briefly before adding the drip for better control.
- Warm the biscoff spread slowly so it flows without becoming runny.
- Bring the cake to room temperature before serving for the best texture.
- Prep Time: 25 minutes
- Cook Time: 30 minutes
- Category: Dessert
- Method: Baking
- Cuisine: European-inspired
- Diet: Vegetarian
Nutrition
- Serving Size: 1 slice
- Calories: 420
- Sugar: 34g
- Sodium: 210mg
- Fat: 22g
- Saturated Fat: 12g
- Unsaturated Fat: 8g
- Trans Fat: 0g
- Carbohydrates: 52g
- Fiber: 1g
- Protein: 5g
- Cholesterol: 85mg
Keywords: biscoff cake, drip cake, caramel biscuit cake, celebration cake, layered cake