Biscoff Thumbprint Cookies
There’s something incredibly comforting about the scent of warm cookies baking in the oven, and these Biscoff Thumbprint Cookies are no exception. They’re soft, chewy, and filled with the rich, spiced sweetness of creamy Biscoff spread. The moment you bite into the center, that burst of caramelized cookie butter melts on your tongue, making each bite more irresistible than the last.
Behind the Recipe
I still remember the first time I tried a spoonful of Biscoff spread. It was during a chilly December evening, and I was instantly hooked. That deep, caramel flavor with warm undertones of cinnamon sparked a wave of inspiration. So I took my love for classic thumbprint cookies and gave them a delicious twist. Baking these cookies quickly became a holiday tradition, though trust me, you’ll want to enjoy them all year round.
Recipe Origin or Trivia
Thumbprint cookies originated in Sweden and are traditionally known as “hallongrotta,” which means “raspberry cave” due to their jam-filled centers. While they’ve been popular in Scandinavian households for generations, bakers around the world have made them their own by experimenting with various fillings. The addition of Biscoff spread is a modern take, combining old-world charm with a new flavor favorite that’s taken the dessert world by storm.
Why You’ll Love Biscoff Thumbprint Cookies
These cookies are everything your sweet tooth dreams of. But beyond their melt-in-your-mouth texture, they bring a little magic to your baking.
Versatile: Perfect for holidays, afternoon snacks, or cozy coffee breaks.
Budget-Friendly: Uses pantry staples and just one special ingredient.
Quick and Easy: Simple steps and no complicated techniques.
Customizable: Swap the filling or add chocolate chips to the dough.
Crowd-Pleasing: Always a hit at parties, bake sales, or potlucks.
Make-Ahead Friendly: Dough can be prepped and chilled ahead of time.
Great for Leftovers: Stays fresh for days and even better the next day.
Chef’s Pro Tips for Perfect Results
To get that picture-perfect cookie every time, here are a few tips I swear by:
- Chill the dough for 30 minutes to prevent spreading.
- Roll the cookies evenly so they bake consistently.
- Press the thumbprint gently while the dough is slightly chilled.
- Add the Biscoff filling after baking for a glossy finish.
- Sprinkle a bit of sea salt to balance out the sweetness.
Kitchen Tools You’ll Need
No fancy gadgets here just a few basics and you’re good to go.
Mixing Bowls: For combining wet and dry ingredients.
Electric Mixer: Helps create a creamy, fluffy dough.
Baking Sheet: Use parchment for easy cleanup.
Measuring Cups & Spoons: Accuracy matters for perfect texture.
Cookie Scoop: Keeps cookies uniform in size.
Cooling Rack: Helps them set without getting soggy bottoms.
Ingredients in Biscoff Thumbprint Cookies
Each ingredient brings its own cozy charm to these cookies, creating a perfect balance of soft, spiced, and sweet.
- Unsalted Butter: 1/2 cup (softened) A creamy base that adds richness and moisture.
- Brown Sugar: 1/2 cup (packed) Brings warmth and a subtle molasses flavor.
- Granulated Sugar: 1/4 cup Adds structure and a bit of crispiness.
- Egg Yolk: 1 large Binds everything together and gives the cookies a tender crumb.
- Vanilla Extract: 1 teaspoon Enhances all the cozy flavors.
- All-Purpose Flour: 1 1/4 cups Gives structure and holds the dough together.
- Baking Soda: 1/2 teaspoon Provides a gentle lift.
- Salt: 1/4 teaspoon Balances the sweetness.
- Biscoff Spread: about 1/2 cup (for filling) The star of the show, creamy and spiced.
- Flaky Sea Salt: optional, for topping Adds a pop of contrast and visual appeal.
Ingredient Substitutions
Don’t worry if you’re missing an item. Here are some clever swaps.
Unsalted Butter: Salted butter, but reduce added salt.
Brown Sugar: Coconut sugar or additional white sugar with a splash of molasses.
Vanilla Extract: Maple extract for a different twist.
Biscoff Spread: Cookie butter alternatives or Nutella for variation.
Ingredient Spotlight
Biscoff Spread: This creamy delight is made from caramelized biscuits and brings deep flavor, warm spice, and a rich, smooth texture that’s simply unforgettable.
Brown Sugar: A small but mighty ingredient that adds chewiness and a warm undertone to the cookies.

Instructions for Making Biscoff Thumbprint Cookies
Alright, let’s get baking! Here are the steps you’re going to follow to create these heavenly cookies.
- Preheat Your Equipment:
Set your oven to 350°F (175°C) and line a baking sheet with parchment paper. - Combine Ingredients:
Cream together the softened butter, brown sugar, and granulated sugar until light and fluffy. Mix in the egg yolk and vanilla extract. - Prepare Your Cooking Vessel:
In a separate bowl, whisk together the flour, baking soda, and salt. Slowly incorporate the dry ingredients into the wet mixture until fully combined. - Assemble the Dish:
Scoop tablespoon-sized balls of dough, roll them in your hands, and place them on the baking sheet. Use your thumb or the back of a spoon to create a small well in the center of each. - Cook to Perfection:
Bake for 10 to 12 minutes until the edges are golden. Remove from oven and let them cool slightly. - Finishing Touches:
Once cooled, fill the thumbprints with Biscoff spread and sprinkle with flaky sea salt if desired. - Serve and Enjoy:
Plate them up and watch them disappear. Perfect with a warm mug of tea or coffee!
Texture & Flavor Secrets
What makes these cookies special is their soft, chewy base paired with that creamy, spiced center. The buttery dough melts in your mouth, and the sweet, slightly salty Biscoff spread adds a luscious richness with hints of cinnamon and caramel.
Cooking Tips & Tricks
Here’s a little extra help to make sure your cookies shine:
- Always use room temperature butter for better creaming.
- Let the cookies cool completely before filling.
- Use a piping bag for clean, precise Biscoff centers.
- A light sprinkle of sea salt brings out the Biscoff flavor beautifully.
What to Avoid
Avoid these common pitfalls to keep your cookies dreamy.
- Overmixing the dough: It can make the cookies tough.
- Filling before baking: Biscoff can dry out in the oven.
- Skipping chill time: Leads to flat, uneven cookies.
- Using cold butter: Won’t cream properly, which affects texture.
Nutrition Facts
Servings: 20
Calories per serving: 150
Note: These are approximate values.
Preparation Time
Prep Time: 15 minutes
Cook Time: 12 minutes
Total Time: 27 minutes
Make-Ahead and Storage Tips
The dough can be made ahead and stored in the fridge for up to 3 days or frozen for up to a month. Baked cookies stay fresh in an airtight container for 4 to 5 days. Reheat briefly in the microwave for that just-baked feel. You can also freeze the finished cookies—just add the Biscoff filling after thawing.
How to Serve Biscoff Thumbprint Cookies
Serve these with a warm drink like chai tea or coffee. For special occasions, dust with powdered sugar or drizzle with melted white chocolate. They also look stunning stacked on a festive tray or tucked into gift boxes.
Creative Leftover Transformations
Have a few extras? Try these fun ideas:
- Cookie Crumble Topping: Crush and sprinkle over ice cream or yogurt.
- Biscoff Sandwiches: Spread extra Biscoff between two cookies.
- Mini Ice Cream Sandwiches: Use small scoops of vanilla or cinnamon ice cream.
Additional Tips
- For extra crunch, add finely chopped pecans or walnuts to the dough.
- Use a cookie scoop to make portioning quick and tidy.
- Warm the Biscoff spread slightly for easier spooning.
Make It a Showstopper
Presentation is key! Arrange cookies on a white plate with cinnamon sticks or star anise nearby. Add a small bowl of extra Biscoff spread in the center for dipping. A sprinkle of flaky salt or powdered sugar can elevate the look instantly.
Variations to Try
- Chocolate Center: Swap Biscoff with melted chocolate or ganache.
- Pumpkin Spice Dough: Add 1/2 teaspoon pumpkin spice to the dough.
- Jam-Filled: Go retro with raspberry or strawberry jam instead.
- Biscoff Drizzle: Drizzle extra Biscoff over the filled cookies for flair.
- Vegan Version: Use plant-based butter and a flax egg.
FAQ’s
Q1: Can I use crunchy Biscoff spread?
Yes, it adds a lovely texture twist to the soft cookie base.
Q2: Can these cookies be frozen after baking?
Absolutely! Just let them cool and store in a freezer-safe container.
Q3: Do I need to refrigerate the dough?
It’s optional but helps prevent spreading and improves texture.
Q4: Can I double the recipe?
Definitely. Just make sure to use multiple trays or bake in batches.
Q5: How long do they stay fresh?
Up to 5 days in an airtight container at room temperature.
Q6: Can I make them gluten-free?
Yes, substitute with a 1:1 gluten-free flour blend.
Q7: Can I fill them with other spreads?
Of course! Nutella, peanut butter, or jam are all great options.
Q8: Why did my cookies spread too much?
You may have skipped chilling or used overly soft butter.
Q9: Can I make these without an electric mixer?
Yes, just make sure to cream the butter and sugar well by hand.
Q10: Are these cookies too sweet?
Not at all. The sea salt balances the sweetness beautifully.
Conclusion
Whether you’re baking for the holidays or just craving something cozy and sweet, these Biscoff Thumbprint Cookies are bound to become a favorite. With their tender crumb, spiced center, and easy prep, they’re the kind of treat you’ll reach for again and again. Trust me, they’re worth every bite.
Print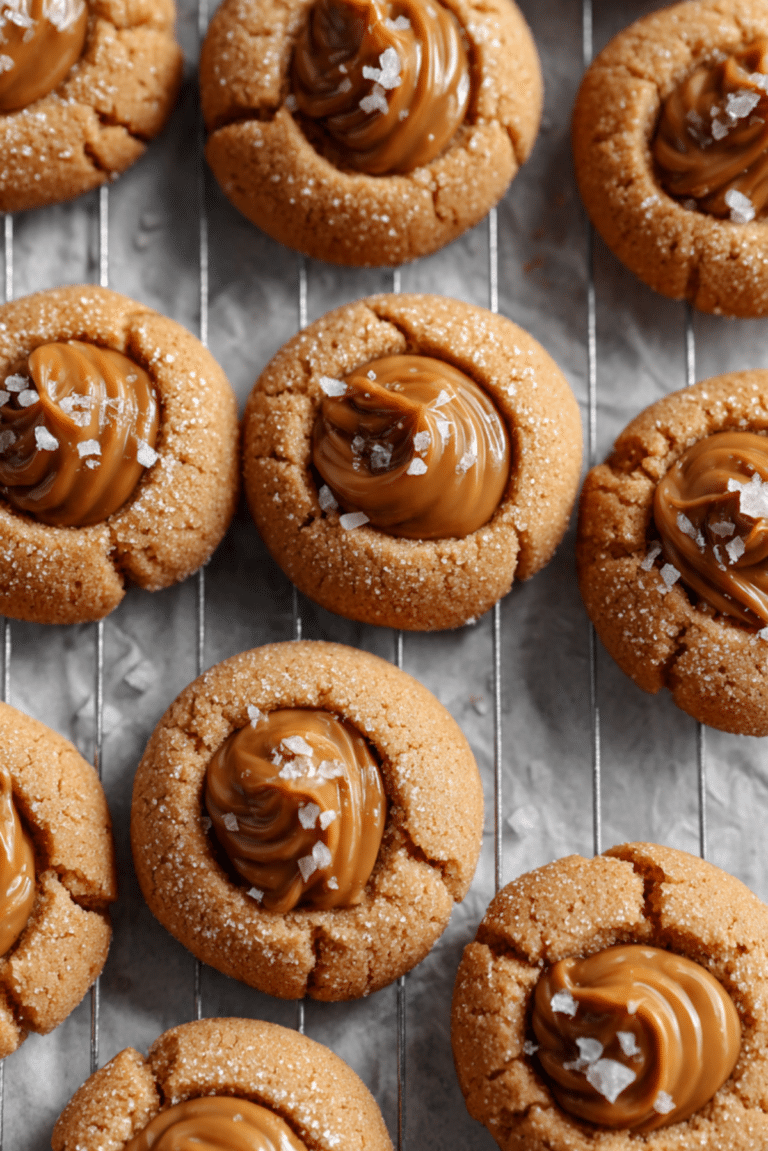
Biscoff Thumbprint Cookies
These soft and chewy Biscoff Thumbprint Cookies are filled with luscious cookie butter and topped with a sprinkle of sea salt. Perfectly spiced and melt-in-your-mouth delicious, they’re an irresistible twist on a classic treat.
- Total Time: 27 minutes
- Yield: 20 cookies 1x
Ingredients
- 1/2 cup unsalted butter, softened
- 1/2 cup packed brown sugar
- 1/4 cup granulated sugar
- 1 large egg yolk
- 1 teaspoon vanilla extract
- 1 1/4 cups all-purpose flour
- 1/2 teaspoon baking soda
- 1/4 teaspoon salt
- 1/2 cup Biscoff spread (for filling)
- Flaky sea salt, optional (for topping)
Instructions
- Preheat oven to 350°F (175°C) and line a baking sheet with parchment paper.
- Cream together softened butter, brown sugar, and granulated sugar until fluffy.
- Mix in egg yolk and vanilla extract until fully combined.
- In a separate bowl, whisk together flour, baking soda, and salt.
- Gradually mix dry ingredients into the wet mixture to form a soft dough.
- Roll dough into tablespoon-sized balls and place on baking sheet.
- Use your thumb or spoon to gently press a well into the center of each ball.
- Bake for 10–12 minutes, or until edges are golden.
- Cool cookies completely, then fill centers with Biscoff spread.
- Sprinkle with flaky sea salt if desired and serve.
Notes
- Chill dough for 30 minutes to reduce spreading.
- Use a piping bag for neat Biscoff centers.
- Warm the spread slightly before filling cookies.
- Store in airtight container for up to 5 days.
- Prep Time: 15 minutes
- Cook Time: 12 minutes
- Category: Dessert
- Method: Baking
- Cuisine: American
- Diet: Vegetarian
Nutrition
- Serving Size: 1 cookie
- Calories: 150
- Sugar: 10g
- Sodium: 90mg
- Fat: 8g
- Saturated Fat: 4g
- Unsaturated Fat: 3g
- Trans Fat: 0g
- Carbohydrates: 18g
- Fiber: 0g
- Protein: 1g
- Cholesterol: 20mg
Keywords: Biscoff thumbprint cookies, cookie butter cookies, holiday cookies, easy dessert, spiced cookies