Homemade Ricotta
There is something quietly magical about watching milk transform into soft, pillowy curds right before your eyes. Homemade ricotta is one of those simple kitchen rituals that feels almost too easy for how luxurious the result tastes. Creamy, delicate, slightly sweet with just a hint of richness, it spreads like a dream over warm toast and melts gently into pasta. Trust me, you’re going to love this. Once you try making it yourself, it becomes hard to go back to store bought.
Why This Creamy Classic Deserves a Spot in Your Kitchen
Fresh ricotta has a lightness that feels almost cloud like. It is tender without being heavy, rich without being overwhelming. When you drizzle it with good olive oil and sprinkle a touch of salt, it becomes something that tastes far more complex than the short ingredient list suggests.
And the best part, you only need a few pantry staples and a little patience. This one’s a total game changer for breakfast spreads, pasta nights, and even simple desserts.
A Little History in Every Spoonful
Ricotta has deep roots in Italian cooking. Traditionally, it was made from the whey left over after producing other cheeses, which made it both resourceful and practical. The name itself means recooked, referring to the way it is gently heated to form those soft curds.
Over time, ricotta became a beloved staple across regions of Italy, used in everything from savory stuffed pasta to sweet pastries. What began as a humble farmhouse creation turned into a cornerstone of Italian comfort food, and now we get to recreate that tradition right in our own kitchens.
Why You Can Always Count on This Recipe
Before we dive into the how, let me tell you why this method works so beautifully every single time.
Versatile: Spread it on toast, fold it into pasta, layer it into lasagna, or sweeten it with honey for dessert. It adapts effortlessly.
Budget-Friendly: Made from simple milk and cream, it costs far less than buying high quality ricotta at the store.
Quick and Easy: From start to finish, you are looking at about an hour, and most of that is hands off.
Customizable: Add herbs, cracked pepper, lemon zest, or a drizzle of olive oil to make it your own.
Crowd-Pleasing: Its mild, creamy flavor wins over almost everyone at the table.
Make-Ahead Friendly: It keeps well in the fridge, which makes entertaining easier.
Great for Leftovers: If you somehow have extra, it folds beautifully into scrambled eggs or pancake batter.
Chef’s Secrets for Perfect Curds Every Time
Making ricotta is simple, but a few insider tips make all the difference.
- Use whole milk for the creamiest texture. Lower fat milk works, but the richness will be lighter.
- Heat the milk gently and avoid stirring too much once the acid is added. This helps the curds form properly.
- Do not let the mixture boil aggressively. Gentle heat creates tender curds.
- Strain longer for thicker ricotta, or shorter for a softer, spreadable texture.
Essential Tools for a Smooth Process
Before we get started, gather these kitchen basics so everything flows easily.
Large Heavy-Bottomed Pot: Helps distribute heat evenly and prevents scorching.
Thermometer: Ensures the milk reaches the right temperature without boiling over.
Fine Mesh Strainer: Allows the whey to drain while keeping the delicate curds intact.
Cheesecloth: Gives you control over how thick or soft the final texture becomes.
Large Bowl: Placed under the strainer to catch the whey.
The Simple Ingredients That Make It Happen
What I love most about homemade ricotta is how honest the ingredients are. Each one plays a clear role in creating that creamy finish.
- Whole Milk: 8 cups, the base that forms the soft curds and provides richness.
- Heavy Cream: 1 cup, adds luxurious texture and smooth body.
- Fresh Lemon Juice: 3 tablespoons, gently curdles the milk and creates separation.
- Salt: 1 teaspoon, enhances flavor and balances the natural sweetness.
- Olive Oil: 1 tablespoon for drizzling, optional but adds depth and aroma when serving.
Flexible Swaps if You Need Them
Sometimes you work with what you have, and that is perfectly fine.
Whole Milk: 2 percent milk can be used, though the texture will be slightly lighter.
Fresh Lemon Juice: White vinegar works just as well for curdling.
Heavy Cream: You can omit it for a leaner version, though the result will be less rich.
Spotlight on the Star Ingredients
Whole Milk: This is the backbone of the recipe. Its fat content determines how creamy your ricotta turns out.
Fresh Lemon Juice: The acidity is what transforms liquid milk into tender curds. Fresh juice gives the cleanest flavor.

Let’s Make It Together
Now let’s dive into the process. It feels almost meditative once you get started.
- Preheat Your Equipment: Place the large pot on the stove over medium heat and clip your thermometer to the side so you can monitor the temperature easily.
- Combine Ingredients: Pour in the whole milk and heavy cream. Add the salt and stir gently to combine.
- Prepare Your Cooking Vessel: Heat the mixture slowly until it reaches about 190 degrees Fahrenheit. Stir occasionally to prevent sticking, but do not let it boil.
- Assemble the Dish: Remove the pot from heat and stir in the fresh lemon juice. Let the mixture sit undisturbed for 10 minutes as the curds form and separate from the whey.
- Cook to Perfection: Line your strainer with cheesecloth and place it over a bowl. Carefully ladle the curds into the strainer and allow them to drain for 20 to 30 minutes, depending on how thick you want the texture.
- Finishing Touches: Transfer the ricotta to a bowl. Taste and adjust salt if needed. Drizzle lightly with olive oil if serving immediately.
- Serve and Enjoy: Spoon it onto warm toasted bread, swirl it into pasta, or enjoy it simply as it is. Let me tell you, it’s worth every bite.
The Magic of Texture and Flavor
Fresh ricotta has a delicate grain that feels soft yet slightly structured on the tongue. The flavor starts mild and milky, then finishes with a gentle brightness from the lemon. When paired with olive oil, the richness deepens and the aroma becomes almost buttery. It is that balance of creamy and fresh that makes it so satisfying.
Helpful Kitchen Tips for Success
Making cheese at home can feel intimidating, but these small reminders help keep things stress free.
- Use fresh lemon juice for the cleanest flavor.
- Avoid stirring once curds begin forming to keep them tender.
- Drain longer for a thicker texture if you plan to use it in pasta dishes.
- Save the whey for soups or baking to reduce waste.
Common Mistakes and How to Avoid Them
Even simple recipes have a few pitfalls, but they are easy to manage.
- Heating too quickly can cause rubbery curds, so keep the temperature steady.
- Using ultra pasteurized milk may prevent proper curd formation. Choose regular whole milk.
- Skipping the resting time after adding lemon juice can reduce yield.
Nutritional Snapshot
Servings: 8
Calories per serving: 180
Note: These are approximate values.
Timing at a Glance
Prep Time: 10 minutes
Cook Time: 30 minutes
Total Time: 40 minutes
Storing and Planning Ahead
Homemade ricotta keeps beautifully in an airtight container in the refrigerator for up to 4 days. If you want to prepare it ahead for a gathering, make it the day before and let it chill overnight. Freezing is possible, though the texture may become slightly grainier once thawed. To refresh it, stir gently and add a small splash of milk.
Serving Ideas to Elevate Every Bite
Spread it over grilled sourdough with roasted vegetables, spoon it onto pasta with fresh herbs, or sweeten it with honey and berries for breakfast. It also pairs beautifully with roasted tomatoes and a sprinkle of cracked pepper.
Creative Ways to Use Leftovers
Blend it into scrambled eggs for extra fluffiness. Stir it into pancake batter for a tender crumb. Use it as a creamy base for savory tarts or mix it with spinach for stuffed shells.
Extra Tips for Even Better Results
Use high quality milk for the best flavor. Taste and adjust salt before serving. If it seems too thick after refrigeration, stir in a teaspoon of whey or milk to loosen it gently.
Turn It Into a Showstopper
Serve your ricotta in a shallow bowl with a generous drizzle of olive oil, flaky salt, and a few fresh herbs. Add warm toasted bread on the side and watch it disappear quickly.
Flavor Variations to Try
- Add lemon zest and cracked black pepper for brightness.
- Fold in chopped fresh basil and parsley for an herby twist.
- Mix with a spoonful of honey and vanilla for a sweet spread.
- Stir in roasted garlic for a savory depth.
FAQ’s
Q1: Can I use low fat milk?
Yes, but the texture will be lighter and less creamy.
Q2: Why did my ricotta not curdle?
Ultra pasteurized milk often does not separate properly. Use regular whole milk.
Q3: How long should I drain it?
Drain for 20 minutes for soft ricotta, up to 40 minutes for thicker texture.
Q4: Can I freeze it?
You can, but expect a slightly grainier texture after thawing.
Q5: What can I do with leftover whey?
Use it in soups, smoothies, or bread dough.
Q6: Is it supposed to taste slightly sweet?
Yes, fresh ricotta has a mild natural sweetness from the milk.
Q7: Can I double the recipe?
Absolutely, just use a larger pot and maintain the same ratios.
Q8: Does it need refrigeration?
Yes, store it in the fridge in an airtight container.
Q9: Can I make it without cream?
Yes, but it will be less rich and slightly drier.
Q10: How do I make it thicker?
Simply strain it longer through the cheesecloth.
Conclusion
Making homemade ricotta is one of those kitchen moments that feels both simple and deeply satisfying. From just a handful of ingredients, you create something creamy, fresh, and incredibly versatile. Once you taste that first spoonful, warm and delicate, you will understand why this tradition has lasted generations. Go ahead and try it, you might just find yourself making it again and again.
Print
Homemade Ricotta
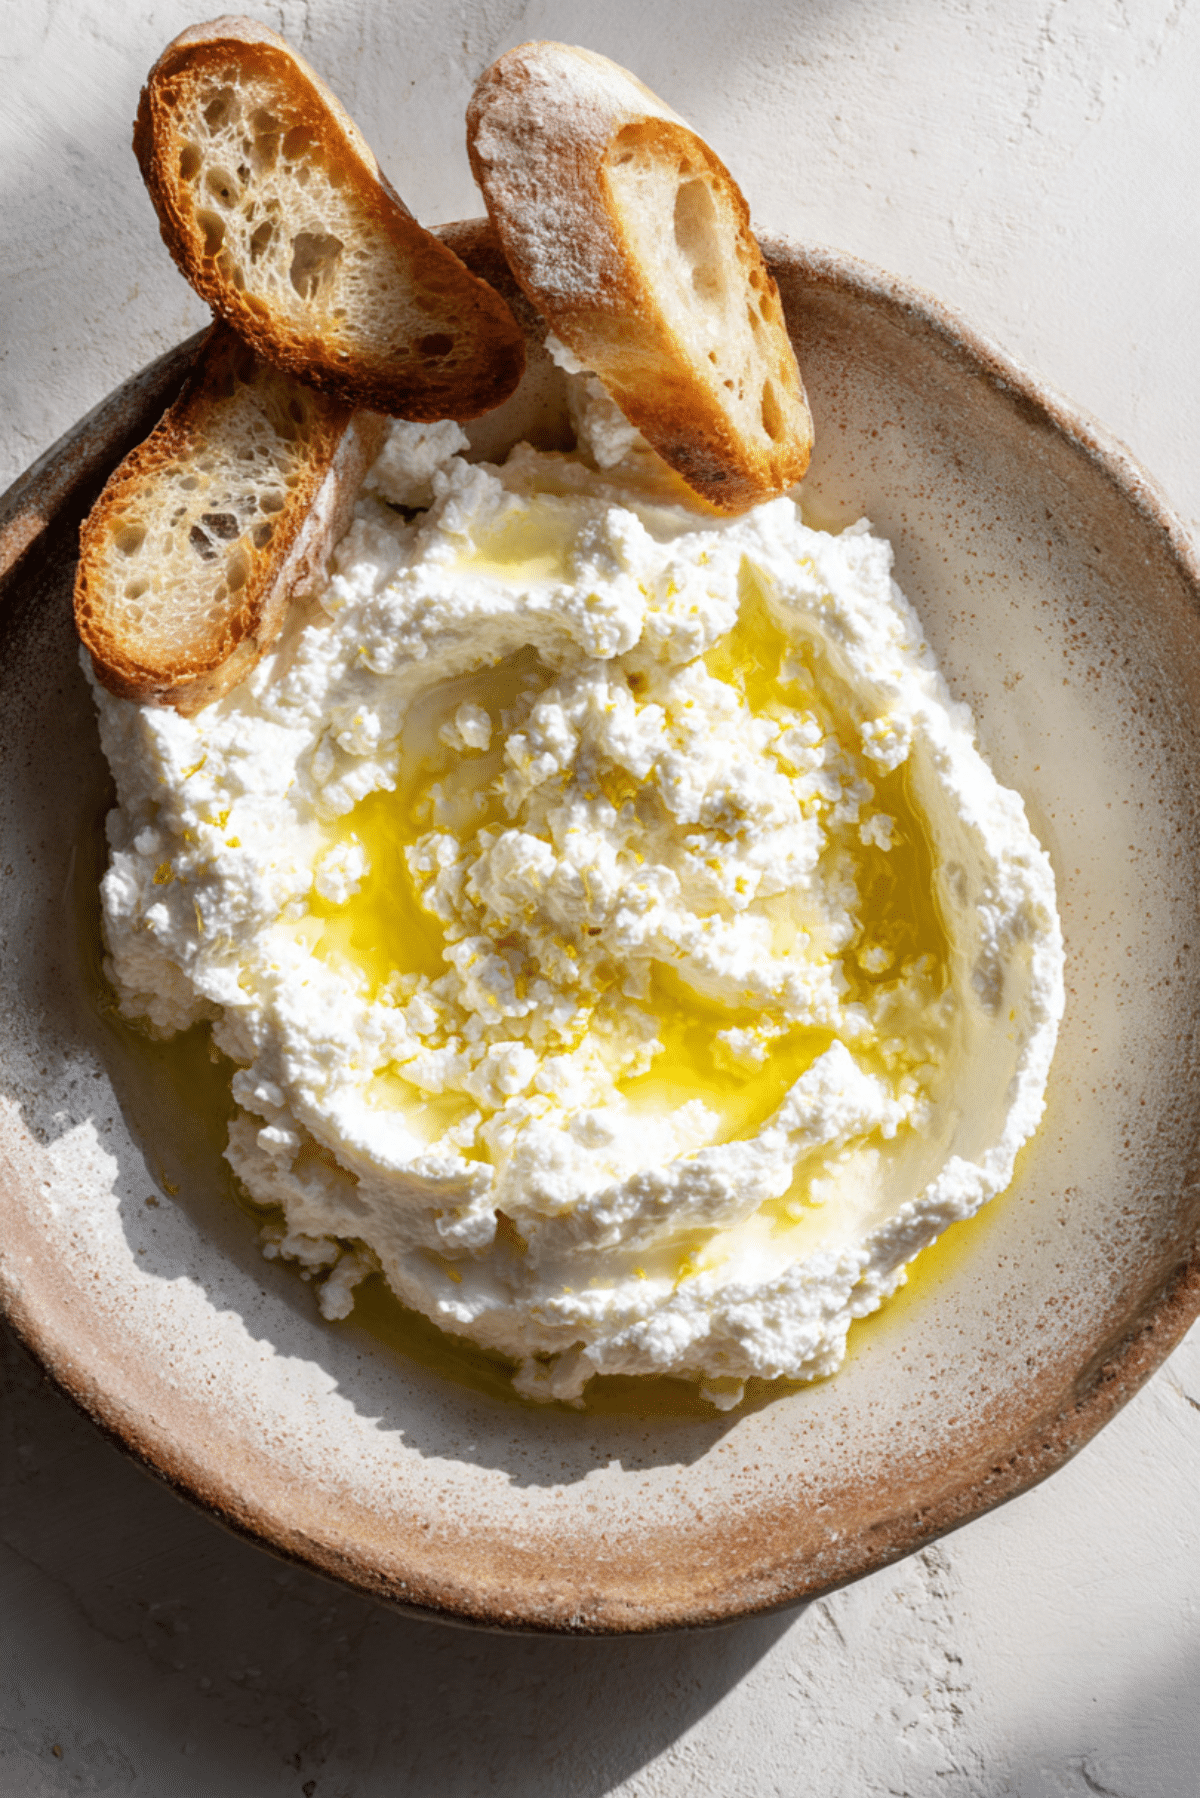
Fresh, creamy homemade ricotta cheese with a delicate texture, drizzled lightly with olive oil and served with toasted slices of bread
- Total Time: 40 minutes
- Yield: 8 servings
Ingredients
- Whole Milk: 8 cups, the base that forms the soft curds and provides richness
- Heavy Cream: 1 cup, adds luxurious texture and smooth body
- Fresh Lemon Juice: 3 tablespoons, gently curdles the milk and creates separation
- Salt: 1 teaspoon, enhances flavor and balances the natural sweetness
- Olive Oil: 1 tablespoon, for drizzling
Instructions
- Preheat Your Equipment: Place the large pot on the stove over medium heat and clip your thermometer to the side to monitor temperature
- Combine Ingredients: Pour in the whole milk and heavy cream, add salt, and stir gently
- Prepare Your Cooking Vessel: Heat mixture until 190°F, stirring occasionally but avoiding a boil
- Assemble the Dish: Remove from heat, stir in fresh lemon juice, and let sit for 10 minutes to form curds
- Cook to Perfection: Line a strainer with cheesecloth over a bowl, ladle curds in, and drain 20-30 minutes
- Finishing Touches: Transfer ricotta to a bowl, adjust salt if needed, drizzle olive oil if desired
- Serve and Enjoy: Spread on warm toasted bread or use in pasta and desserts
Notes
- Use fresh lemon juice for the cleanest flavor
- Do not stir once curds form to keep them tender
- Drain longer for thicker ricotta if desired
- Save whey for soups or baking
- Prep Time: 10 minutes
- Cook Time: 30 minutes
- Category: Cheese / Dairy
- Method: Stovetop, Curdling
- Cuisine: Italian
- Diet: Vegetarian
Nutrition
- Serving Size: 1/8 of recipe
- Calories: 180
- Sugar: 5g
- Sodium: 120mg
- Fat: 12g
- Saturated Fat: 7g
- Unsaturated Fat: 4g
- Trans Fat: 0g
- Carbohydrates: 6g
- Fiber: 0g
- Protein: 10g
- Cholesterol: 40mg
Keywords: homemade ricotta, fresh ricotta, Italian cheese, creamy ricotta, ricotta recipe