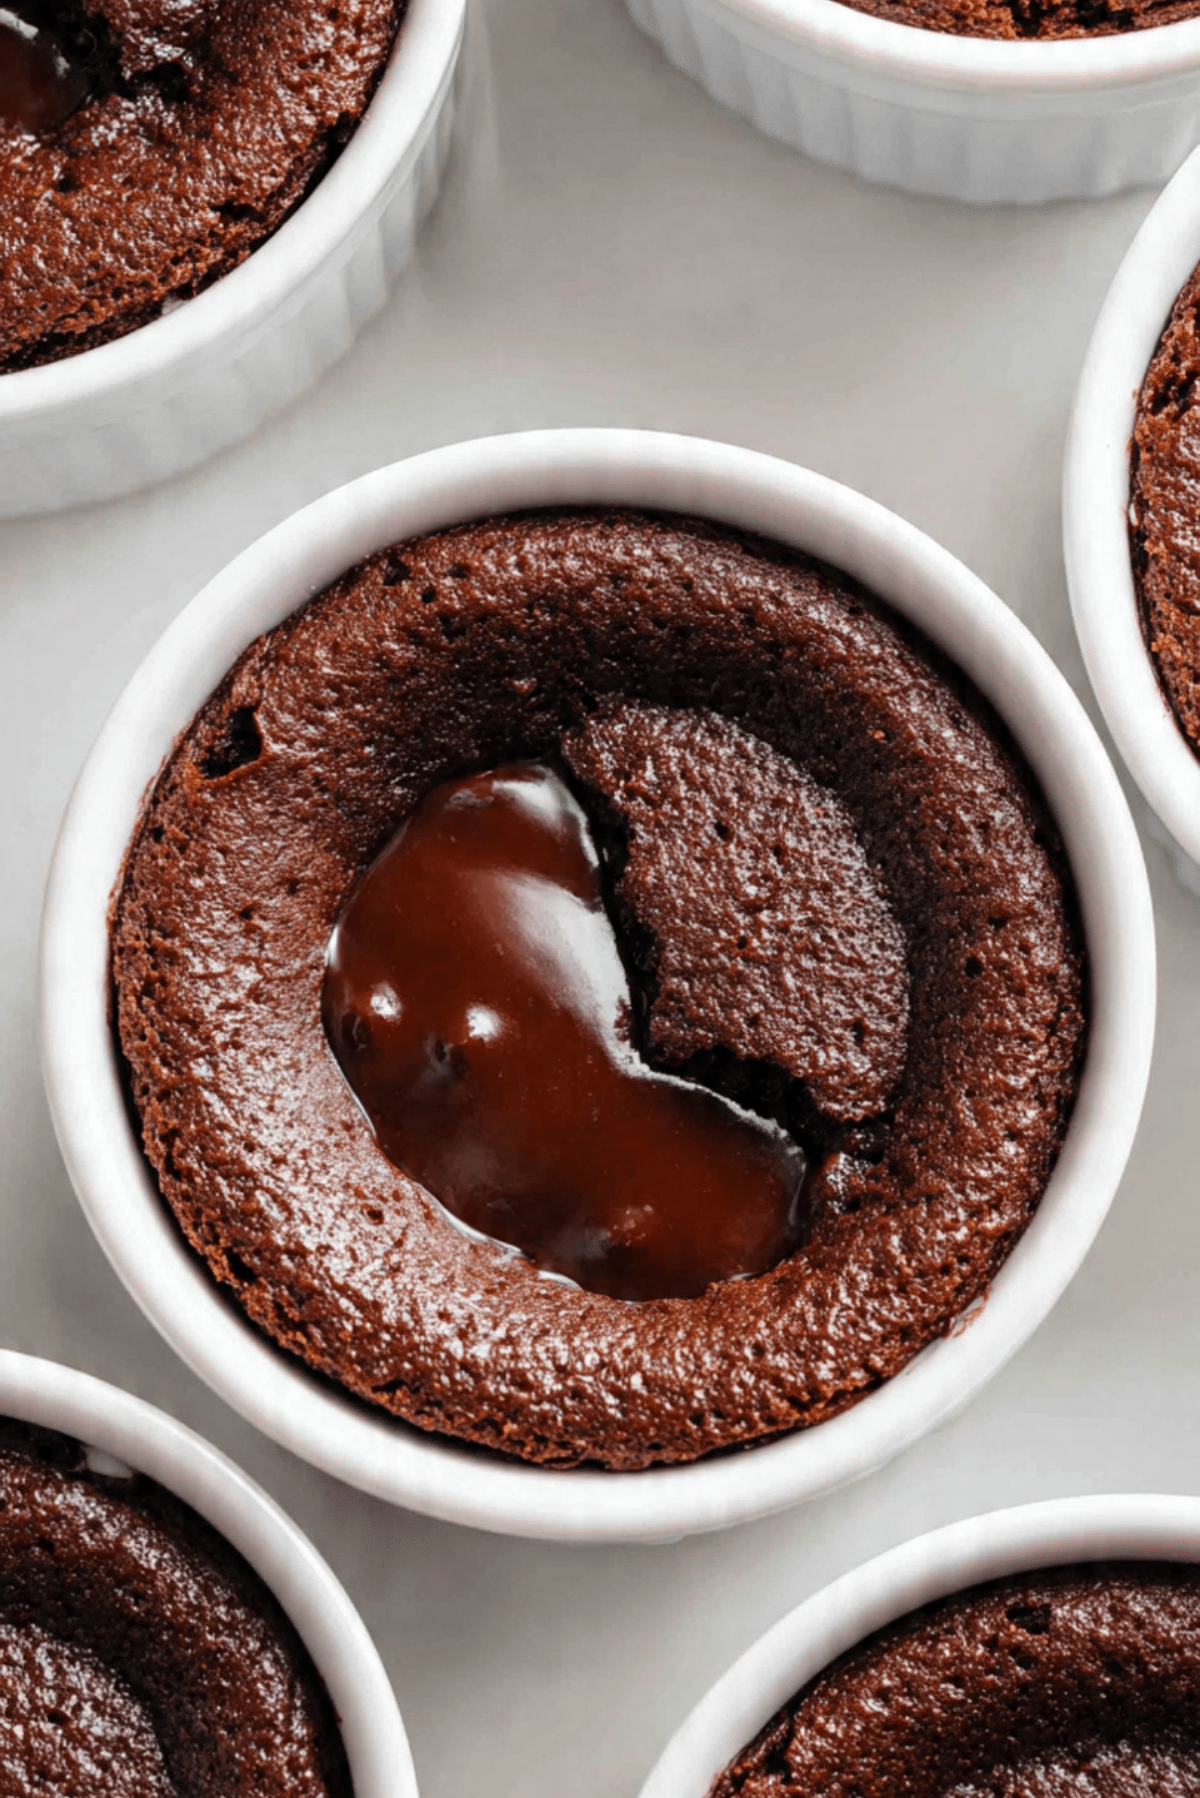
Lava Cookie Cup
The moment you crack into one of these warm cups, you know you are in for something special. Crisp edges give way to a soft center that flows with melted chocolate, filling the kitchen with a deep cocoa aroma that feels instantly comforting. Trust me, you’re going to love this, it is the kind of dessert that makes people pause mid bite and smile.
Why This Dessert Feels Like Pure Comfort
There is something irresistible about combining a classic cookie with a molten chocolate center. It feels familiar yet exciting, like a favorite treat that decided to dress up a little. Each spoonful delivers rich chocolate flavor, tender cookie texture, and that dramatic lava moment that never fails to impress.
A Little Backstory Behind This Chocolate Treat
Molten chocolate desserts became popular in French restaurants during the 1980s, where chefs played with timing and temperature to create flowing centers. Over time, home cooks adapted the idea into simpler forms. This cookie cup version brings that restaurant style magic into a cozy, approachable bake that anyone can master at home.
What Makes This Recipe a Keeper
This is where things really shine, and now let’s dive into why it works so well every single time.
Versatile: These cups work as a dinner party finale or a quiet weeknight treat with a scoop of ice cream.
Budget-Friendly: Simple pantry staples like flour, sugar, and cocoa do all the heavy lifting.
Quick and Easy: No chilling dough or complicated techniques required, just mix and bake.
Customizable: You can add chocolate chunks or a pinch of espresso powder if you like deeper flavor.
Crowd-Pleasing: The molten center always gets reactions, which makes it perfect for guests.
Make-Ahead Friendly: Batter can be mixed earlier and baked just before serving.
Great for Leftovers: They reheat beautifully and stay soft the next day.
Baker Level Tips From the Kitchen
Before turning on the oven, a few insider tricks can make all the difference. These small details help guarantee that gooey center everyone hopes for.
- Do not overbake, the centers should look slightly underdone.
- Use room temperature eggs so the batter mixes smoothly.
- Grease the ramekins well to ensure easy release.
- Let the cups rest for a minute after baking so the lava settles just enough.
Tools You Will Want Ready
Having the right tools nearby makes the process smooth and relaxed.
Mixing Bowl: Large enough to combine everything without spills.
Whisk or Spoon: Either works for blending the batter evenly.
Measuring Cups and Spoons: Accuracy keeps the texture just right.
Ramekins: Small ceramic cups help the cookie bake evenly.
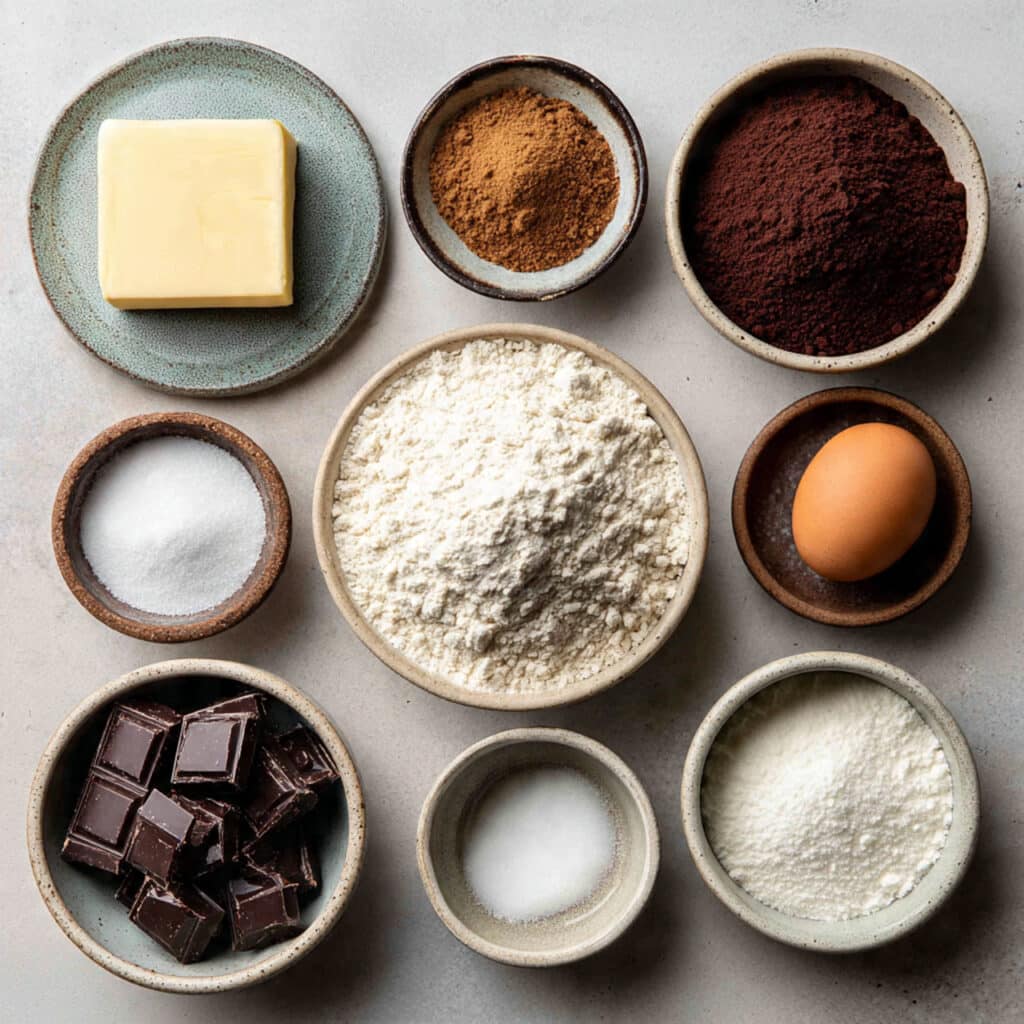
Ingredients That Bring It All Together
Each ingredient has a role to play, and together they create that signature molten bite.
- Unsalted Butter: 6 tablespoons, melted, adds richness and moisture.
- Granulated Sugar: 1 quarter cup, provides sweetness and crisp edges.
- Brown Sugar: 2 tablespoons, adds depth and chewiness.
- Large Egg: 1, at room temperature, binds the batter smoothly.
- Vanilla Extract: 1 teaspoon, enhances the chocolate flavor.
- All Purpose Flour: 1 third cup, gives structure without heaviness.
- Unsweetened Cocoa Powder: 3 tablespoons, delivers deep chocolate taste.
- Baking Powder: 1 quarter teaspoon, helps the cups rise gently.
- Salt: A pinch, balances the sweetness.
- Dark Chocolate Chunks: 2 ounces, creates the molten center.
Easy Ingredient Swaps to Try
Sometimes you want to adapt, and this recipe is forgiving.
Dark Chocolate Chunks: Use semi sweet chocolate if preferred.
Brown Sugar: Coconut sugar works for a slightly caramel note.
Unsalted Butter: Salted butter can be used, just reduce added salt.
The Stars of the Recipe
Unsweetened Cocoa Powder: This is where the deep chocolate flavor starts, giving the cookie its rich base.
Dark Chocolate Chunks: These melt into the center, creating that lava effect everyone loves.
Let’s Bake Together Step by Step
Now let’s dive into the fun part, where everything comes together and the kitchen starts to smell incredible.
- Preheat Your Equipment: Preheat the oven to 350°F and grease four small ramekins thoroughly.
- Combine Ingredients: In a bowl, whisk melted butter, granulated sugar, and brown sugar until glossy.
- Prepare Your Cooking Vessel: Stir in the egg and vanilla until smooth and well combined.
- Assemble the Dish: Fold in flour, cocoa powder, baking powder, and salt until just mixed, then gently add chocolate chunks.
- Cook to Perfection: Divide batter evenly into ramekins and bake for 10 to 12 minutes until edges are set and centers are soft.
- Finishing Touches: Remove from oven and let rest for one minute.
- Serve and Enjoy: Serve warm straight from the ramekin or inverted onto a plate.
Texture and Flavor Magic
The contrast is what makes this dessert unforgettable. The outer cookie is tender with lightly crisp edges, while the center stays molten and glossy. Chocolate flavor deepens as it bakes, turning bittersweet and rich without becoming heavy.
Helpful Baking Tips
A few extra pointers can help you nail it every time.
- Use high quality cocoa for better flavor.
- Bake on the middle rack for even heat.
- Serve immediately for the best lava flow.
Common Mistakes and How to Avoid Them
Even simple recipes have pitfalls, but they are easy to fix.
- Overbaking will dry the center, so watch closely.
- Skipping greasing can cause sticking.
- Mixing too much can make the texture dense.
Nutrition Facts at a Glance
Servings: 4
Calories per serving: 320
Note: These values are approximate.
Time Breakdown
Prep Time: 10 minutes
Cook Time: 12 minutes
Total Time: 22 minutes
Make Ahead and Storage Ideas
You can mix the batter a few hours ahead and refrigerate it. Once baked, leftovers keep well covered in the fridge for up to two days. Reheat gently in the microwave for a few seconds to bring back the soft center.
Serving Suggestions
Serve these warm with a scoop of vanilla ice cream or a dollop of whipped cream. Fresh berries on the side add brightness and balance.
Creative Ways to Use Leftovers
Crumble leftover cups over ice cream or layer them into a dessert jar with cream for a quick parfait.
Extra Helpful Tips
Use identical ramekins so they bake evenly. Place them on a baking sheet for easy transfer in and out of the oven.
Make It Look Stunning
Dust lightly with powdered sugar or add a single chocolate square on top right before serving for a simple yet dramatic finish.
Fun Variations to Explore
- Add a pinch of espresso powder to deepen chocolate flavor.
- Swirl in peanut butter before baking.
- Sprinkle flaky salt on top after baking.
- Add chopped walnuts for texture.
FAQ’s
1. Can I make these without ramekins
Yes, a muffin tin works, just reduce baking time slightly.
2. How do I know when they are done
The edges should look set while the center remains soft.
3. Can I double the recipe
Absolutely, just keep portions even for consistent baking.
4. Do these freeze well
Baked cups freeze well, but the lava effect is best fresh.
5. Can I use milk chocolate
You can, but the result will be sweeter.
6. Why did mine turn cakey
They were likely overbaked or overmixed.
7. Can I serve them cold
They are best warm, but still tasty chilled.
8. What size ramekins should I use
Small four ounce ramekins are ideal.
9. Can I add chocolate chips
Yes, they work just as well as chunks.
10. Is this good for beginners
Definitely, it is simple and forgiving.
Conclusion
This one’s a total game changer when you want an impressive dessert without stress. Warm, rich, and flowing with chocolate, it feels indulgent yet easy, and let me tell you, it’s worth every bite.
Print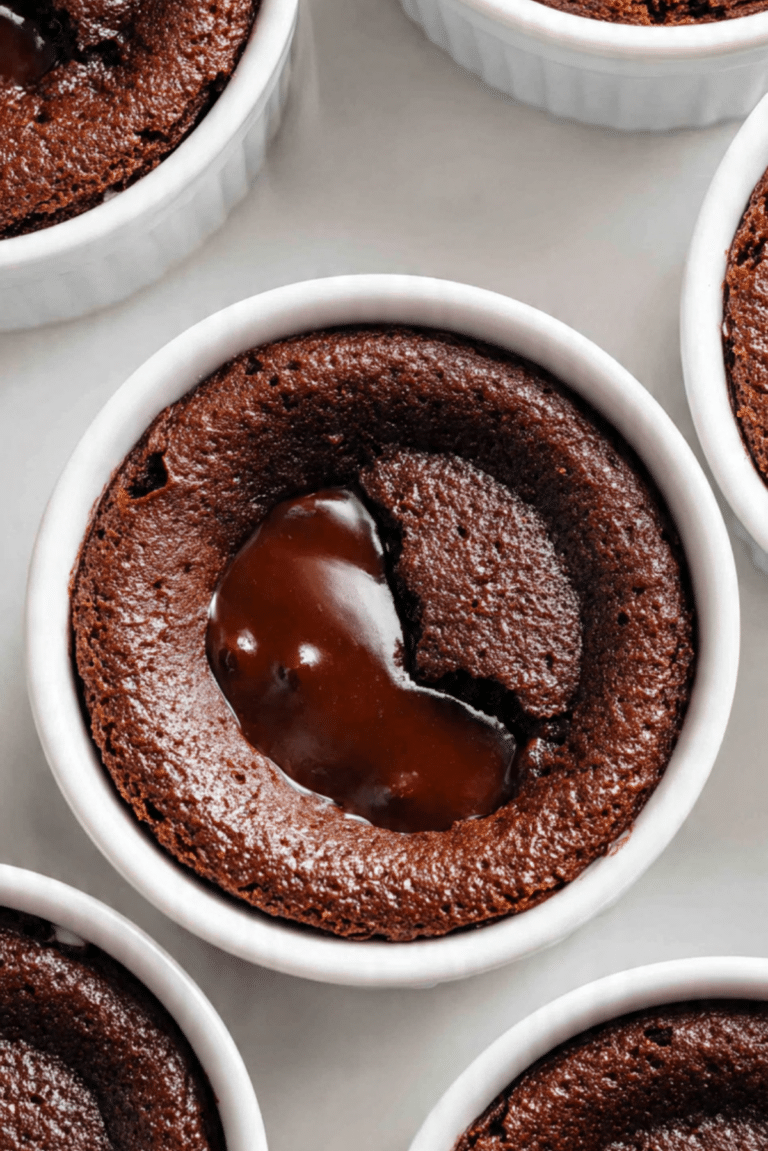
Lava Cookie Cup
Warm chocolate cookie cups with crisp edges and a soft molten center that flows with rich chocolate flavor, perfect for an easy yet impressive dessert
- Total Time: 22 minutes
- Yield: 4 servings 1x
Ingredients
- 6 tablespoons unsalted butter, melted
- 1/4 cup granulated sugar
- 2 tablespoons brown sugar
- 1 large egg, at room temperature
- 1 teaspoon vanilla extract
- 1/3 cup all purpose flour
- 3 tablespoons unsweetened cocoa powder
- 1/4 teaspoon baking powder
- 1 pinch salt
- 2 ounces dark chocolate chunks
Instructions
- Preheat the oven to 350°F and grease four small ramekins thoroughly.
- In a mixing bowl, whisk together the melted butter, granulated sugar, and brown sugar until smooth and glossy.
- Add the egg and vanilla extract, then mix until fully combined.
- Stir in the flour, cocoa powder, baking powder, and salt just until the batter comes together.
- Fold in the dark chocolate chunks gently.
- Divide the batter evenly between the prepared ramekins.
- Bake for 10 to 12 minutes, until the edges are set and the centers remain soft.
- Remove from the oven and let rest for 1 minute before serving warm.
Notes
- Do not overbake or the centers will lose their molten texture.
- Use room temperature egg for smoother batter.
- Serve immediately for the best lava effect.
- Prep Time: 10 minutes
- Cook Time: 12 minutes
- Category: Dessert
- Method: Baking
- Cuisine: American
- Diet: Vegetarian
Nutrition
- Serving Size: 1 cookie cup
- Calories: 320
- Sugar: 24g
- Sodium: 110mg
- Fat: 18g
- Saturated Fat: 11g
- Unsaturated Fat: 6g
- Trans Fat: 0g
- Carbohydrates: 36g
- Fiber: 3g
- Protein: 5g
- Cholesterol: 65mg
Keywords: chocolate dessert, molten cookie, lava dessert, cookie cup