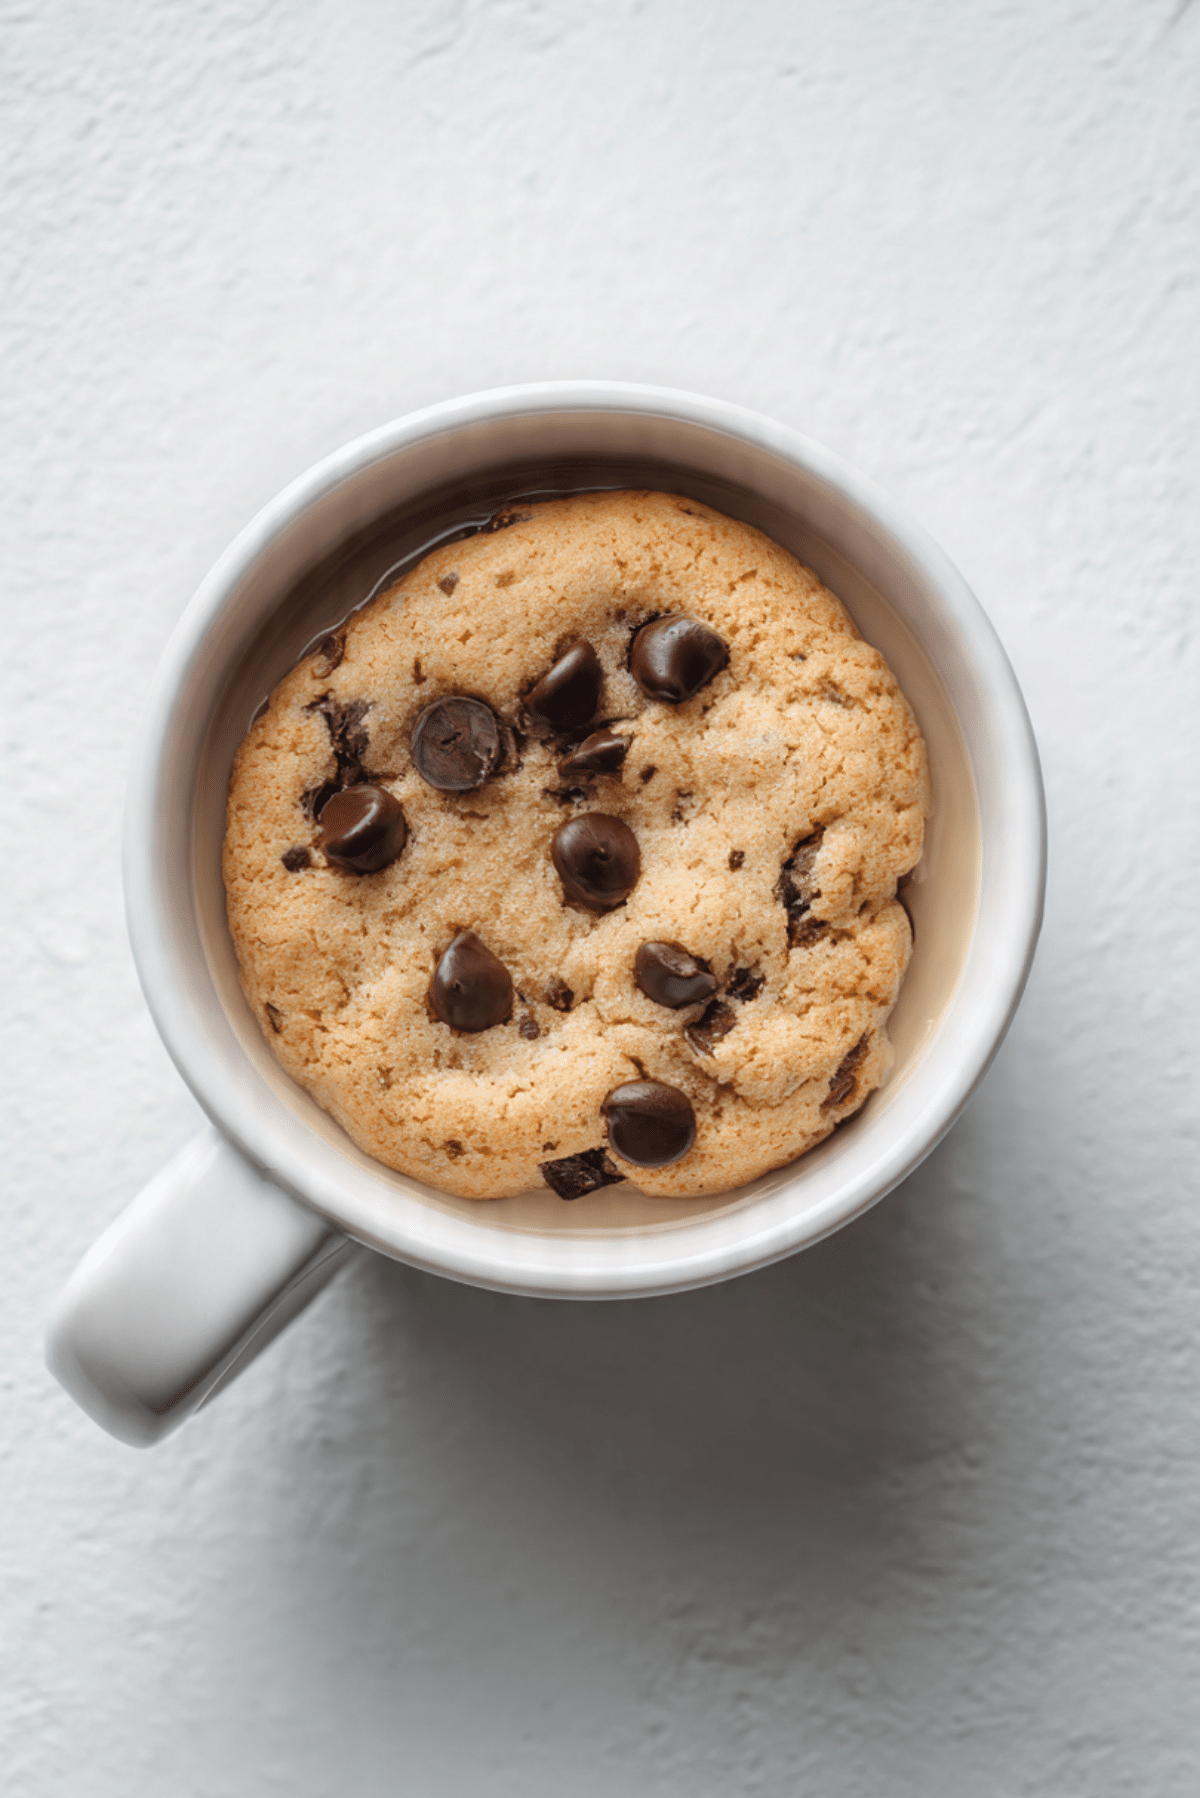
Milk and Cookies Mug Crunch
There is something almost magical about dessert in a mug. It feels spontaneous, cozy, and just a little indulgent. This Milk and Cookies Mug Crunch is the kind of treat you make when the craving hits hard and you do not want to wait an hour. Warm, golden, slightly crisp on top and soft in the center, with little pockets of melted chocolate that stretch with every spoonful. Trust me, you’re going to love this. It tastes like dunking cookies into a cold glass of milk, but in cake form and ready in minutes.
Why This Cozy Mug Dessert Feels Like a Hug in a Cup
You know those evenings when you just want something sweet but simple, something that does not require turning your whole kitchen upside down? This one’s a total game-changer. It is warm, comforting, and portioned perfectly for one, which makes it feel like your own little secret treat. The top gets slightly crisp while the inside stays tender and almost gooey, and when the chocolate melts into the batter, it creates the dreamiest texture contrast. Let me tell you, it’s worth every bite.
The Sweet Story Behind Mug Desserts
Mug desserts became popular when quick microwave baking started trending, especially for late night cravings and college dorm cooking. The idea was simple, mix a few pantry staples in a mug and microwave it. Over time, home bakers refined the technique, balancing moisture and sweetness to avoid rubbery results.
This milk and cookie inspired version builds on that idea. Instead of just a plain cake, it captures that nostalgic pairing of milk and chocolate chip cookies. It feels modern because of the microwave method, yet classic because of the flavors we all grew up loving.
Why You Can Always Count on This Recipe
Before we jump into mixing and microwaving, let me tell you why this one earns a permanent spot in your dessert rotation.
Versatile: You can switch the chocolate chips, add crushed cookies, or even swirl in a spoonful of nut butter without changing the base structure.
Budget-Friendly: Every ingredient is a simple pantry staple, flour, sugar, milk, butter, and chocolate chips.
Quick and Easy: From start to finish, it takes about 7 minutes. No oven, no complicated steps.
Customizable: Adjust the sweetness, add spices like cinnamon, or toss in white chocolate for a twist.
Crowd-Pleasing: Even though it is single serve, you can easily make several mugs at once for friends or family.
Make-Ahead Friendly: You can mix the dry ingredients in advance and store them, then just add the wet ingredients when ready.
Great for Leftovers: If you somehow have leftovers, it reheats beautifully for a few seconds in the microwave.
Insider Tips for Perfect Texture Every Time
Microwave desserts can be tricky, but once you know the small details, it becomes foolproof.
- Do not overmix the batter. Stir just until combined to keep the texture soft.
- Use room temperature milk so the melted butter blends smoothly.
- Microwave in short bursts if your microwave runs hot.
- Let it rest for one minute after cooking so the center finishes setting gently.
Kitchen Tools That Make It Easy
You do not need much, which is part of the charm.
Microwave-Safe Mug: A standard 12 ounce ceramic mug works perfectly and allows room for rising.
Small Mixing Spoon or Fork: For blending everything directly in the mug.
Measuring Spoons: Accuracy matters for texture, even in small recipes.
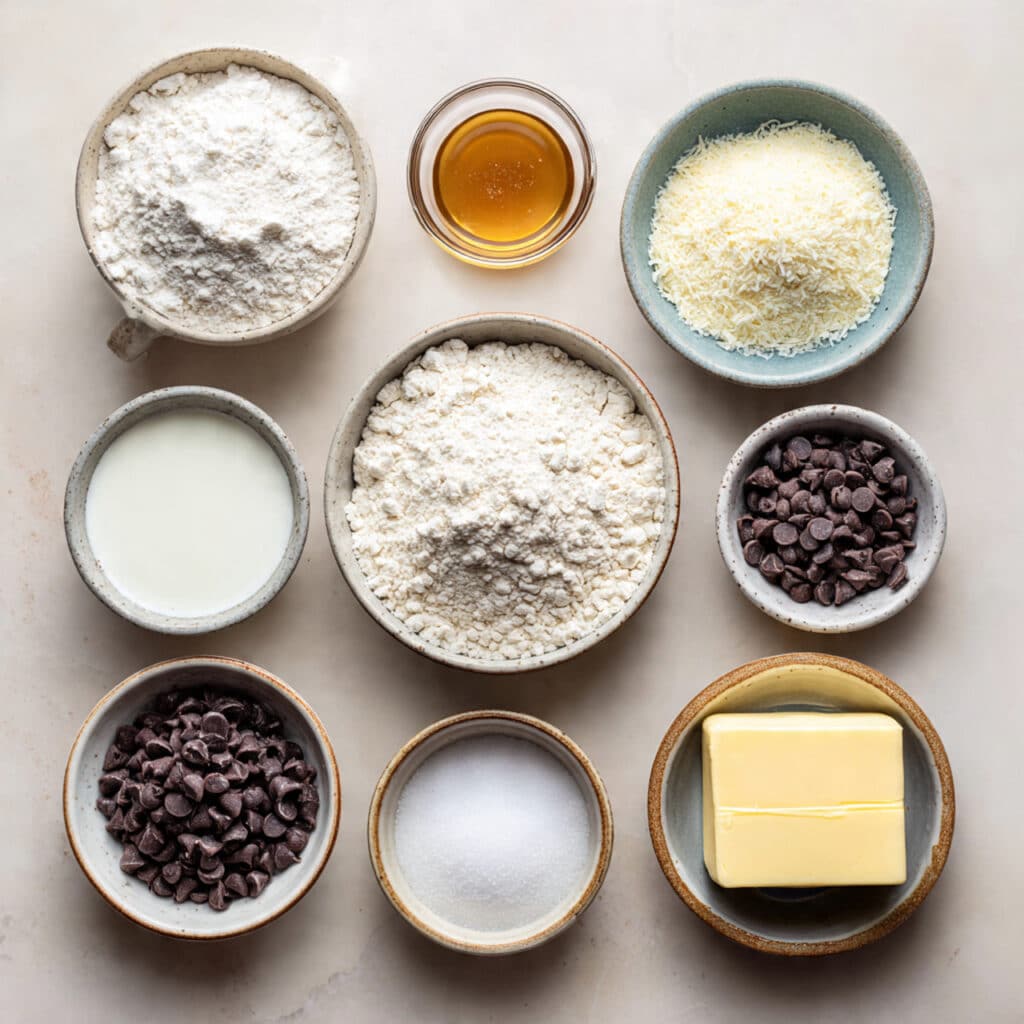
The Simple Ingredients That Create Magic
The beauty of this dessert is how basic ingredients come together to create something surprisingly special.
- All-Purpose Flour: 4 tablespoons, about 30 grams. This forms the structure and gives that soft cake base.
- Granulated Sugar: 2 tablespoons, about 25 grams. Adds sweetness and helps create a slight crust on top.
- Baking Powder: 1/4 teaspoon, ensures the batter rises and stays fluffy.
- Salt: A small pinch, balances the sweetness and enhances the chocolate flavor.
- Milk: 3 tablespoons, about 45 milliliters. Adds moisture and ties everything together.
- Unsalted Butter: 1 tablespoon, melted, about 14 grams. Brings richness and tenderness.
- Vanilla Extract: 1/4 teaspoon, adds warmth and depth.
- Chocolate Chips: 2 tablespoons, about 30 grams. Creates melty pockets throughout the dessert.
Easy Swaps If You Want to Experiment
Once you master the base, you can play around a bit.
All-Purpose Flour: Swap with a gluten free flour blend in equal amount.
Granulated Sugar: Use light brown sugar for a deeper caramel flavor.
Unsalted Butter: Replace with neutral oil in the same quantity.
Chocolate Chips: Try white chocolate or dark chocolate chunks.
Spotlight on the Star Ingredient
Chocolate Chips: They are not just for sweetness. When heated, they melt into silky pockets that create a contrast between the soft cake and gooey chocolate. That texture difference is what makes each spoonful exciting.
Let’s Make It Together
Alright, and now let’s dive into the fun part. Grab your mug and let’s turn simple pantry staples into something warm and irresistible.
- Preheat Your Equipment: No traditional preheating needed, but ensure your microwave is clean and your mug is microwave safe.
- Combine Ingredients: In the mug, add flour, sugar, baking powder, and salt. Stir well. Add milk, melted butter, and vanilla. Mix gently until just combined. Fold in chocolate chips.
- Prepare Your Cooking Vessel: Make sure the batter sits no higher than halfway up the mug to prevent overflow.
- Assemble the Dish: Smooth the top slightly and sprinkle a few extra chocolate chips if desired.
- Cook to Perfection: Microwave on high for 60 to 75 seconds. The top should look set but slightly soft in the center.
- Finishing Touches: Let it sit for one minute. The residual heat finishes cooking the center gently.
- Serve and Enjoy: Grab a spoon and dig in while warm, maybe with a splash of cold milk on the side.
The Texture and Flavor Journey
As it cooks, the batter rises and forms a tender crumb. The edges firm up first, creating a subtle crunch, while the center stays moist. The vanilla adds warmth, the butter gives richness, and the chocolate melts into silky pockets. That combination of crisp top and soft center is what makes it so satisfying.
Helpful Tips for Even Better Results
A few small adjustments can elevate it even more.
- Add a tablespoon of crushed cookies on top before microwaving for extra crunch.
- Under cook by five seconds if you prefer a gooier center.
- Sprinkle a tiny pinch of sea salt on top after cooking for contrast.
Common Mistakes and How to Avoid Them
Sometimes small details make a big difference.
- Overcooking leads to dryness, so start with 60 seconds and check.
- Using too large a mug can cause uneven cooking. Stick to a 12 ounce size.
- Skipping the salt can make the sweetness taste flat.
Quick Nutrition Snapshot
Servings: 1
Calories per serving: 420
Note: These are approximate values.
Time Breakdown at a Glance
Prep Time: 5 minutes
Cook Time: 1 minute
Total Time: 6 minutes
Make Ahead and Storage Advice
You can pre mix the dry ingredients and store them in a small airtight container. When the craving hits, just add the wet ingredients and microwave.
If you need to store leftovers, cover the mug and refrigerate for up to one day. Reheat for 10 to 15 seconds. Freezing is not recommended as the texture may become dense.
Serving Ideas to Make It Extra Special
Serve it warm with a scoop of vanilla ice cream. Drizzle a little warm milk over the top. Pair it with coffee for an afternoon treat or enjoy it as a late night comfort snack.
Fun Ways to Reinvent Leftovers
Crumble leftovers over yogurt for a sweet breakfast twist. Press small chunks into softened ice cream for a quick cookie swirl effect.
Extra Tips for Flavor and Ease
Always use good quality chocolate chips for the best melt. Measure carefully because small recipes depend on precision. Let it rest before eating so you do not burn your tongue.
Turn It Into a Showstopper
Top with whipped cream and a sprinkle of mini chocolate chips. Add a drizzle of chocolate sauce for visual appeal. Even in a mug, presentation matters.
Variations to Keep It Interesting
- Add a tablespoon of peanut butter into the center before cooking.
- Stir in a pinch of cinnamon for warmth.
- Replace half the chocolate chips with white chocolate.
- Mix in a tablespoon of crushed sandwich cookies.
FAQ’s
Q1: Can I bake this instead of microwaving?
Yes, bake at 350 degrees Fahrenheit for about 12 to 15 minutes in an oven safe ramekin.
Q2: Why is my mug cake rubbery?
It was likely overcooked. Reduce the microwave time slightly.
Q3: Can I make it dairy free?
Yes, use plant based milk and replace butter with oil.
Q4: Can I double the recipe?
It is better to make two separate mugs for even cooking.
Q5: What if I do not have baking powder?
The texture will be denser, but it will still cook.
Q6: Can I reduce the sugar?
Yes, reduce by one tablespoon, though it will be less sweet.
Q7: How do I know it is done?
The top should look set and spring back lightly.
Q8: Can I add nuts?
Yes, a tablespoon of chopped nuts works well.
Q9: Is it safe to eat slightly gooey?
Yes, as long as the flour is fully cooked and the center is hot.
Q10: Can I use self rising flour?
Yes, omit the baking powder and salt if you do.
Conclusion
This Milk and Cookies Mug Crunch is proof that comfort food does not have to be complicated. In just minutes, you get warm chocolate, soft cake, and that nostalgic milk and cookie flavor in one cozy mug. It is simple, satisfying, and perfect for when you want something sweet without the wait. Go ahead and try it tonight, you deserve it.
Print
Milk and Cookies Mug Crunch
A warm and comforting single-serve milk and cookies mug crunch with a golden soft center, slightly crisp edges, and melted chocolate chips in every bite. Ready in minutes and perfect for satisfying sweet cravings fast.
- Total Time: 6 minutes
- Yield: 1 serving 1x
Ingredients
- 4 tablespoons (30 grams) all-purpose flour
- 2 tablespoons (25 grams) granulated sugar
- 1/4 teaspoon baking powder
- A small pinch of salt
- 3 tablespoons (45 milliliters) milk
- 1 tablespoon (14 grams) unsalted butter, melted
- 1/4 teaspoon vanilla extract
- 2 tablespoons (30 grams) chocolate chips
Instructions
- In a 12 ounce microwave-safe mug, combine flour, sugar, baking powder, and salt. Stir well to evenly distribute the dry ingredients.
- Add milk, melted butter, and vanilla extract. Stir gently until just combined, being careful not to overmix.
- Fold in the chocolate chips, reserving a few to sprinkle on top if desired.
- Ensure the batter fills no more than halfway up the mug to prevent overflow.
- Microwave on high for 60 to 75 seconds, until the top looks set but slightly soft in the center.
- Let the mug rest for 1 minute to allow residual heat to finish cooking the center.
- Serve warm and enjoy directly from the mug.
Notes
- Microwave times may vary depending on wattage, start with 60 seconds and add time in 5 second increments if needed.
- For a gooier center, reduce cooking time slightly.
- Add a tablespoon of crushed cookies on top before microwaving for extra crunch.
- A tiny pinch of sea salt on top enhances the chocolate flavor.
- Prep Time: 5 minutes
- Cook Time: 1 minute
- Category: Dessert
- Method: Microwave
- Cuisine: American
- Diet: Vegetarian
Nutrition
- Serving Size: 1 mug
- Calories: 420
- Sugar: 34g
- Sodium: 220mg
- Fat: 20g
- Saturated Fat: 12g
- Unsaturated Fat: 6g
- Trans Fat: 0g
- Carbohydrates: 55g
- Fiber: 2g
- Protein: 6g
- Cholesterol: 55mg
Keywords: milk and cookies mug crunch, mug dessert, microwave mug cake, single serve dessert, chocolate chip mug cake