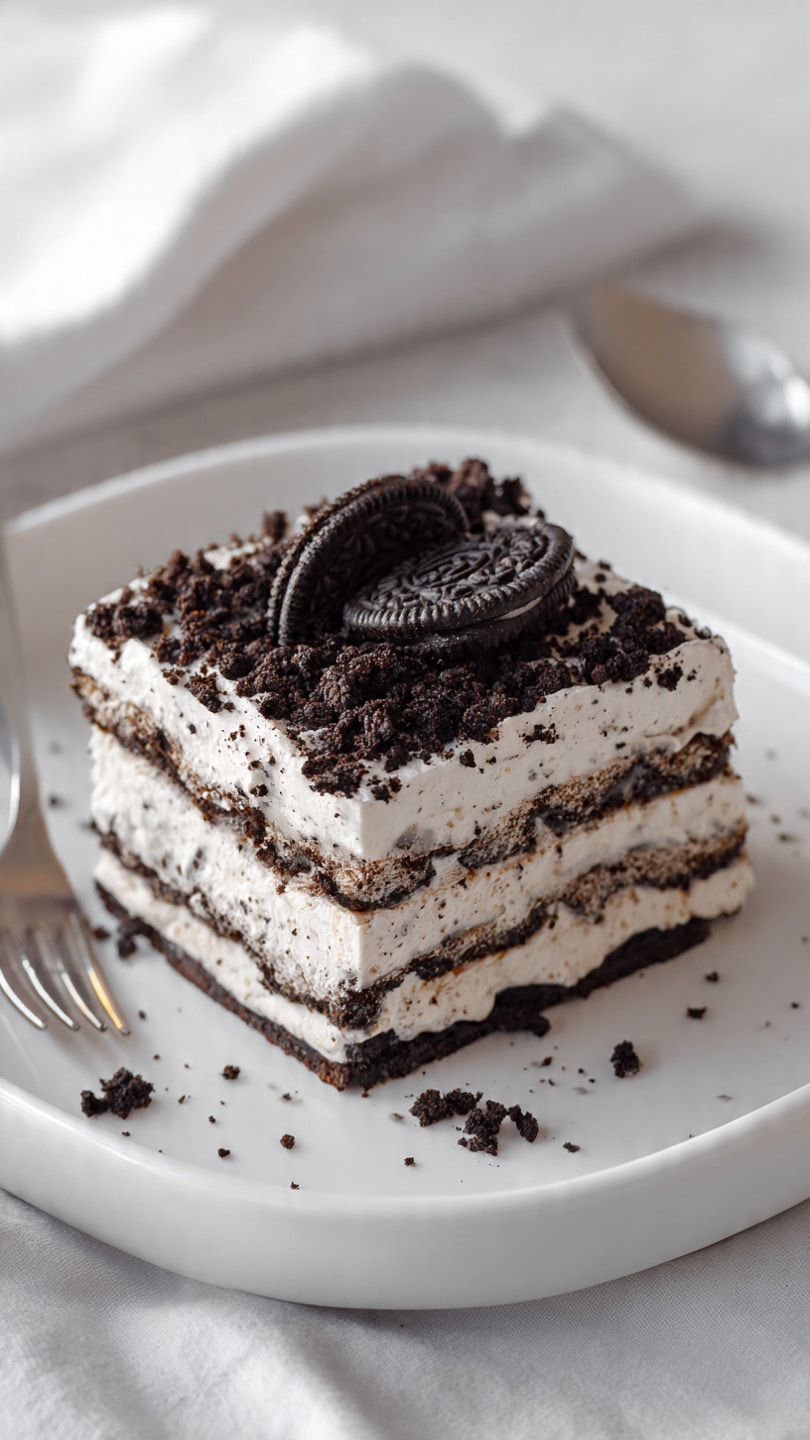
No Bake Oreo Icebox Cake
When you’re craving something sweet, creamy, and chocolatey but can’t stand the thought of turning on the oven, this No Bake Oreo Icebox Cake comes to the rescue. Each layer delivers that perfect blend of cookies and cream, softening just right in the fridge to create a sliceable dessert dream. It’s indulgent but effortless, and let me tell you, it’s worth every bite.
Behind the Recipe
This recipe has been a summer favorite in our family for years. I remember my aunt making it for every family barbecue. We’d all crowd around the fridge, counting down the hours until it was fully set. The beauty of it was in its simplicity no complicated steps, just a layering ritual that somehow felt therapeutic. It’s one of those recipes that makes you feel like a kitchen genius even if you barely lift a finger.
Recipe Origin or Trivia
The concept of icebox cakes dates back to the early 1900s, when refrigerators were still a luxury, and “iceboxes” kept things chilled. These no-bake desserts became wildly popular in the 1920s and 30s as quick and elegant treats that homemakers could prepare in advance. Oreos, first introduced in 1912, became a natural partner for this dessert with their crispy, chocolatey crunch and iconic cream center. Today, this recipe is a modern twist on that nostalgic tradition.
Why You’ll Love No Bake Oreo Icebox Cake
It’s not just about the taste it’s about how effortlessly satisfying it is.
Versatile: You can dress it up with fruit, drizzle it with caramel, or even layer it with peanut butter for a twist.
Budget-Friendly: Made with pantry staples, it won’t break the bank.
Quick and Easy: If you can spread and stack, you can make this cake.
Customizable: Swap in flavored Oreos or add chocolate chips between layers to make it your own.
Crowd-Pleasing: Perfect for parties, potlucks, or just a Tuesday night treat.
Make-Ahead Friendly: It needs to chill, so it’s ready when you are.
Great for Leftovers: It tastes even better the next day.
Chef’s Pro Tips for Perfect Results
There’s no baking, but a few tips can make a big difference.
- Chill your mixing bowl before whipping the cream to get maximum fluff.
- Use full-fat cream cheese for the best texture and richness.
- Let the cake chill overnight if you can the layers soften perfectly.
- Don’t rush the layering process. Take your time to align those cookies neatly.
- Use a serrated knife to slice for clean, gorgeous pieces.
Kitchen Tools You’ll Need
You won’t need much, but having the right tools makes it a breeze.
Mixing Bowls: For whipping cream and blending the filling.
Hand or Stand Mixer: Whipping the cream to stiff peaks is much easier with a little power.
Rubber Spatula: For smooth and even spreading.
9×13 Inch Baking Dish: The perfect size to build your layers.
Offset Spatula: Helps get clean layers, especially for that top whipped finish.
Ingredients in No Bake Oreo Icebox Cake
Each ingredient plays a tasty role in this creamy, dreamy dessert.
- Oreo Cookies: About 36 cookies. These form the base and middle layers, softening beautifully in the fridge.
- Heavy Whipping Cream: 2 cups, cold. This gives the filling its signature airy richness.
- Powdered Sugar: 1/2 cup. Lightly sweetens the whipped cream.
- Cream Cheese: 8 ounces, softened. Adds tang and body to the cream layer.
- Vanilla Extract: 1 teaspoon. Rounds out the flavor with a warm, sweet aroma.
- Crushed Oreos (for topping): 1/2 cup. Adds a delightful crunch and finishing touch.
Ingredient Substitutions
Whether you’re out of something or need a dietary tweak, here are some handy swaps.
Heavy Whipping Cream: Cool Whip works in a pinch for a more shortcut version.
Powdered Sugar: Granulated sugar can be used, but beat longer to dissolve.
Cream Cheese: Mascarpone cheese adds a smoother, richer flavor.
Vanilla Extract: Almond extract for a nuttier twist.
Oreos: Try Golden Oreos, Mint Oreos, or any seasonal variety for fun changes.
Ingredient Spotlight
Oreo Cookies: These iconic chocolate sandwich cookies soften beautifully without falling apart, making them perfect for no-bake layering desserts.
Heavy Whipping Cream: When whipped just right, it creates a cloud-like texture that balances the crunch of the cookies.

Instructions for Making No Bake Oreo Icebox Cake
No oven, no stress. Just a few simple steps and some patience while it chills.
- Preheat Your Equipment:
Chill your mixing bowl and beaters for 10–15 minutes before whipping cream. - Combine Ingredients:
In a large bowl, whip the heavy cream with powdered sugar and vanilla until stiff peaks form. In a separate bowl, beat cream cheese until smooth. Fold whipped cream into the cream cheese mixture gently. - Prepare Your Cooking Vessel:
Grab a 9×13 baking dish and get ready to layer. - Assemble the Dish:
Start with a single layer of Oreos on the bottom. Spread a layer of the cream mixture over the cookies. Repeat the layers, ending with the cream on top. - Cook to Perfection:
No cooking required, but chill in the fridge for at least 6 hours, preferably overnight. - Finishing Touches:
Just before serving, sprinkle the top with crushed Oreos for texture and flair. - Serve and Enjoy:
Slice with a serrated knife for clean edges and serve chilled. Each bite melts in your mouth.
Texture & Flavor Secrets
The magic of this cake is in how the cookies transform. After a long chill, they become soft and cake-like, blending seamlessly into the creamy layers. The filling is airy and rich, with just enough tang from the cream cheese to balance the sweet chocolatey Oreos. It’s creamy, crunchy, sweet, and smooth all in one glorious bite.
Cooking Tips & Tricks
Here’s how to make every bite the best it can be.
- Always chill it for at least 6 hours so the layers meld properly.
- Whip the cream to stiff peaks for structure, not just soft peaks.
- Press down lightly after each layer to keep things compact and even.
- Store in an airtight container to keep it fresh and moist.
What to Avoid
Here are a few common mistakes to steer clear of.
- Skipping the chill time the cake won’t hold together well.
- Using low-fat cream cheese it can make the filling too runny.
- Not softening the cream cheese before mixing it’ll stay lumpy.
- Overwhipping the cream it’ll turn into butter.
Nutrition Facts
Servings: 12
Calories per serving: 370
Note: These are approximate values.
Preparation Time
Prep Time: 20 minutes
Cook Time: 0 minutes
Total Time: 6 hours 20 minutes (including chill time)
Make-Ahead and Storage Tips
This is the ultimate make-ahead dessert. You can prepare it the night before and let the fridge do the magic. It stores beautifully for up to 4 days, tightly covered in the fridge. You can even freeze it just slice and wrap individually, then thaw in the fridge overnight.
How to Serve No Bake Oreo Icebox Cake
Serve it cold straight from the fridge, ideally with a tall glass of milk or a scoop of vanilla ice cream. For an elegant touch, add a drizzle of chocolate syrup or a dollop of whipped cream on top.
Creative Leftover Transformations
Got leftovers? Turn them into something new.
- Layer them in mason jars for mini Oreo trifles.
- Blend into a milkshake for a cookies and cream treat.
- Use as a filling for whoopie pies or cookie sandwiches.
Additional Tips
- Garnish with mini Oreos or chocolate shavings for extra wow.
- Let it sit at room temperature for 10 minutes before slicing for clean cuts.
- Craving crunch? Add chopped nuts or toffee bits between layers.
Make It a Showstopper
Presentation counts. Use a clear glass dish to show off the layers. Sprinkle the top with extra crushed cookies and a few whole Oreos for drama. You could even pipe whipped cream swirls around the edges for that bakery-style finish.
Variations to Try
- Peanut Butter Twist: Add a layer of peanut butter between the Oreos and cream.
- Berry Delight: Fold in chopped strawberries or raspberries for a fruity note.
- Mocha Flavor: Add a tablespoon of instant espresso powder to the cream mixture.
- Mint Cookies & Cream: Use mint-flavored Oreos and add a drop of peppermint extract.
- Nutella Swirl: Drizzle Nutella between layers for a hazelnut-chocolate upgrade.
FAQ’s
Q1: Can I use Cool Whip instead of homemade whipped cream?
Yes, it works well if you’re short on time. Just know the flavor and texture will be slightly different.
Q2: How long should I chill it?
At least 6 hours, but overnight is best for that cake-like texture.
Q3: Can I freeze this cake?
Absolutely. Slice it, wrap it tightly, and freeze. Thaw in the fridge before serving.
Q4: What kind of Oreos work best?
Classic Oreos are ideal, but any flavor you love will work.
Q5: Do I need to dip the Oreos in milk first?
Nope. The cream filling softens them naturally during chilling.
Q6: Can I make it in a round dish?
Sure! Just adjust the cookie arrangement to fit the shape.
Q7: Is this dessert too sweet?
It’s sweet, yes, but the cream cheese adds a tangy balance.
Q8: Can I make this dairy-free?
Yes. Use dairy-free cream cheese and coconut whipped cream alternatives.
Q9: Should I cover the cake while chilling?
Yes. Use plastic wrap or foil to prevent it from absorbing fridge odors.
Q10: Can kids make this?
Definitely. It’s a fun, mess-free project for little helpers.
Conclusion
Whether you’re baking with kids, prepping for a summer party, or just craving something ridiculously delicious without all the effort, this No Bake Oreo Icebox Cake is your go-to. Trust me, you’re going to love this and it just might become your new favorite no-bake dessert.
Print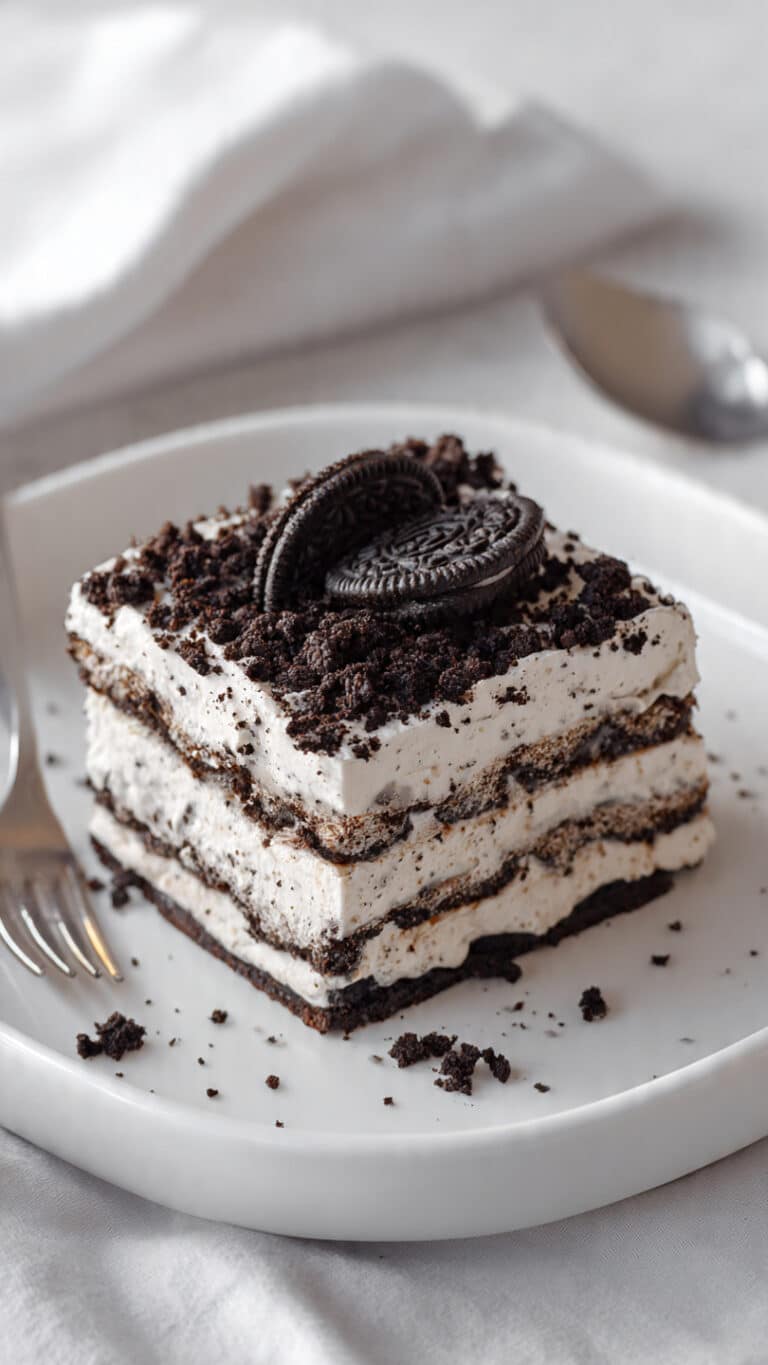
No Bake Oreo Icebox Cake
This no bake Oreo icebox cake is a dreamy, creamy dessert layered with Oreo cookies and whipped cream, chilled to perfection. It’s quick to make, requires no oven, and is always a crowd favorite.
- Total Time: 6 hours 20 minutes
- Yield: 12 servings 1x
Ingredients
- 36 Oreo cookies
- 2 cups heavy whipping cream (cold)
- 1/2 cup powdered sugar
- 8 ounces cream cheese (softened)
- 1 teaspoon vanilla extract
- 1/2 cup crushed Oreos (for topping)
Instructions
- Chill your mixing bowl and beaters for 10–15 minutes.
- Whip the heavy cream with powdered sugar and vanilla until stiff peaks form.
- In another bowl, beat the cream cheese until smooth, then fold in the whipped cream mixture.
- In a 9×13 inch dish, layer Oreos on the bottom.
- Spread a layer of the cream mixture over the cookies.
- Repeat layering, finishing with a cream layer on top.
- Chill in the fridge for at least 6 hours, preferably overnight.
- Top with crushed Oreos before serving and slice with a serrated knife.
Notes
- Chilling overnight gives the best texture.
- Use full-fat cream cheese for a rich and stable filling.
- Add chocolate drizzle or fresh berries for a twist.
- Prep Time: 20 minutes
- Cook Time: 0 minutes
- Category: Dessert
- Method: No-Bake
- Cuisine: American
- Diet: Vegetarian
Nutrition
- Serving Size: 1 slice
- Calories: 370
- Sugar: 22g
- Sodium: 220mg
- Fat: 24g
- Saturated Fat: 14g
- Unsaturated Fat: 8g
- Trans Fat: 0g
- Carbohydrates: 35g
- Fiber: 1g
- Protein: 4g
- Cholesterol: 55mg
Keywords: oreo icebox cake, no bake dessert, easy oreo cake, layered oreo cake, whipped cream dessert