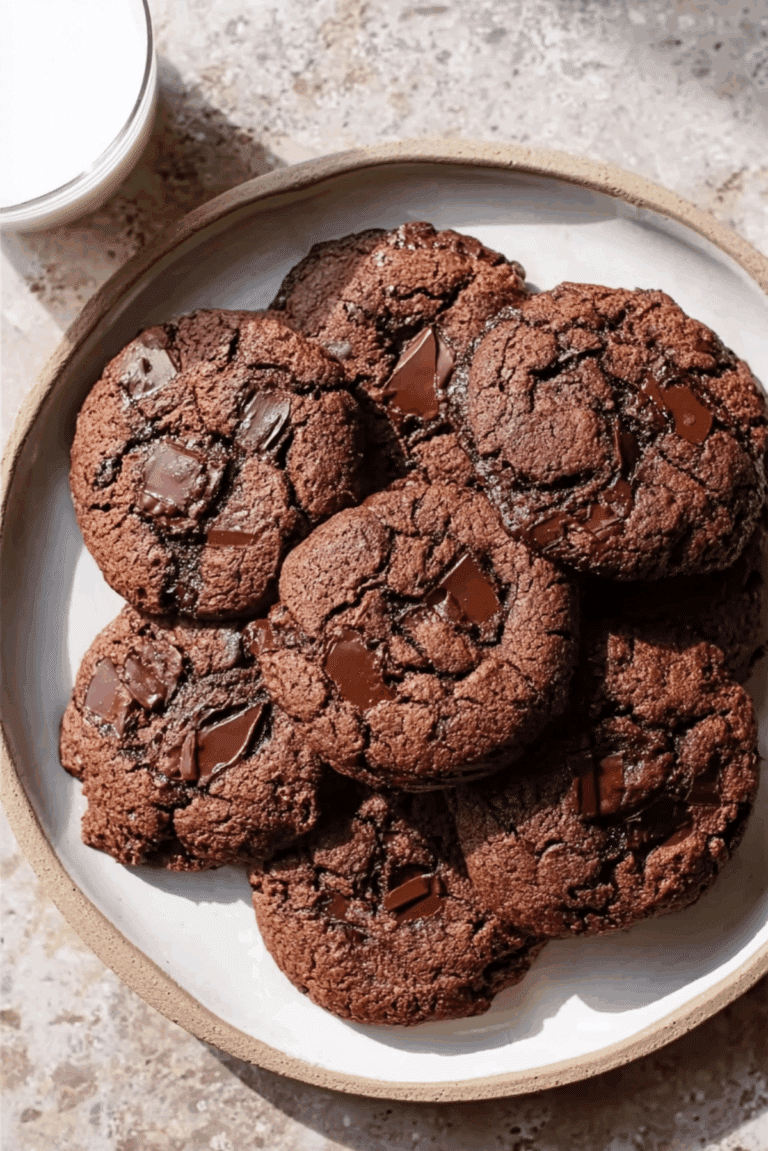
Oreo Icebox Cake
There is something quietly magical about a dessert that comes together without ever touching the oven, and this one proves it beautifully. With layers of chocolate cookies softening into a cake-like texture and clouds of creamy filling in between, every bite feels rich, cool, and comforting. Trust me, you’re going to love this, especially on days when you want something impressive without the extra effort.
Why This No-Bake Dessert Always Wins Hearts
As we move from that first glance into what makes this dessert so irresistible, you will notice it is not just about taste. It is about ease, texture, and that satisfying moment when simple ingredients transform into something that feels bakery-level special.
A Sweet Slice of History and Nostalgia
Icebox cakes date back to the early 1900s, when refrigerators were often called iceboxes. Home cooks discovered that layering cookies with whipped cream and letting it chill overnight created a soft, cake-like dessert without baking. This version carries that same charm, blending modern convenience with a bit of vintage kitchen magic.
Why You’ll Keep Coming Back to This Recipe
Before we dive into making it, let’s talk about why this one becomes a repeat favorite so quickly.
Versatile: You can switch flavors, add toppings, or adjust sweetness depending on your mood or occasion.
Budget-Friendly: It uses simple, accessible ingredients that do not break the bank.
Quick and Easy: Minimal prep and no baking make it perfect for busy days.
Customizable: Add fruits, chocolate drizzle, or flavored cream to make it your own.
Crowd-Pleasing: Its creamy texture and familiar flavors make it a hit with all ages.
Make-Ahead Friendly: It actually gets better as it chills, which makes planning ahead easy.
Great for Leftovers: The texture stays delicious even after a couple of days in the fridge.
Pro Tips That Make All the Difference
Now let’s dive a little deeper into how to make it truly shine.
- Chill the dessert overnight for the best texture
- Use full-fat cream for a richer and more stable filling
- Layer evenly so every slice holds together perfectly
- Lightly dip cookies in milk if you want an even softer texture faster
Tools That Make Preparation Effortless
Before starting, gather a few basics that make the process smooth.
Mixing Bowl: For whipping and combining the cream mixture.
Electric Mixer: Helps achieve light and fluffy whipped cream quickly.
Spatula: Useful for spreading layers evenly.
Rectangular Baking Dish: Gives that classic layered presentation.
Ingredients That Come Together Beautifully
Now we reach the heart of it all, where simple ingredients turn into something unforgettable.
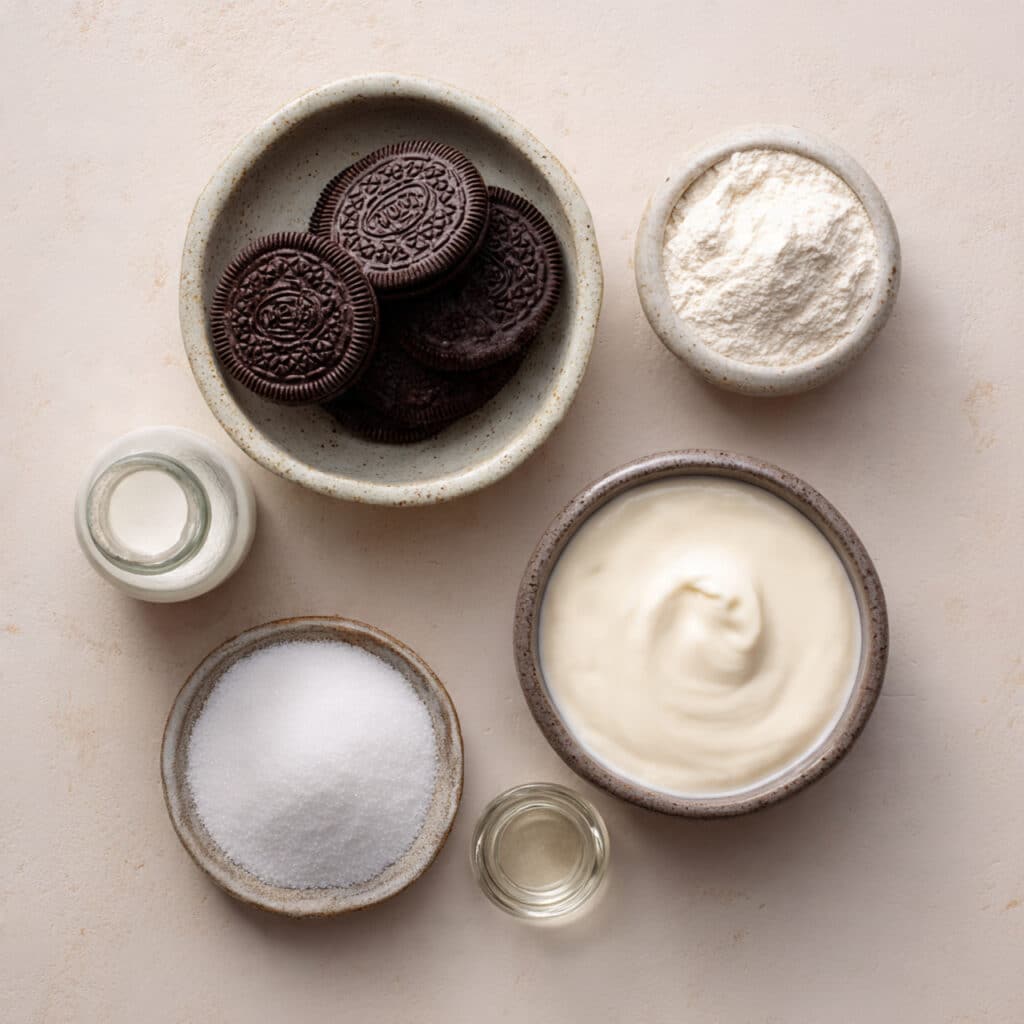
- Chocolate Sandwich Cookies: 36 cookies, these create the structure and soften into cake-like layers
- Heavy Whipping Cream: 2 cups, provides the rich and airy texture
- Powdered Sugar: 1/2 cup, adds gentle sweetness without graininess
- Vanilla Extract: 1 teaspoon, enhances the overall flavor with warmth
Easy Ingredient Swaps You Can Try
And if you feel like experimenting, here are some easy swaps.
Chocolate Sandwich Cookies: Use chocolate wafers or graham crackers
Heavy Cream: Substitute with whipped topping if needed
Vanilla Extract: Try almond extract for a slightly nutty flavor
The Star Ingredients That Make It Shine
Let’s highlight what truly defines this dessert.
Chocolate Sandwich Cookies: They soften beautifully and create that signature layered texture.
Heavy Cream: Whips into a light and airy filling that balances the richness.
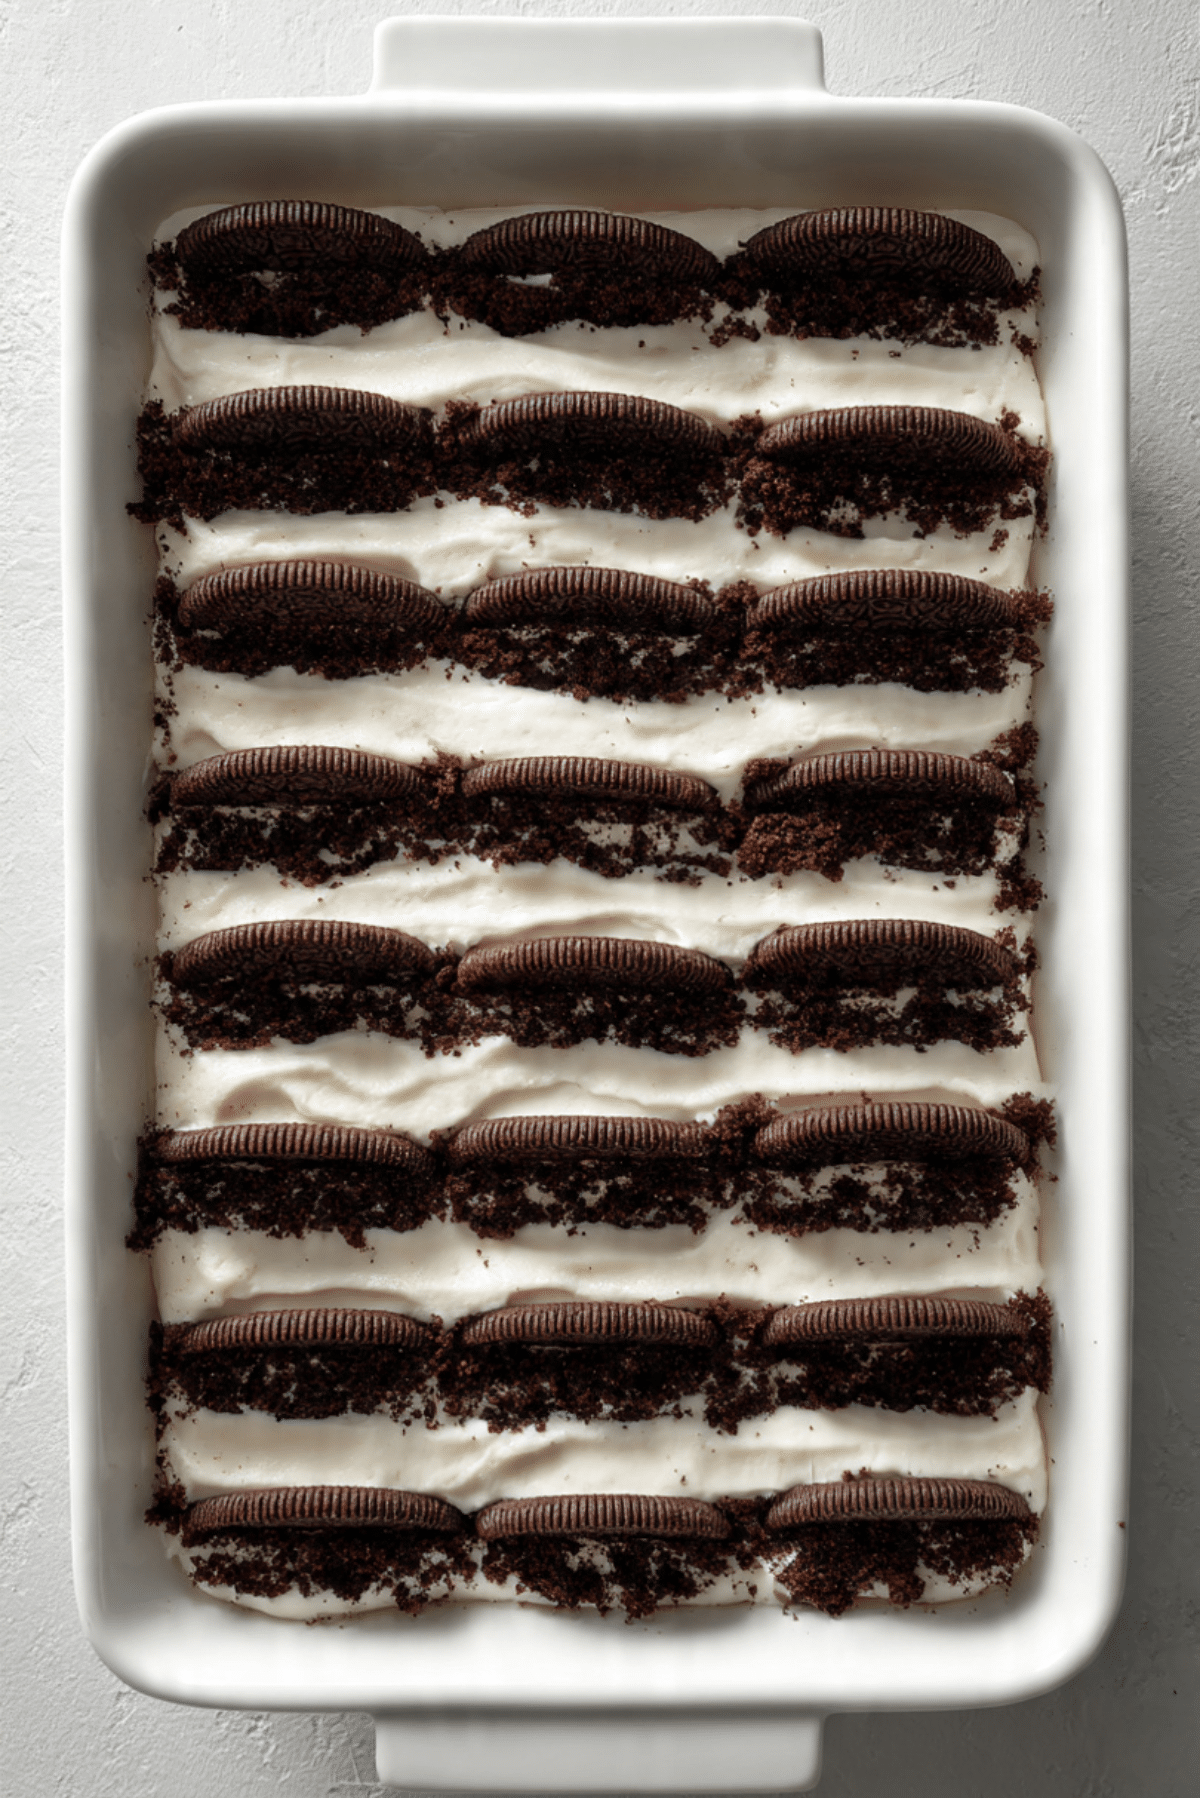
Let’s Build This Dessert Step by Step
And now let’s dive into the fun part, bringing everything together.
- Preheat Your Equipment: No oven needed, simply ensure your fridge has space ready
- Combine Ingredients: Whip heavy cream, powdered sugar, and vanilla until soft peaks form
- Prepare Your Cooking Vessel: Lightly grease or line your baking dish if desired
- Assemble the Dish: Layer cookies and whipped cream, repeating until all ingredients are used
- Cook to Perfection: Refrigerate for at least 6 hours or overnight
- Finishing Touches: Smooth the top and add crushed cookies if desired
- Serve and Enjoy: Slice and serve chilled for the best texture
Texture and Flavor That Melt Together Perfectly
As it chills, the cookies absorb moisture from the cream and soften into a tender, cake-like consistency. The contrast between the creamy layers and chocolate flavor creates a dessert that feels both light and indulgent at the same time.
Helpful Tips for the Best Results
A few small adjustments can make a big difference.
- Chill longer for cleaner slices
- Use cold cream for better whipping results
- Spread layers evenly for balanced texture
Common Mistakes and How to Avoid Them
Even simple recipes have a few things to watch out for.
- Skipping chill time leads to a firm, less cohesive texture
- Overwhipping cream can make it grainy
- Uneven layers can cause the dessert to fall apart when sliced
Nutritional Snapshot
Servings: 8
Calories per serving: 320
Note: These values are approximate.
Time Breakdown for Planning
Prep Time: 20 minutes
Cook Time: 0 minutes
Total Time: 6 hours 20 minutes
Make-Ahead and Storage Tips
This dessert is perfect for planning ahead. Prepare it the night before and let it chill overnight. Store leftovers covered in the fridge for up to 3 days. Freezing is possible, just thaw slightly before serving for the best texture.
Serving Ideas to Make It Extra Special
Serve chilled with a sprinkle of crushed cookies on top or a drizzle of chocolate syrup. Fresh berries on the side add a nice contrast and a pop of color.
Creative Ways to Use Leftovers
Turn leftovers into parfaits by layering pieces in glasses with extra whipped cream. You can also freeze slices for a firmer, ice cream-like treat.
Extra Tips for Success
Keep everything cold while preparing, especially the cream. This helps maintain structure and gives a smoother finish.
Make It Look Absolutely Stunning
Smooth the top layer carefully and finish with evenly crushed cookies for a clean and professional look. A neat slice reveals those beautiful layers that make it so appealing.
Fun Variations to Try
- Add sliced bananas between layers
- Use flavored cookies for a twist
- Mix cocoa powder into the cream for extra richness
- Add a layer of chocolate ganache on top
FAQ’s
Q1: Can I make it ahead of time?
Yes, it actually tastes better when made a day in advance.
Q2: How long does it need to chill?
At least 6 hours, but overnight is ideal.
Q3: Can I freeze it?
Yes, freeze and thaw slightly before serving.
Q4: Can I use store-bought whipped topping?
Yes, it works as a quick alternative.
Q5: Why are my layers not holding?
It likely needs more chilling time.
Q6: Can I add fruit?
Absolutely, bananas and strawberries work great.
Q7: How do I get clean slices?
Use a sharp knife and wipe between cuts.
Q8: Is it too sweet?
You can reduce powdered sugar slightly.
Q9: Can I use low-fat cream?
Full-fat is recommended for best texture.
Q10: Can I make individual portions?
Yes, assemble in cups for easy serving.
Conclusion
And just like that, you have a dessert that feels both nostalgic and effortlessly impressive. This one’s a total game-changer when you want something simple yet satisfying. Let me tell you, it’s worth every bite, especially when those layers come together into that perfect creamy texture.
Print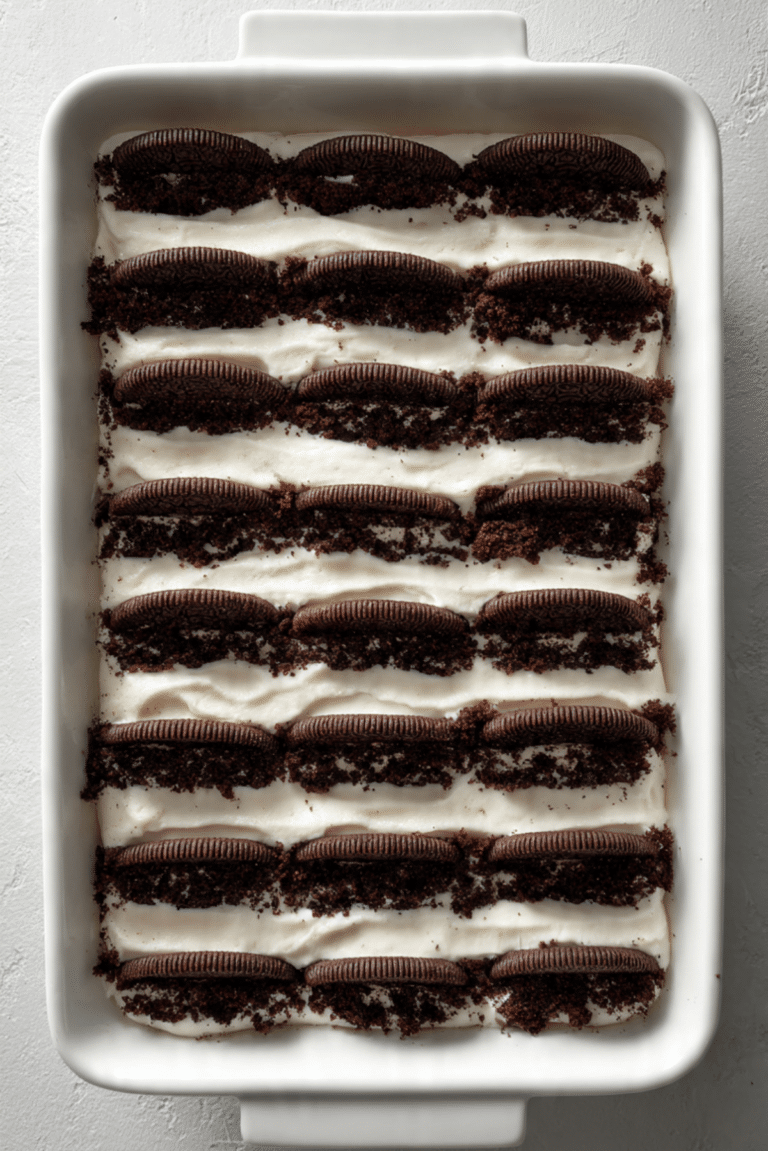
Oreo Icebox Cake
A creamy no-bake dessert made with layers of chocolate sandwich cookies and whipped cream that transforms into a soft, cake-like treat.
- Total Time: 6 hours 20 minutes
- Yield: 8 servings 1x
Ingredients
- 36 chocolate sandwich cookies
- 2 cups heavy whipping cream
- 1/2 cup powdered sugar
- 1 teaspoon vanilla extract
Instructions
- Whip heavy cream, powdered sugar, and vanilla until soft peaks form.
- Prepare a rectangular baking dish.
- Layer cookies and whipped cream evenly.
- Repeat layers until ingredients are used.
- Refrigerate for at least 6 hours or overnight.
- Smooth the top and add crushed cookies if desired.
- Slice and serve chilled.
Notes
- Chill overnight for best texture
- Use cold cream for better whipping
- Keep layers even for clean slices
- Prep Time: 20 minutes
- Cook Time: 0 minutes
- Category: Dessert
- Method: No-Bake
- Cuisine: American
- Diet: Vegetarian
Nutrition
- Serving Size: 1 slice
- Calories: 320
- Sugar: 18g
- Sodium: 210mg
- Fat: 20g
- Saturated Fat: 12g
- Unsaturated Fat: 6g
- Trans Fat: 0g
- Carbohydrates: 32g
- Fiber: 1g
- Protein: 3g
- Cholesterol: 55mg
Keywords: oreo icebox cake, no bake dessert, easy dessert, layered dessert