Peanut Butter Cups
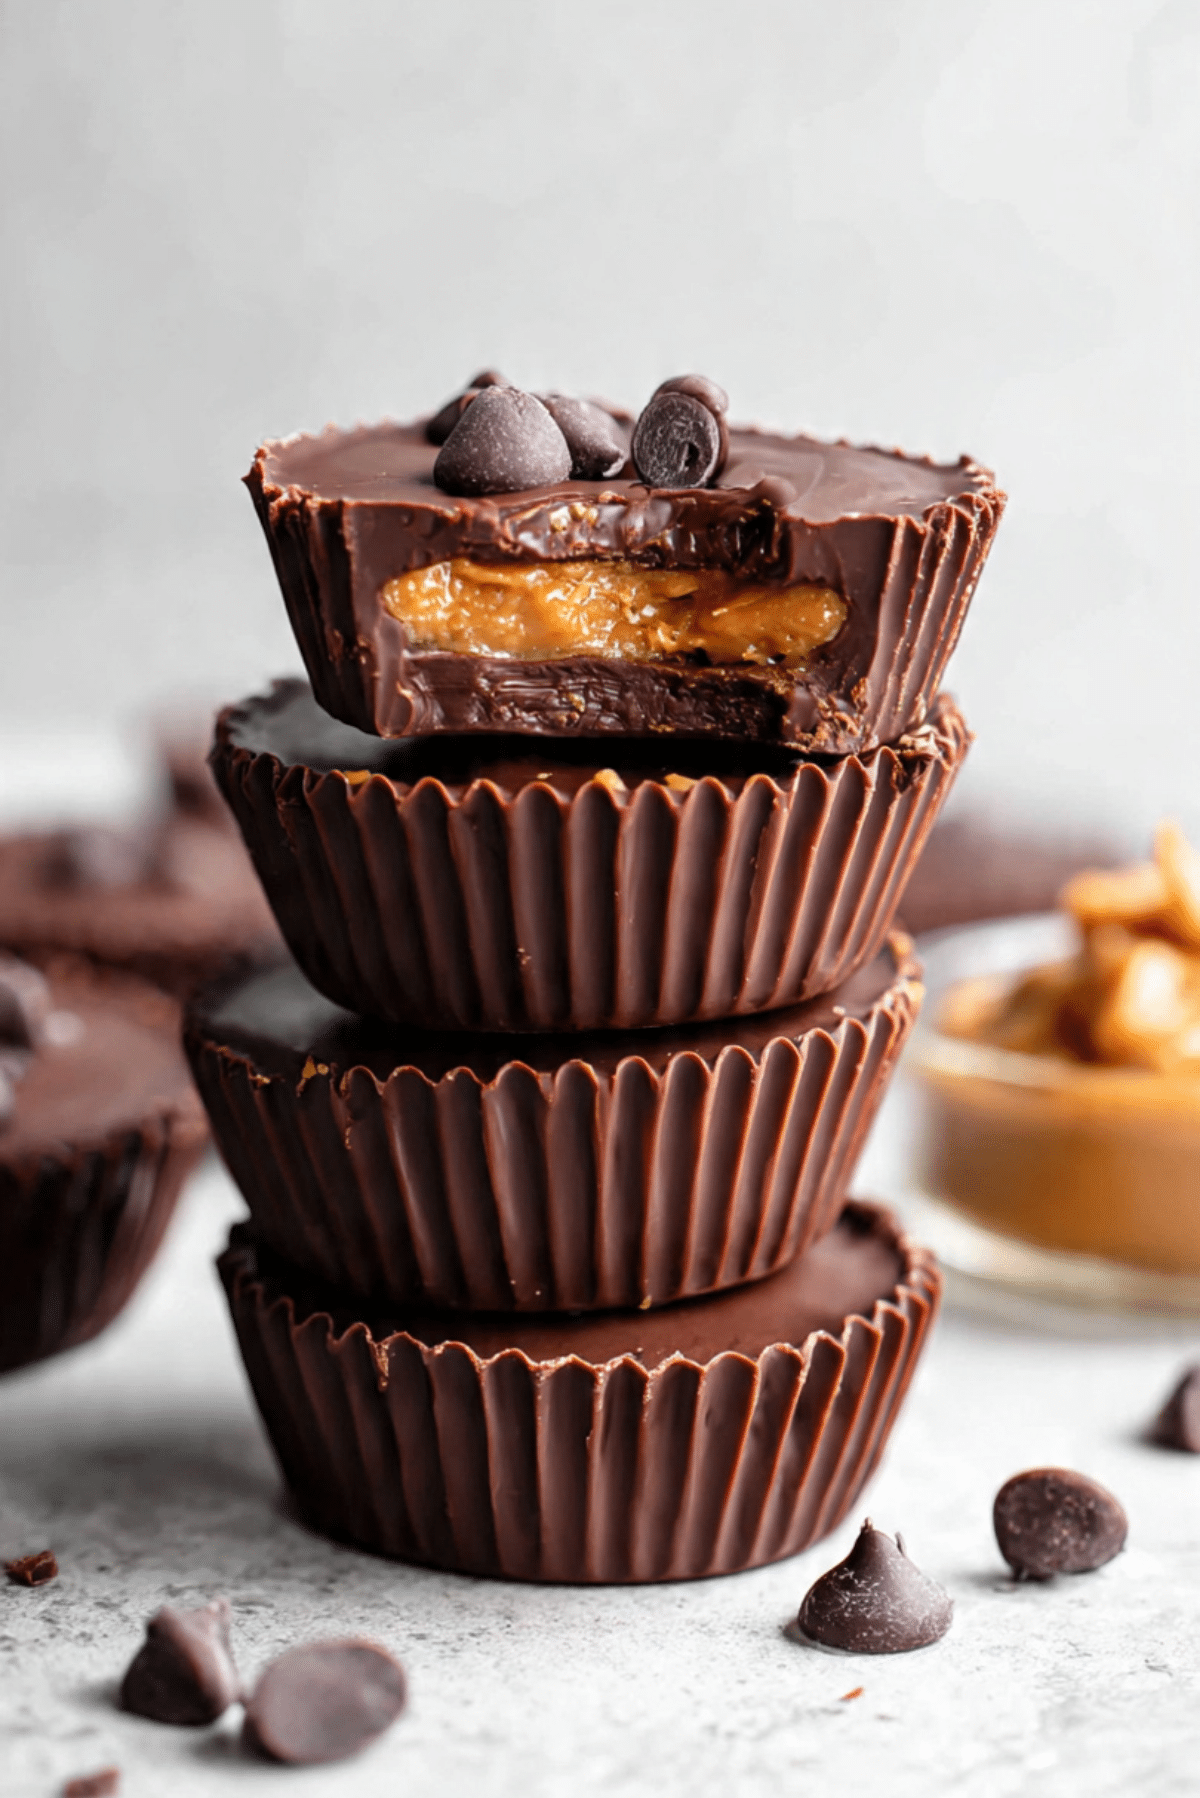
There’s something almost magical about that first bite into a peanut butter cup. The snap of smooth chocolate gives way to the creamy, nutty center, and it’s a little moment of joy that never gets old. Whether you’re sneaking one from the fridge or serving them at a party, these homemade peanut butter cups are the kind of treat that brings out the kid in everyone. Rich, chocolatey, perfectly sweet, and a little salty they hit all the right notes.
Behind the Recipe
I still remember the first time I made peanut butter cups from scratch. It was a rainy weekend, and the store-bought version just wasn’t cutting it anymore. I wanted that classic flavor, but better smoother peanut butter, deeper chocolate, and none of the mystery ingredients. Once I saw how simple and satisfying they were to make, they quickly became a go-to treat. And now, every time I make a batch, it brings back that cozy memory of experimenting in the kitchen with sticky fingers and chocolate smudges.
Recipe Origin or Trivia
Peanut butter cups have become an iconic American candy, thanks to H.B. Reese, who first introduced them in the 1920s. Originally made in the basement of his home, Reese’s Cups were his clever combination of two things people already loved chocolate and peanut butter in one neat little package. Over the decades, they’ve become a favorite in lunchboxes, holidays, and dessert tables alike. While the commercial version is wildly popular, homemade peanut butter cups offer that same nostalgic flavor with a fresher, richer twist.
Why You’ll Love Peanut Butter Cups
These treats are more than just candy they’re a moment of indulgence that’s hard to resist. Here’s why they’ll win you over:
Versatile: You can use dark, milk, or even white chocolate, and shape them into mini or jumbo cups.
Budget-Friendly: Way more affordable than buying premium chocolate candies from the store.
Quick and Easy: No baking required, and they come together in under 30 minutes.
Customizable: Add a pinch of sea salt, swap almond butter, or mix in crunchy bits for texture.
Crowd-Pleasing: Everyone loves them, from toddlers to grandparents.
Make-Ahead Friendly: They store well in the fridge or freezer for weeks.
Great for Leftovers: Crumble into ice cream or blend into milkshakes for a treat remix.
Chef’s Pro Tips for Perfect Results
Homemade candy can feel intimidating, but these tips make it foolproof:
- Use Good Quality Chocolate: It makes a huge difference in flavor and texture. Go for baking bars or high-quality chips.
- Chill Between Layers: After pouring the bottom chocolate layer, chill it briefly before adding the peanut butter. This helps it set and keeps layers neat.
- Smooth Peanut Butter Works Best: Natural peanut butter can be too oily or runny, so stick with a creamy, no-stir version.
- Use Silicone Muffin Cups: They make it incredibly easy to pop the finished cups out cleanly.
- Don’t Overfill: Leave space at the top so the chocolate can fully seal in the filling.
Kitchen Tools You’ll Need
To make these treats seamless from start to finish, gather these essentials:
Mixing Bowl: For stirring up the peanut butter filling until smooth.
Muffin Pan or Silicone Mold: To form the classic cup shape.
Cupcake Liners: Paper or silicone liners help keep things tidy.
Microwave-Safe Bowl or Double Boiler: For gently melting the chocolate.
Spoon or Cookie Scoop: To evenly portion out the filling and chocolate layers.
Ingredients in Peanut Butter Cups
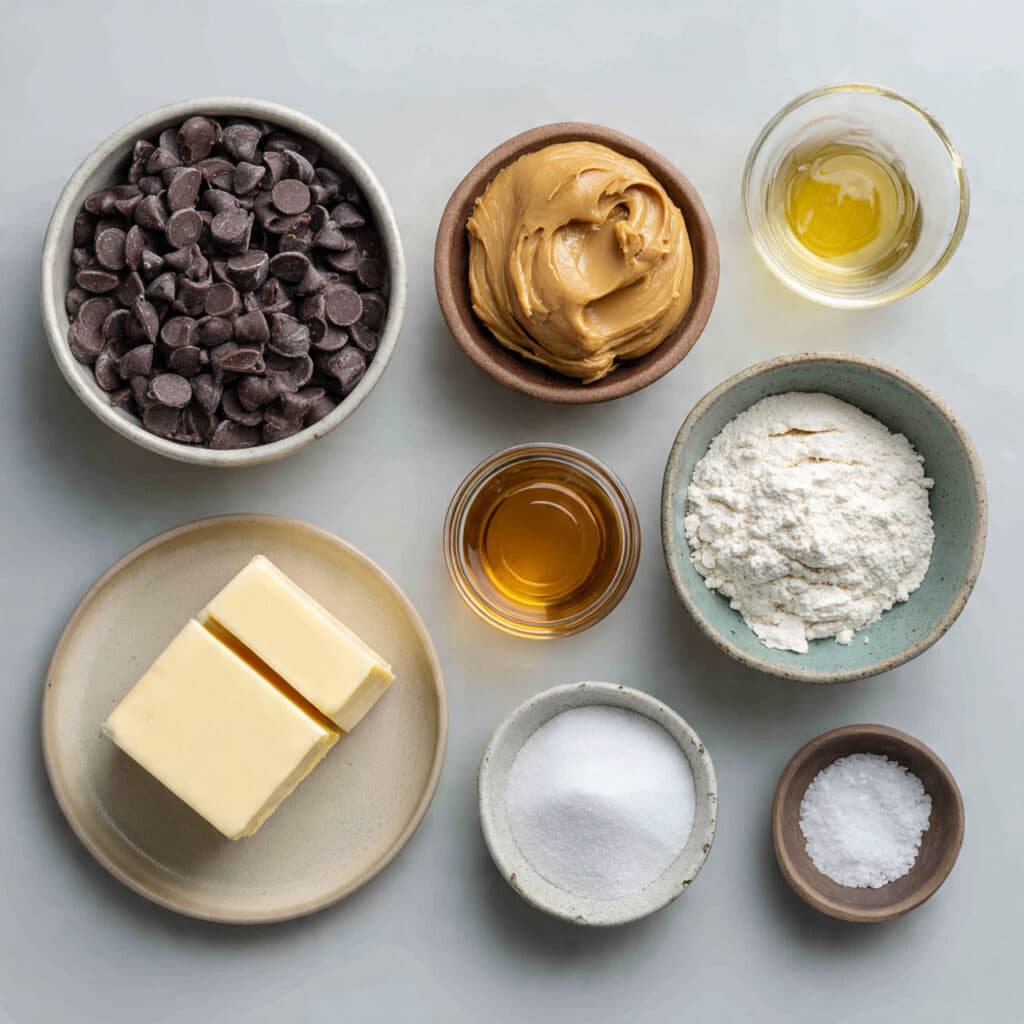
This recipe brings together pantry staples into something seriously craveable. Here’s what you’ll need:
- Semi-Sweet Chocolate Chips: 2 cups. Melted down for that rich, chocolatey coating that snaps when you bite into it.
- Creamy Peanut Butter: 1 cup. The star of the show, smooth and slightly salty to balance the sweetness.
- Powdered Sugar: 1/2 cup. Sweetens and thickens the peanut butter layer for the perfect creamy texture.
- Butter: 2 tablespoons, softened. Adds richness and helps bind the filling.
- Vanilla Extract: 1 teaspoon. Adds a warm, aromatic hint that elevates the flavor.
- Salt: A pinch. Just enough to enhance the flavors and balance the sweetness.
Ingredient Substitutions
Don’t stress if you’re missing something. Try these easy swaps:
Semi-Sweet Chocolate Chips: Use dark chocolate or milk chocolate instead.
Creamy Peanut Butter: Almond butter or sunflower seed butter works great.
Powdered Sugar: Use maple syrup and a bit of coconut flour to thicken, or a sugar-free substitute if needed.
Butter: Coconut oil is a good dairy-free alternative.
Vanilla Extract: Try almond extract for a slightly different twist.
Ingredient Spotlight
Peanut Butter: The key to a perfect cup is using a no-stir, creamy peanut butter. It spreads easily and sets up beautifully without separating.
Chocolate Chips: Choosing a high-quality chocolate really boosts the flavor. Look for options with cocoa butter listed as a main ingredient.
Instructions for Making Peanut Butter Cups
Making these is actually really fun like edible arts and crafts. Here’s how to pull them together step-by-step:
- Preheat Your Equipment: No need for an oven, but prepare your muffin tin by lining it with paper or silicone liners.
- Combine Ingredients: In a bowl, mix the peanut butter, softened butter, powdered sugar, vanilla, and salt until creamy and smooth.
- Prepare Your Cooking Vessel: Melt the chocolate chips in a microwave-safe bowl in 30-second intervals, stirring between each, until fully melted and glossy.
- Assemble the Dish: Spoon about a teaspoon of melted chocolate into the bottom of each liner, spreading it slightly. Chill for 5–10 minutes.
- Cook to Perfection: Add a scoop of the peanut butter filling over the chocolate base. Flatten slightly. Then top with more melted chocolate to cover.
- Finishing Touches: Tap the pan gently to level the chocolate and remove air bubbles. Chill until fully set, about 20 minutes.
- Serve and Enjoy: Once firm, peel away the liners and enjoy that perfect bite.
Texture & Flavor Secrets
It’s all about contrast. The chocolate shell is firm and snappy, while the filling is creamy and sweet with just a hint of salt. That balance makes each bite feel indulgent and satisfying, never overly rich or cloying. The slight chill adds a coolness that enhances the texture even more.
Cooking Tips & Tricks
Sometimes it’s the little tweaks that make all the difference:
- Use two spoons to help spread and layer the melted chocolate easily.
- For extra flair, sprinkle flaky sea salt on top before chilling.
- Make mini versions for bite-sized treats using a mini muffin tin.
What to Avoid
Even simple recipes have their pitfalls, but they’re easy to dodge:
- Don’t use runny or oily peanut butter. It won’t hold its shape and might leak.
- Don’t overheat the chocolate. Slow, gentle melting keeps it glossy and smooth.
- Don’t skip the chilling step. It’s what keeps the layers clean and distinct.
Nutrition Facts
Servings: 12
Calories per serving: 240
Note: These are approximate values.
Preparation Time
Prep Time: 15 minutes
Cook Time: 0 minutes
Total Time: 30 minutes
Make-Ahead and Storage Tips
These peanut butter cups are the perfect make-ahead treat. You can store them in an airtight container in the fridge for up to 2 weeks. They also freeze beautifully just wrap them individually and store in a zip-top bag. To enjoy, thaw for a few minutes at room temperature for the best texture.
How to Serve Peanut Butter Cups
Serve them cold for that satisfying snap or let them sit for a minute for a softer bite. They’re great on dessert platters, packed in lunchboxes, or nestled into holiday gift boxes. You can also crumble them over ice cream or stir into brownies for an extra treat.
Creative Leftover Transformations
Got extras? (Lucky you.)
- Chop and mix into cookie dough for peanut butter cup cookies.
- Use as a topping for frozen yogurt or ice cream sundaes.
- Blend into a milkshake for the ultimate chocolate-peanut indulgence.
Additional Tips
- To keep the layers sharp, chill each one before adding the next.
- For a cleaner finish, wipe the edges of the liners after spreading chocolate.
- Want a nut-free version? Try sunflower seed butter or oat butter.
Make It a Showstopper
Presentation counts, especially for gifting or parties. Use gold foil cupcake liners for a luxe look, drizzle the tops with melted white chocolate, or sprinkle crushed peanuts on top. Stack them neatly on a cake stand or tray for an irresistible display.
Variations to Try
- Crunchy Peanut Butter Cups: Add crushed graham crackers or chopped peanuts to the filling.
- Dark Chocolate Sea Salt: Use 70% dark chocolate and top with flaky sea salt.
- White Chocolate Twist: Replace semi-sweet chocolate with white chocolate for a sweeter version.
- Layered Swirl Cups: Mix milk and dark chocolate layers for a marbled effect.
- Mini Cups: Use a mini muffin tin for perfect bite-sized versions.
FAQ’s
Q1. Can I use natural peanut butter?
Yes, but make sure it’s well-stirred and not too oily. You may need to chill the filling longer.
Q2. How long do they last in the fridge?
Up to two weeks in an airtight container.
Q3. Can I make them vegan?
Absolutely. Use dairy-free chocolate and vegan butter.
Q4. Can I freeze them?
Yes. Freeze in a single layer, then transfer to a bag. Thaw before eating.
Q5. What if I don’t have liners?
Lightly grease the muffin tin or use silicone molds.
Q6. Can I use white sugar instead of powdered?
Not recommended. Powdered sugar gives the filling its smooth, creamy texture.
Q7. Are these gluten-free?
Yes, all the ingredients are naturally gluten-free. Just check your chocolate.
Q8. How do I keep the chocolate from getting dull?
Tempering helps, but simply not overheating the chocolate goes a long way.
Q9. Can I add flavors to the filling?
Sure! Try cinnamon, espresso powder, or a drop of maple extract.
Q10. How do I prevent chocolate from seizing?
Avoid water contact, and melt slowly and gently.
Conclusion
Homemade peanut butter cups are one of those sweet treats that feel just as special to make as they do to eat. Whether you’re whipping up a batch for the holidays or just because you need a chocolate fix, these are guaranteed to please. Trust me, you’re going to love this every bite is worth it.
Print
Peanut Butter Cups
These homemade peanut butter cups are rich, chocolatey, and filled with a creamy peanut butter center. They’re easy to make, perfectly sweet and salty, and better than store-bought.
- Total Time: 30 minutes
- Yield: 12 peanut butter cups 1x
Ingredients
- 2 cups semi-sweet chocolate chips
- 1 cup creamy peanut butter
- 1/2 cup powdered sugar
- 2 tablespoons softened butter
- 1 teaspoon vanilla extract
- A pinch of salt
Instructions
- Line a muffin tin with paper or silicone liners.
- In a bowl, mix the peanut butter, powdered sugar, softened butter, vanilla extract, and salt until smooth.
- Melt the chocolate chips in a microwave-safe bowl in 30-second intervals, stirring between each until smooth.
- Spoon a teaspoon of melted chocolate into each muffin liner and spread slightly. Chill for 5–10 minutes.
- Add a scoop of the peanut butter mixture on top of the chocolate layer and flatten slightly.
- Top with more melted chocolate to cover the peanut butter. Tap gently to smooth.
- Chill the cups until completely set, about 20 minutes.
- Remove from liners and enjoy.
Notes
- Use silicone liners for easy removal.
- Chill each layer for cleaner layers.
- Sprinkle sea salt on top for extra flavor.
- Store in the fridge or freezer for longer shelf life.
- Prep Time: 15 minutes
- Cook Time: 0 minutes
- Category: Dessert
- Method: No-Bake
- Cuisine: American
- Diet: Vegetarian
Nutrition
- Serving Size: 1 peanut butter cup
- Calories: 240
- Sugar: 18g
- Sodium: 90mg
- Fat: 16g
- Saturated Fat: 7g
- Unsaturated Fat: 8g
- Trans Fat: 0g
- Carbohydrates: 22g
- Fiber: 2g
- Protein: 4g
- Cholesterol: 5mg
Keywords: homemade peanut butter cups, no-bake chocolate dessert, easy candy recipe, chocolate peanut butter treats