Pickled Veggies
There’s something undeniably satisfying about the crunch of a well-pickled vegetable. Whether it’s a tangy carrot, a briny cucumber, or a peppery radish, pickled veggies bring life to any meal with their bold, zesty flavors and vibrant colors. This recipe is more than just a mix of vegetables in vinegar it’s a celebration of flavor, texture, and old-world technique made beautifully simple for today’s kitchen.
Behind the Recipe
Growing up, there was always a jar of homemade pickles sitting on the kitchen counter, the lid barely sealed as the brine worked its magic. My grandmother used whatever vegetables were in season, tossing them together in a large glass jar with garlic, herbs, and vinegar. The aroma would hit you as soon as you walked through the door. This recipe is inspired by those memories a comforting, colorful mix of veggies, all pickled to crunchy perfection.
Recipe Origin or Trivia
Pickling vegetables has deep roots in many cultures, from Middle Eastern torshi to Korean kimchi and Eastern European pickled beets. It’s one of the oldest food preservation methods in the world, with records dating back thousands of years. What makes this method so special is how it not only extends shelf life but also transforms ordinary vegetables into something extraordinary crunchy, sour, salty, and sometimes even a little spicy.
Why You’ll Love Pickled Veggies
There’s no shortage of reasons to fall in love with this crisp and colorful medley. Let’s take a closer look:
Versatile: Add them to sandwiches, serve alongside grilled meats, or enjoy them straight from the jar.
Budget-Friendly: Made with simple pantry staples and seasonal vegetables, it’s a low-cost way to elevate meals.
Quick and Easy: Minimal prep and no canning required just chop, boil, pour, and wait.
Customizable: Swap in your favorite veggies or adjust the spice level to suit your taste.
Crowd-Pleasing: They’re always a hit at gatherings, picnics, and BBQs.
Make-Ahead Friendly: Prepare a big batch and let them sit they only get better with time.
Great for Leftovers: Got extra carrots, celery, or radishes? Pickle them and give them a new life.
Chef’s Pro Tips for Perfect Results
If you want your pickled veggies to be unforgettable, keep these pro tips in mind:
- Use Fresh Veggies: The crisper the vegetable, the better the texture after pickling. Soft or wilted veggies won’t hold up.
- Cut Evenly: Slice vegetables into similar sizes and thickness to ensure even pickling.
- Boil the Brine: Always bring the vinegar mixture to a boil before pouring it over the vegetables to help them absorb flavor faster.
- Cool Before Storing: Let the jars cool to room temperature before refrigerating to avoid condensation.
- Wait Before Eating: For best flavor, give the veggies at least 24–48 hours to soak in the brine.
Kitchen Tools You’ll Need
Making pickled veggies is a breeze when your kitchen is ready. Here’s what you’ll need:
Sharp Knife: For clean and even slicing of your veggies.
Cutting Board: To chop everything safely and efficiently.
Medium Saucepan: To boil the brine mixture.
Large Mason Jars or Glass Containers: For storing your pickled vegetables.
Measuring Cups and Spoons: Accuracy matters when balancing vinegar, sugar, and salt.
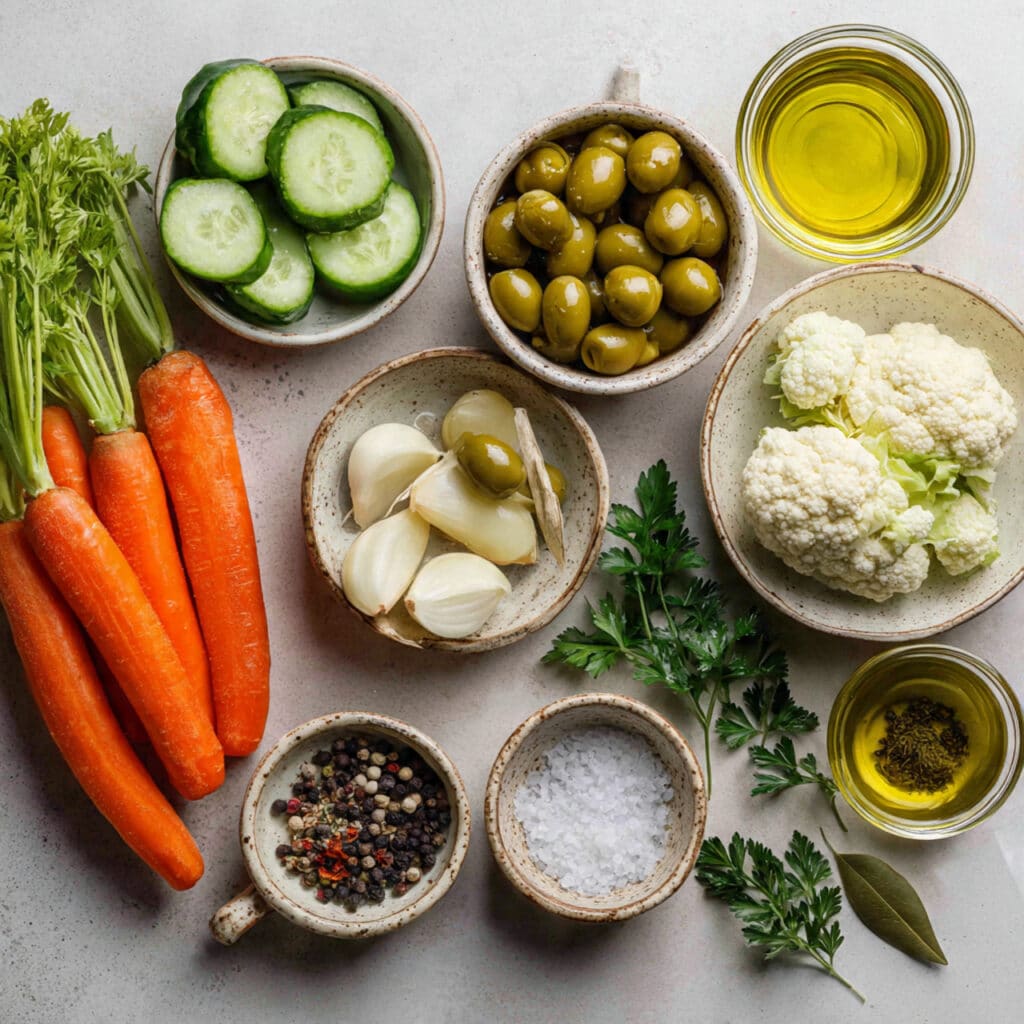
Ingredients in Pickled Veggies
These simple ingredients come together to create a tangy, crunchy mix that’s full of personality.
- Carrots: 1 cup, peeled and sliced into coins. Adds sweetness and crunch.
- Cucumbers: 1 cup, sliced or speared. Brings a refreshing, classic pickle vibe.
- Radishes: ½ cup, thinly sliced. Offers a peppery note and bright pink hue.
- Celery: ½ cup, chopped. Adds a nice herbal bite.
- Cauliflower Florets: ½ cup, chopped into small pieces. Absorbs brine like a sponge.
- Green Olives: ¼ cup, whole. Briny and rich, adds a Mediterranean touch.
- Garlic Cloves: 2–3 cloves, peeled. Infuses the brine with bold flavor.
- White Vinegar: 2 cups. The acidic backbone of the brine.
- Water: 1 cup. Helps mellow out the sharpness of the vinegar.
- Sugar: 2 tablespoons. Balances the acidity.
- Salt: 1 tablespoon. Essential for both taste and preservation.
- Bay Leaf: 1 leaf. Adds subtle depth and aroma.
- Whole Black Peppercorns: 1 teaspoon. For a gentle heat and spice.
- Fresh Parsley: A handful. Used for garnish and a fresh finish.
Ingredient Substitutions
Sometimes your fridge is missing an item or two. Here’s how to pivot without losing flavor.
White Vinegar: Apple cider vinegar.
Carrots: Daikon or parsnips.
Cucumbers: Zucchini or green beans.
Radishes: Turnips or red onions.
Sugar: Honey or maple syrup.
Salt: Pickling salt or kosher salt.
Garlic: Shallots or garlic powder (in small amount).
Ingredient Spotlight
Vinegar: This sharp liquid isn’t just for tang it’s the preservative that gives pickles their iconic punch and extends their shelf life.
Garlic: A few cloves go a long way. Garlic infuses the brine with a subtle pungency that keeps you coming back for more.
Instructions for Making Pickled Veggies
This process is as fun as it is simple. Let’s walk through it together.
- Preheat Your Equipment:
Sterilize your mason jars with hot water and set them aside to dry completely. - Combine Ingredients:
In a saucepan, combine white vinegar, water, sugar, salt, bay leaf, and peppercorns. Bring to a boil, then let simmer for 2 minutes. - Prepare Your Cooking Vessel:
While the brine is simmering, pack your sliced vegetables, garlic, and olives into your sterilized jars. - Assemble the Dish:
Carefully pour the hot brine over the vegetables in the jars, making sure they are fully submerged. - Cook to Perfection:
Tap the jars lightly to remove any air bubbles. Seal the jars with tight-fitting lids. - Finishing Touches:
Let jars cool to room temperature. Add fresh parsley right before sealing, if desired. - Serve and Enjoy:
Store in the refrigerator for at least 24 hours before tasting. The flavor deepens over time.
Texture & Flavor Secrets
It’s all about the contrast. You want that crisp snap when you bite into a carrot and the juicy tang of a cucumber soaked in brine. The vinegar brings sharpness, while the sugar softens it. Peppercorns add warmth, garlic adds depth, and parsley brings a bright, herby finish.
Cooking Tips & Tricks
Every batch of pickled veggies is a new adventure. Here are a few things to keep in mind:
- Always use clean, dry jars to avoid spoilage.
- Pack the jars tightly to prevent floating veggies.
- If you like a little heat, add a slice of jalapeño or chili flake to each jar.
- Use a funnel to pour brine and avoid spills or messes.
What to Avoid
Let’s dodge the common missteps so your pickles turn out perfect.
- Avoid using iodized salt it can cloud the brine and affect taste.
- Don’t skip the cooling step before refrigerating.
- Don’t use soft or overripe veggies they’ll turn mushy.
- Avoid overcrowding the jar brine needs space to circulate.
Nutrition Facts
Servings: 6
Calories per serving: 35
Note: These are approximate values.
Preparation Time
Prep Time: 15 minutes
Cook Time: 5 minutes
Total Time: 20 minutes (plus marinating time)
Make-Ahead and Storage Tips
Pickled veggies were practically made for prepping ahead. In fact, they taste even better the next day. Store them in the refrigerator for up to 3 weeks. Just make sure the vegetables stay submerged in the brine. You can also freeze the brine separately for future batches.
How to Serve Pickled Veggies
Pickled vegetables are as versatile as they come. Serve them with grilled meats, pile them into sandwiches, or pair them with cheese boards. They also shine on their own as a snack or side dish with warm pita and hummus.
Creative Leftover Transformations
Don’t toss the extras repurpose them creatively.
- Chop them up and mix into a potato or pasta salad.
- Use the brine as a tangy base for salad dressing.
- Top your next burger or hot dog with a crunchy medley.
Additional Tips
- Add a sprig of dill or thyme to customize the herbal profile.
- Layer veggies by color for an eye-catching presentation.
- Label your jars with the date and ingredients for easy rotation.
Make It a Showstopper
Use clear glass jars to show off the vibrant layers of color. Garnish the top with fresh herbs and label each jar with a rustic tag or handwritten sticker. It’s a feast for the eyes before anyone takes a bite.
Variations to Try
- Spicy Pickles: Add chili flakes or a jalapeño to each jar.
- Middle Eastern Style: Add cumin seeds, coriander, and a clove of garlic.
- Sweet Pickles: Increase the sugar and add cloves or cinnamon.
- Asian-Inspired: Use rice vinegar and add a touch of soy sauce or ginger.
- Beet Pickles: Add thin slices of beets for a rich pink hue and earthy flavor.
FAQ’s
Q1: How long do pickled veggies last in the fridge?
They’ll stay fresh for up to 3 weeks if kept submerged in brine.
Q2: Can I use apple cider vinegar instead of white vinegar?
Yes, but expect a slightly sweeter, fruitier flavor.
Q3: Are these pickles safe to can for long-term storage?
This recipe is intended for refrigerator pickling only.
Q4: Can I reuse the brine for another batch?
It’s best to make fresh brine each time for food safety and taste.
Q5: Can I skip the sugar?
Yes, but the sugar helps balance the sharpness of the vinegar.
Q6: Do I need to peel the carrots and cucumbers?
Peeling is optional, but it can help them absorb flavor better.
Q7: Why did my brine turn cloudy?
It could be due to impurities in salt or veggies. Use kosher salt and fresh produce.
Q8: Can I add herbs like dill or oregano?
Absolutely. Herbs add a great flavor twist.
Q9: Are pickled veggies good for gut health?
While they don’t contain probiotics like fermented pickles, they are low-cal and flavorful.
Q10: Can I pickle frozen vegetables?
It’s not recommended the texture becomes mushy.
Conclusion
Whether you’re topping a sandwich or building the perfect mezze platter, these pickled veggies bring color, crunch, and zing to the table. Trust me, you’re going to love this. Once you make your first batch, you’ll wonder how you ever lived without a jar of these beauties in your fridge.
Print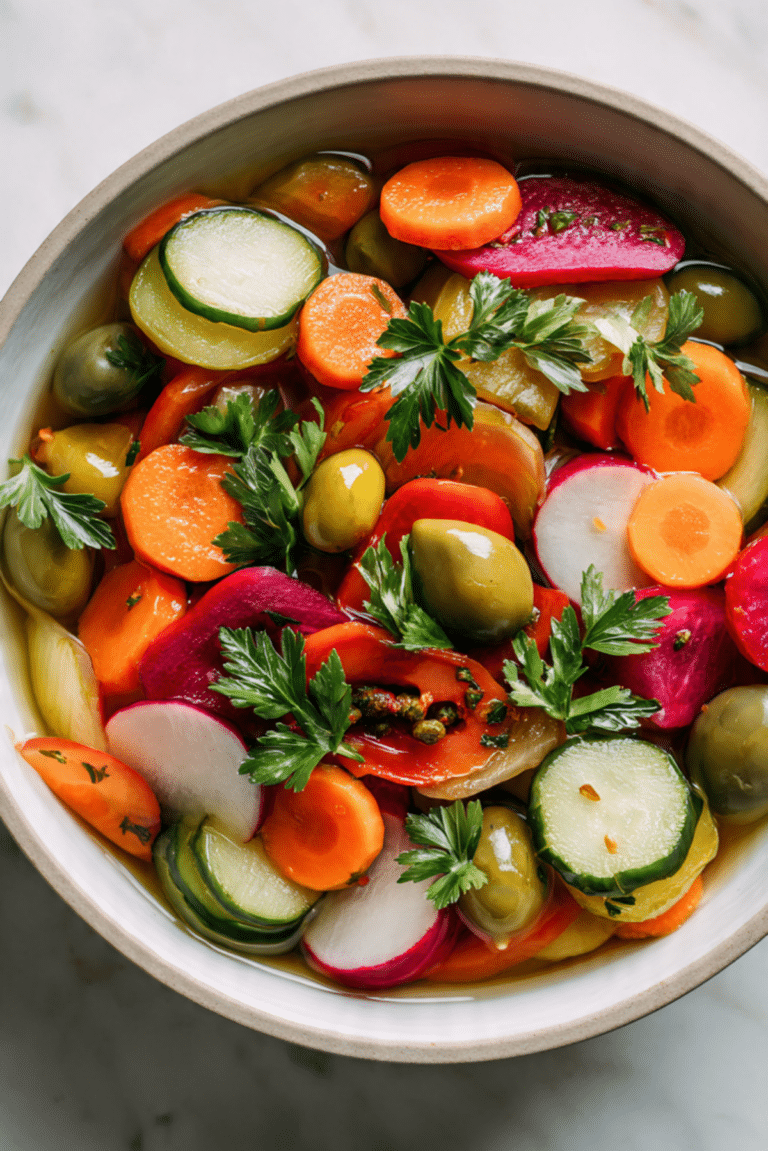
Pickled Veggies
A colorful, crunchy medley of quick pickled veggies, perfect as a zesty snack or flavorful side. Packed with vinegar tang and garden-fresh goodness.
- Total Time: 20 minutes
- Yield: 6 servings 1x
Ingredients
- 1 cup carrots, peeled and sliced into coins
- 1 cup cucumbers, sliced
- 1/2 cup radishes, thinly sliced
- 1/2 cup celery, chopped
- 1/2 cup cauliflower florets
- 1/4 cup green olives, whole
- 2–3 garlic cloves, peeled
- 2 cups white vinegar
- 1 cup water
- 2 tablespoons sugar
- 1 tablespoon salt
- 1 bay leaf
- 1 teaspoon whole black peppercorns
- Fresh parsley, for garnish
Instructions
- Sterilize your mason jars using hot water and set them aside to dry.
- In a saucepan, combine white vinegar, water, sugar, salt, bay leaf, and peppercorns. Bring to a boil and simmer for 2 minutes.
- While brine is simmering, pack vegetables, garlic, and olives into the jars.
- Carefully pour hot brine over the veggies, ensuring they’re fully submerged.
- Tap jars gently to remove air bubbles and seal with lids.
- Let jars cool to room temperature. Add parsley just before sealing if desired.
- Refrigerate for at least 24 hours before enjoying.
Notes
- Use kosher or pickling salt to avoid cloudy brine.
- Add chili flakes for a spicier kick.
- Layer by color for a beautiful presentation.
- These pickles last up to 3 weeks in the refrigerator.
- Prep Time: 15 minutes
- Cook Time: 5 minutes
- Category: Side Dish
- Method: Refrigerator Pickling
- Cuisine: Middle Eastern
- Diet: Vegetarian
Nutrition
- Serving Size: 1/2 cup
- Calories: 35
- Sugar: 3g
- Sodium: 290mg
- Fat: 0g
- Saturated Fat: 0g
- Unsaturated Fat: 0g
- Trans Fat: 0g
- Carbohydrates: 7g
- Fiber: 2g
- Protein: 1g
- Cholesterol: 0mg
Keywords: pickled vegetables, quick pickles, refrigerator pickles, easy pickling recipe, tangy veggies