Espresso Brownie Cookies
Espresso Brownie Cookies are the kind of treat that makes the kitchen feel cozy before the first bite even happens. The chocolate melts into a deep, glossy batter, the espresso wakes everything up, and by the time these cookies come out of the oven with crackly tops and soft middles, you already know they are going to disappear fast.
They have that brownie-style richness, but in cookie form, which means crisp edges, fudgy centers, and just enough flaky salt on top to make the chocolate taste even deeper. Trust me, you’re going to love this, especially if you like desserts that feel a little bakery-style without needing a complicated afternoon.
Why These Cookies Feel Like a Little Chocolate Bakery Moment
There is something special about a cookie that looks simple but tastes layered. These cookies start with melted chocolate and butter, then get lifted by espresso powder, which does not make them taste like a cup of coffee. Instead, it makes the cocoa taste darker, warmer, and more intense.
And now let’s step into the little story behind this kind of dessert, because once you understand why chocolate and espresso work so well together, the recipe becomes even more fun to make.
A Sweet Little Bit of Cookie and Brownie History
Brownies have been loved in American baking for more than a century, usually because they sit in that perfect place between cake and fudge. Cookies, of course, have always been the easy treat we reach for when we want something shareable and comforting.
This recipe blends both worlds. It borrows the glossy crackled top from classic brownies and the handheld ease of a cookie. Espresso has long been used by bakers to deepen chocolate flavor, especially in cakes, brownies, and truffles. Here, it slips quietly into the dough and makes every bite taste richer without stealing the spotlight.
Why This Recipe Earns a Spot in Your Dessert Rotation
Before we start pulling out bowls and chocolate, it helps to know why this one’s a total game-changer. These cookies feel special, but the process stays friendly and doable.
Versatile: You can serve them after dinner, pack them for a party, or enjoy one with a glass of milk or warm tea. They fit almost every cozy dessert moment.
Budget-Friendly: The ingredients are simple pantry staples, with chocolate and espresso powder doing most of the flavor work. You get bakery-style results without buying anything fancy.
Quick and Easy: The dough comes together fast, and the cookies bake in minutes. A short chill helps the texture, but the recipe still feels easy enough for a weeknight.
Customizable: You can add chocolate chunks, a pinch of cinnamon, or a little extra flaky salt. Small changes make the cookies feel new each time.
Crowd-Pleasing: Chocolate lovers will be hooked by the fudgy center and crackly top. Let me tell you, it’s worth every bite.
Make-Ahead Friendly: The dough can be chilled ahead, which makes baking fresh cookies even easier when you need them.
Great for Leftovers: These cookies stay soft and rich for days when stored properly. They are also amazing crumbled over ice cream.
Little Chef Tips for That Fudgy Brownie Texture
Now that you know why these cookies are so lovable, let’s talk about the small details that make them really shine. These are the little kitchen moves that turn a good cookie into a cookie people ask about later.
- Whip the eggs and sugars well: This helps create that shiny, crackly brownie top. Give the mixture enough time to look lighter and slightly thick.
- Use good chocolate: Since chocolate is the main flavor, choose a semi-sweet chocolate bar or chips that taste good on their own.
- Do not overbake: The centers should look slightly soft when you pull them out. They finish setting on the hot baking sheet.
- Chill the dough briefly: A short chill keeps the cookies from spreading too much and helps the texture stay fudgy.
- Add flaky salt at the end: It balances the sweetness and makes the chocolate taste deeper.
Tools That Make Baking Feel Easy
Once those tips are tucked in your apron pocket, it is time to gather the tools. Nothing complicated here, just the basics that help the dough come together smoothly.
Mixing Bowls: You will need one for melting the chocolate mixture and one for whisking the eggs and sugars.
Electric Mixer or Whisk: An electric mixer makes the egg and sugar step easier, but a strong whisk works too.
Rubber Spatula: This helps fold the dry ingredients into the glossy batter without overmixing.
Baking Sheet: A sturdy baking sheet helps the cookies bake evenly.
Parchment Paper: This keeps the cookies from sticking and makes cleanup simple.
Cookie Scoop: A scoop helps make cookies that are the same size, which means they bake evenly.
Cooling Rack: This lets the cookies firm up without getting soggy underneath.
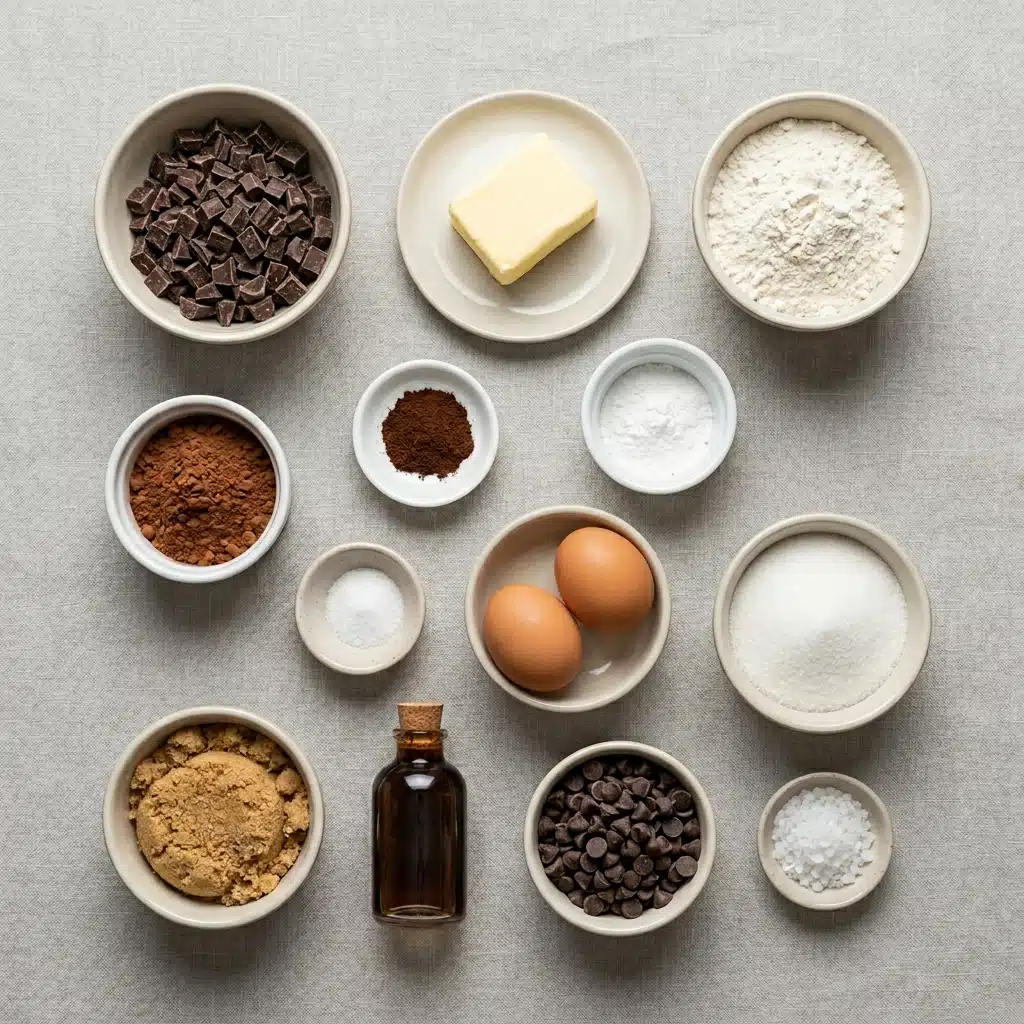
Ingredients You Will Need for the Best Chocolate Espresso Cookies
Now we get to the heart of the recipe. Each ingredient has a job, and together they create cookies that are chewy at the edges, soft in the center, and deeply chocolatey.
- Semi-Sweet Chocolate: 8 ounces, chopped, gives the cookies their rich brownie-like base and glossy texture.
- Unsalted Butter: 1/4 cup, melted with the chocolate for smoothness and flavor.
- All-Purpose Flour: 1/2 cup, gives the cookies structure while keeping them soft.
- Unsweetened Cocoa Powder: 2 tablespoons, adds extra chocolate depth.
- Instant Espresso Powder: 1 tablespoon, boosts the chocolate flavor and adds a warm roasted note.
- Baking Powder: 1/2 teaspoon, helps the cookies puff slightly.
- Fine Salt: 1/4 teaspoon, balances the sweetness in the dough.
- Large Eggs: 2, help create the shiny tops and fudgy middle.
- Granulated Sugar: 1/2 cup, helps with sweetness and crackly tops.
- Light Brown Sugar: 1/4 cup, adds moisture and a soft chew.
- Vanilla Extract: 1 teaspoon, rounds out the chocolate and espresso flavor.
- Chocolate Chips: 1/2 cup, add melty pockets throughout the cookies.
- Flaky Sea Salt: 1/2 teaspoon, sprinkled on top for a beautiful finish and balanced flavor.
Easy Ingredient Swaps That Still Taste Wonderful
If your pantry is missing one little thing, do not panic. This recipe has a little wiggle room, and these swaps keep the cookies delicious.
Semi-Sweet Chocolate: Dark chocolate can be used for a more intense flavor.
Unsalted Butter: Salted butter works if you reduce the fine salt to a small pinch.
All-Purpose Flour: A 1 to 1 gluten-free baking flour can work, though the texture may be slightly more delicate.
Instant Espresso Powder: Instant coffee powder can be used, but the flavor will be a little softer.
Light Brown Sugar: Dark brown sugar gives a deeper molasses note and chewier texture.
Chocolate Chips: Chopped chocolate chunks can make the cookies feel extra bakery-style.
The Ingredients That Make These Cookies Shine
Now let’s pause for the stars of the bowl, because two ingredients really carry this dessert from simple to memorable.
Semi-Sweet Chocolate: This is where the brownie feeling begins. Melted into the butter, it gives the dough a rich, silky base and helps create that soft center.
Instant Espresso Powder: Espresso powder is the quiet helper here. It deepens the chocolate without making the cookies taste too bitter or too strong.
How to Bake Them Step by Step
And now let’s dive into the baking part. The process is simple, but each step builds texture, shine, and flavor, so take your time and enjoy the chocolatey little journey.
- Preheat Your Equipment: Preheat the oven to 350°F. Line a baking sheet with parchment paper so the cookies lift cleanly after baking.
- Combine Ingredients: Melt the semi-sweet chocolate and unsalted butter together in a heat-safe bowl, stirring until smooth. In another bowl, whisk the flour, cocoa powder, espresso powder, baking powder, and fine salt.
- Prepare Your Cooking Vessel: In a large bowl, beat the eggs, granulated sugar, light brown sugar, and vanilla extract for about 2 to 3 minutes, until the mixture looks lighter and slightly thick. This helps create that brownie-style crackle.
- Assemble the Dish: Pour the melted chocolate mixture into the egg mixture and fold gently until glossy. Add the dry ingredients and fold just until combined, then fold in the chocolate chips. Chill the dough for 20 minutes so it thickens slightly.
- Cook to Perfection: Scoop the dough into 2 tablespoon portions and place them about 2 inches apart on the baking sheet. Bake for 9 to 11 minutes, until the edges are set and the centers still look soft.
- Finishing Touches: Sprinkle the warm cookies with flaky sea salt right after baking. Let them rest on the baking sheet for 10 minutes so the centers finish setting.
- Serve and Enjoy: Move the cookies to a cooling rack, then enjoy them slightly warm for the fudgiest bite. The chocolate will be soft, the tops will be crackly, and the flavor will feel rich and cozy.
How the Texture and Flavor Come Together
The magic happens when the melted chocolate meets whipped eggs and sugar. That combination gives the cookies their brownie-like tops, while the small amount of flour keeps the centers dense and fudgy instead of cakey.
As they bake, the edges set first and turn lightly chewy. The middle stays soft, almost like a bite of brownie tucked inside a cookie shell. The espresso adds warmth, the cocoa adds darkness, and the sea salt wakes everything up at the finish.
Helpful Baking Tips for Better Cookies
By now, your kitchen probably smells like chocolate and roasted espresso, which is the best kind of warning that something good is coming. Here are a few extra tips to keep the cookies on track.
- Use room temperature eggs: They whip better with the sugars and help the batter turn glossy.
- Scoop evenly: Similar-sized cookies bake at the same speed and look prettier on the plate.
- Let them cool before moving: Freshly baked cookies are soft and need time to firm up.
- Bake one test cookie first: If the dough spreads too much, chill it for another 10 minutes.
Mistakes to Skip for Better Results
Even easy cookies have a few sneaky spots where things can go sideways. The good news is that every issue has a simple fix.
- Overbaking the cookies: Pull them out when the centers still look soft. They will set as they cool.
- Skipping the chill time: The dough may spread too much without a short rest in the fridge.
- Overmixing after adding flour: This can make the cookies tougher. Fold gently and stop when no dry streaks remain.
- Using hot melted chocolate: Let it cool slightly before adding it to the eggs so the mixture stays smooth.
Nutrition Facts for Each Fudgy Cookie
Servings: 18 cookies
Calories per serving: 165
Note: These are approximate values.
Timing for This Chocolatey Bake
Prep Time: 25 minutes
Cook Time: 10 minutes
Total Time: 35 minutes
Make-Ahead and Storage Tips
These cookies are perfect for planning ahead, which makes them extra handy for parties, holidays, or a random Wednesday chocolate craving.
You can make the dough up to 24 hours ahead and keep it covered in the fridge. Let it sit at room temperature for a few minutes before scooping if it becomes too firm. Baked cookies keep well in an airtight container at room temperature for up to 4 days.
For longer storage, freeze the baked cookies for up to 2 months. Let them thaw at room temperature, then warm them for a few seconds in the microwave if you want that fresh-baked softness. You can also freeze scooped dough balls and bake from frozen, adding 1 to 2 extra minutes to the bake time.
How to Serve These Cookies
These cookies are lovely on their own, but they also know how to dress up a dessert plate. Serve them with cold milk, hot coffee, or a scoop of vanilla ice cream.
For a cozy dessert board, pair them with fresh berries, chocolate-dipped pretzels, and a few soft caramels. If you want something simple but gorgeous, stack them on a small plate and sprinkle just a touch of flaky salt over the top right before serving.
Creative Leftover Cookie Ideas
If you somehow have leftovers, they can turn into something new and fun. Crumble them over ice cream for an easy sundae, or press broken pieces into a yogurt parfait with berries.
You can also chop them and fold them into brownie batter, cookie bars, or a milkshake. They bring that deep chocolate flavor into anything they touch.
Additional Tips for Freshness and Flavor
For the best flavor, let the cookies cool for at least 15 minutes before eating. That short wait gives the chocolate time to settle and the texture time to become fudgy.
Store them with a small piece of parchment between layers if stacking. If you like a softer cookie, place a slice of sandwich bread in the container overnight, then remove it the next day.
Make It a Showstopper
Presentation is simple here because the cookies already look dramatic with their dark crackled tops. A round gray plate, a light sprinkle of flaky salt, and a clean white table make them look bakery-ready.
For parties, stack them in a slightly uneven pile so the crinkles and chocolate chips show. Add a small bowl of whipped cream or vanilla ice cream nearby if you want a dessert that feels extra special.
Variations to Try
- Double Chocolate Chunk: Replace the chocolate chips with chopped dark chocolate for bigger melted pockets.
- Salted Caramel Style: Add soft caramel bits to the dough and finish with flaky sea salt.
- Peppermint Chocolate: Add 1/4 teaspoon peppermint extract for a holiday-style cookie.
- Mocha Cinnamon: Add 1/4 teaspoon ground cinnamon for warmth.
- Nutty Chocolate: Fold in 1/3 cup chopped toasted walnuts or pecans for crunch.
FAQ’s
Q1: Can I make these cookies without espresso powder?
A1: Yes, you can leave it out. The cookies will still taste chocolatey, but the flavor will be a little less deep.
Q2: Do these cookies taste strongly like coffee?
A2: Not really. The espresso powder mostly boosts the chocolate flavor and adds a warm background note.
Q3: Why are my cookies not shiny on top?
A3: The eggs and sugars may not have been beaten long enough. Whipping them until lighter and slightly thick helps create that crackly brownie top.
Q4: Can I chill the dough overnight?
A4: Yes, overnight chilling works well. Let the dough soften slightly before scooping.
Q5: Can I freeze the dough?
A5: Yes, scoop the dough into portions, freeze on a tray, then store in a freezer bag. Bake from frozen and add 1 to 2 minutes.
Q6: Why did my cookies spread too much?
A6: The dough may have been too warm. Chill it longer before baking, especially if your kitchen is warm.
Q7: Can I use chocolate chips instead of chopped chocolate for melting?
A7: Yes, but chopped chocolate usually melts smoother. Use good-quality chips if that is what you have.
Q8: How do I keep the centers fudgy?
A8: Do not overbake them. Pull the cookies out when the centers still look soft.
Q9: Can I make them smaller?
A9: Yes, use a 1 tablespoon scoop and bake for about 7 to 8 minutes.
Q10: What is the best way to reheat them?
A10: Warm one cookie in the microwave for about 8 to 10 seconds. It brings back that soft, fudgy texture.
Conclusion
Espresso Brownie Cookies bring together everything we love about brownies and cookies in one rich, fudgy, crackly little treat. They are easy enough for a casual baking day but special enough to share, stack, and show off. Bake a batch, let the chocolate aroma fill the kitchen, and enjoy every soft, salty, deeply chocolatey bite.
Print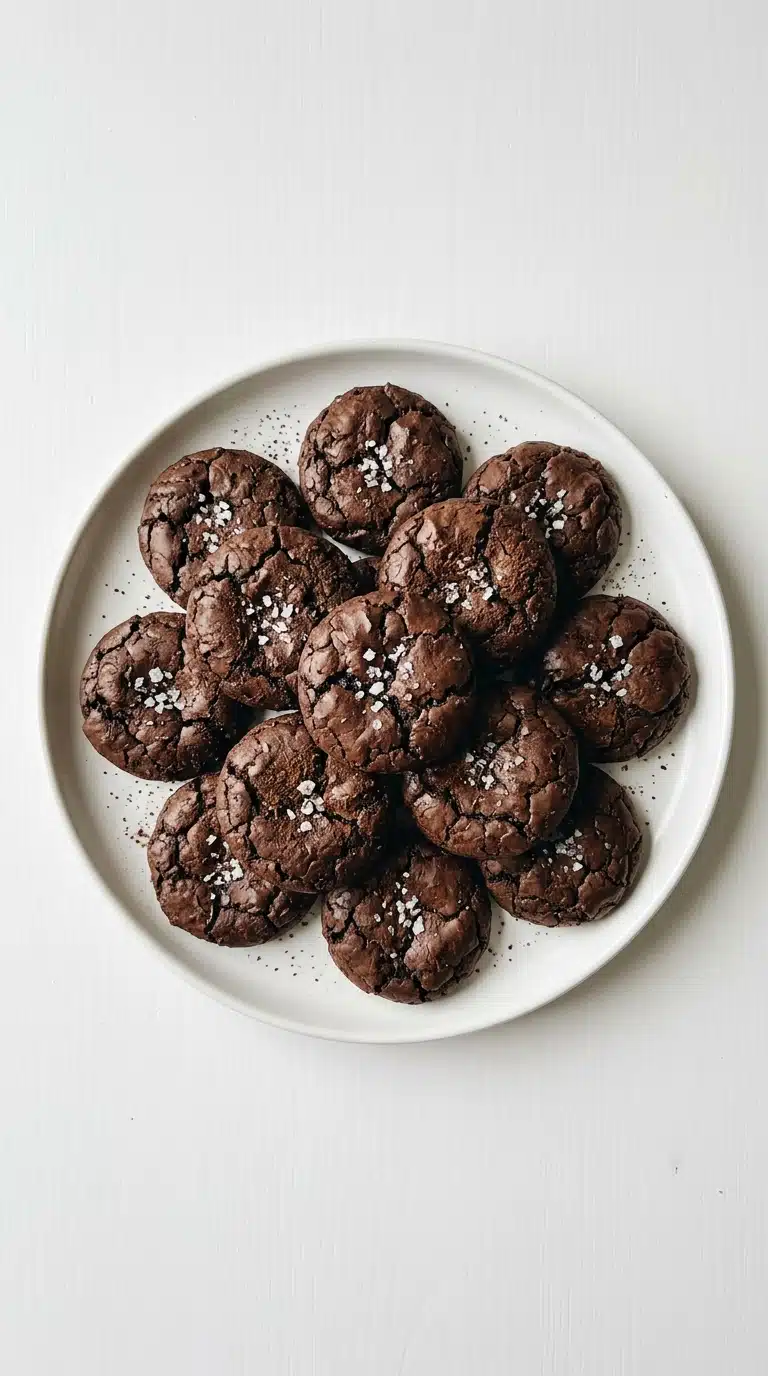
Espresso Brownie Cookies
Rich, fudgy chocolate cookies with crackly brownie-style tops, deep espresso flavor, melty chocolate chips, and a light sprinkle of flaky sea salt.
- Total Time: 35 minutes
- Yield: 18 cookies 1x
Ingredients
- 8 ounces semi-sweet chocolate, chopped
- 1/4 cup unsalted butter
- 1/2 cup all-purpose flour
- 2 tablespoons unsweetened cocoa powder
- 1 tablespoon instant espresso powder
- 1/2 teaspoon baking powder
- 1/4 teaspoon fine salt
- 2 large eggs
- 1/2 cup granulated sugar
- 1/4 cup light brown sugar
- 1 teaspoon vanilla extract
- 1/2 cup chocolate chips
- 1/2 teaspoon flaky sea salt
Instructions
- Preheat the oven to 350°F and line a baking sheet with parchment paper.
- Melt the semi-sweet chocolate and unsalted butter together until smooth, then let the mixture cool slightly.
- In a small bowl, whisk together the flour, cocoa powder, espresso powder, baking powder, and fine salt.
- In a large bowl, beat the eggs, granulated sugar, light brown sugar, and vanilla extract for 2 to 3 minutes, until lighter and slightly thick.
- Fold the melted chocolate mixture into the egg mixture until glossy.
- Add the dry ingredients and fold just until combined, then fold in the chocolate chips.
- Chill the dough for 20 minutes.
- Scoop the dough into 2 tablespoon portions and place them 2 inches apart on the prepared baking sheet.
- Bake for 9 to 11 minutes, until the edges are set and the centers still look soft.
- Sprinkle with flaky sea salt, cool on the baking sheet for 10 minutes, then transfer to a cooling rack.
Notes
- Do not overbake, the cookies finish setting as they cool.
- Use good-quality chocolate for the richest flavor.
- Chill the dough a little longer if it feels too loose to scoop.
- Store in an airtight container at room temperature for up to 4 days.
- Prep Time: 25 minutes
- Cook Time: 10 minutes
- Category: Dessert
- Method: Baking
- Cuisine: American
- Diet: Vegetarian
Nutrition
- Serving Size: 1 cookie
- Calories: 165
- Sugar: 14g
- Sodium: 70mg
- Fat: 8g
- Saturated Fat: 5g
- Unsaturated Fat: 3g
- Trans Fat: 0g
- Carbohydrates: 22g
- Fiber: 2g
- Protein: 3g
- Cholesterol: 30mg
Keywords: espresso brownie cookies, chocolate espresso cookies, fudgy brownie cookies, mocha cookies, chocolate cookies