Red Velvet Cake
There’s something truly magical about a classic red velvet cake. That bold crimson crumb, the rich cocoa flavor, and the dreamy swirl of cream cheese frosting make it more than just a dessert. It’s a slice of joy, perfect for celebrations, quiet moments, and everything in between. Every time I make this, the aroma of vanilla and chocolate fills the kitchen and I know something special is on the way.
Behind the Recipe
This red velvet cake has a bit of nostalgia baked into it. I remember watching my grandmother whip it up for birthdays and holidays, always insisting that the secret was in the buttermilk. It was the cake everyone looked forward to, with its vibrant color and just-right sweetness. Over time, I’ve tweaked the recipe slightly, but the heart of it remains the same rich, tender, and impossible to resist.
Recipe Origin or Trivia
Red velvet cake has Southern roots, but its popularity quickly spread across the country, especially in the early 20th century. It’s believed to have gained traction thanks to the Adams Extract company, which marketed red food coloring and included recipes with their product. The cake’s color originally came from the natural reaction between cocoa and acidic ingredients, but modern versions use food coloring for that iconic red hue. Paired with cream cheese or ermine frosting, red velvet became a dessert staple at diners and bakeries alike.
Why You’ll Love Red Velvet Cake
Let me tell you, this one’s a total showstopper. Whether you’re baking it for a party or just a sweet craving, here’s why you’ll love it:
Versatile: Great for birthdays, holidays, or just a cozy weekend treat. It can be made as a layer cake, cupcakes, or even a trifle.
Budget-Friendly: Most ingredients are pantry staples, and even with the buttermilk and food coloring, it won’t break the bank.
Quick and Easy: With simple steps and easy-to-follow instructions, even beginner bakers can nail this.
Customizable: Want more cocoa? Less frosting? Swap the frosting flavor? Go ahead, it’s super adaptable.
Crowd-Pleasing: Everyone from kids to grandparents loves the unique flavor and stunning look.
Make-Ahead Friendly: Bake the cake layers ahead and store them until ready to frost.
Great for Leftovers: Stays moist for days and makes fantastic cake pops if you have leftovers.
Chef’s Pro Tips for Perfect Results
If you want that bakery-style finish and flavor, here are some tricks I always use:
- Use room temperature ingredients to ensure a smooth, even batter.
- Don’t overmix once the flour is added, to keep the cake tender.
- For an even rise, tap the filled pans gently on the counter before baking.
- Chill the cake layers before frosting to avoid crumbs mixing into the icing.
- Add a tiny pinch of salt to the frosting to balance out the sweetness.
Kitchen Tools You’ll Need
Let’s make sure you’ve got everything before you begin:
Mixing Bowls: For wet and dry ingredients, preferably in various sizes.
Electric Mixer: To cream the butter and sugar and blend the batter evenly.
Spatula: Helps fold and scrape the batter cleanly.
Cake Pans: Two 8-inch round pans work perfectly.
Wire Rack: Essential for cooling the cake layers evenly.
Offset Spatula or Piping Bag: For smooth or decorative frosting.
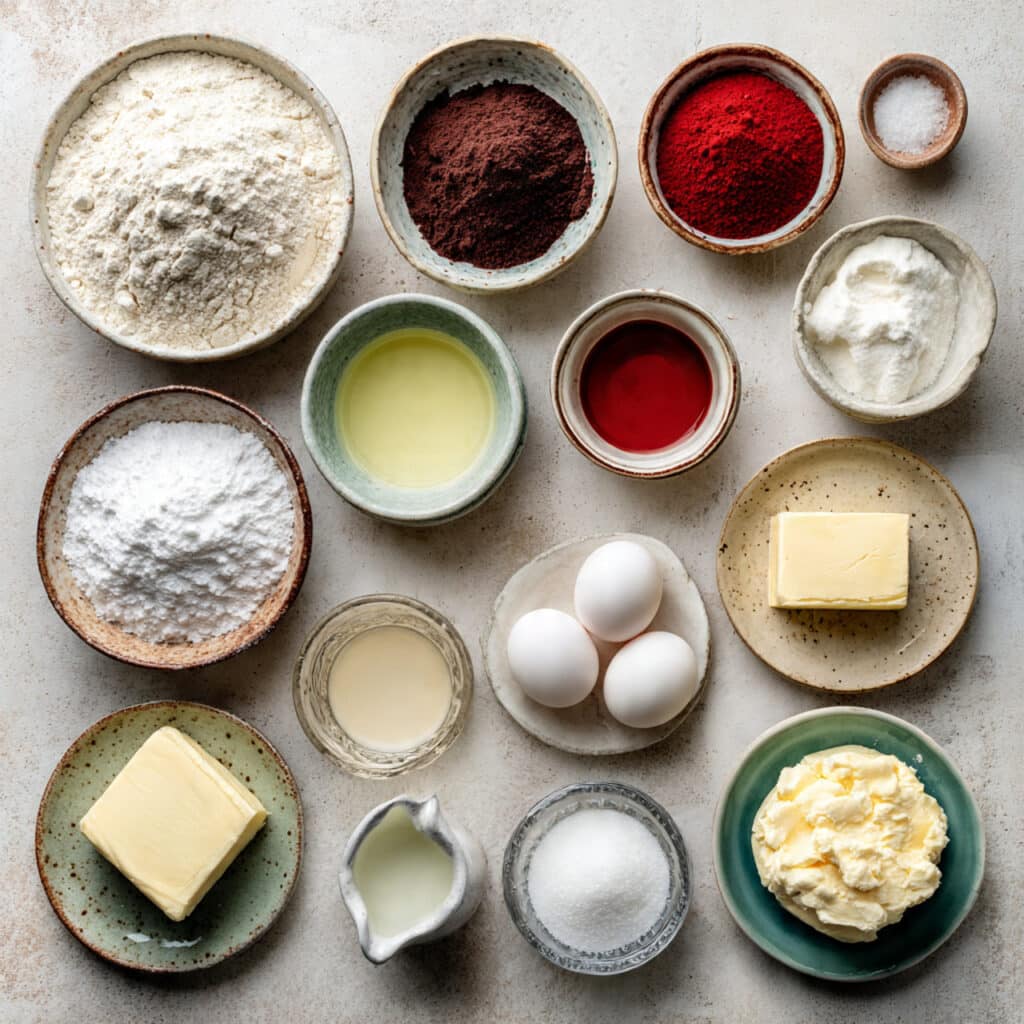
Ingredients in Red Velvet Cake
This ingredient list is what brings all the magic together. Each one has a role in building the flavor and texture we love:
- All-Purpose Flour: 2 ½ cups. Forms the structure of the cake, giving it stability without being too dense.
- Granulated Sugar: 1 ½ cups. Sweetens and tenderizes the crumb.
- Cocoa Powder: 2 tablespoons. Gives that subtle chocolate background.
- Baking Soda: 1 teaspoon. Helps the cake rise and stay fluffy.
- Salt: ½ teaspoon. Balances the sweetness and enhances flavor.
- Buttermilk: 1 cup. Adds moisture, tang, and reacts with baking soda.
- Vegetable Oil: 1 cup. Keeps the cake ultra moist and soft.
- Eggs: 2 large. Bind the batter and add richness.
- White Vinegar: 1 teaspoon. Reacts with baking soda for lift.
- Vanilla Extract: 2 teaspoons. Adds aroma and depth.
- Red Food Coloring: 2 tablespoons. Gives that bold red hue.
- Cream Cheese: 16 ounces. Key to the smooth, tangy frosting.
- Unsalted Butter: ½ cup (for frosting). Adds creaminess and stability.
- Powdered Sugar: 4 cups. Sweetens and thickens the frosting.
- Milk or Cream: 2–3 tablespoons. Adjusts frosting consistency if needed.
Ingredient Substitutions
Need to make a few changes? No problem.
Buttermilk: Use 1 cup milk mixed with 1 tablespoon lemon juice or vinegar.
Vegetable Oil: Canola oil or melted coconut oil work well too.
Cream Cheese: Mascarpone makes a richer, slightly sweeter substitute.
Red Food Coloring: Beetroot powder or gel food coloring as a natural alternative.
Ingredient Spotlight
Buttermilk: This ingredient does more than add tang. It helps tenderize the cake and reacts with baking soda to create a fluffier crumb.
Cocoa Powder: Though used in a small amount, it’s essential for that classic red velvet taste a whisper of chocolate that makes it so unique.
Instructions for Making Red Velvet Cake
This part is where the magic truly begins. Here are the steps you’re going to follow for a cake that wows every time:
- Preheat Your Equipment:
Preheat your oven to 350°F (175°C). Grease and line two 8-inch round cake pans with parchment paper. - Combine Ingredients:
In one bowl, whisk together flour, cocoa powder, baking soda, and salt. In another bowl, beat sugar and oil until smooth. Add eggs one at a time, then mix in the buttermilk, vanilla, vinegar, and food coloring. Slowly mix in the dry ingredients until just combined. - Prepare Your Cooking Vessel:
Divide the batter evenly between your prepared pans and smooth the tops with a spatula. - Assemble the Dish:
Place pans in the preheated oven. Bake for 30 to 35 minutes or until a toothpick comes out clean. - Cook to Perfection:
Let cakes cool in the pans for 10 minutes, then transfer to a wire rack to cool completely. - Finishing Touches:
While cakes cool, beat cream cheese and butter until fluffy. Gradually add powdered sugar, then a splash of milk or cream if needed for smoothness. - Serve and Enjoy:
Frost the cooled layers with cream cheese frosting, decorate as desired, and dig in!
Texture & Flavor Secrets
The texture is where red velvet really shines. Soft, airy layers with a tender crumb and just a hint of cocoa make every bite comforting. The frosting adds tang, sweetness, and creaminess, making it the perfect balance of richness and lightness. Let me tell you, it’s worth every bite.
Cooking Tips & Tricks
Here’s how to make sure everything turns out perfect:
- Use gel food coloring for a deeper red and less moisture.
- Don’t skip the vinegar it helps the cake rise and keeps the crumb tender.
- Chill the frosting before piping to help it hold shape.
What to Avoid
Here are a few pitfalls you can easily dodge:
- Overbaking: Will lead to dry cake. Start checking around the 28-minute mark.
- Overmixing: Makes the cake tough. Mix just until combined.
- Skipping cooling time: Warm cake can melt your frosting and make a mess.
Nutrition Facts
Servings: 12
Calories per serving: 480
Note: These are approximate values.
Preparation Time
Prep Time: 25 minutes
Cook Time: 35 minutes
Total Time: 1 hour
Make-Ahead and Storage Tips
Red velvet cake is surprisingly storage-friendly. You can bake the layers a day in advance and wrap them tightly in plastic. The frosted cake keeps in the fridge for up to 5 days. You can even freeze unfrosted layers for up to 2 months. Just thaw and frost when ready.
How to Serve Red Velvet Cake
Serve this beauty on a pretty cake stand for that wow factor. Pair it with coffee or tea, or go all-out and add fresh berries on the side. It’s also perfect with a scoop of vanilla ice cream if you’re feeling extra indulgent.
Creative Leftover Transformations
Don’t toss those extra slices! Here are some fun ideas:
- Crumble into cake pops and dip in white chocolate.
- Layer into parfaits with whipped cream and fruit.
- Turn it into an ice cream sundae topping.
Additional Tips
- Sift your powdered sugar for lump-free frosting.
- Use parchment rounds to avoid cake sticking.
- Let the cake sit out for 20 minutes before serving for best texture.
Make It a Showstopper
Pipe decorative swirls on top, sprinkle red velvet crumbs, or add edible flowers. A naked-style frosting look keeps it rustic yet elegant. Serve with confidence this one’s made to impress.
Variations to Try
- Chocolate Red Velvet: Add extra cocoa for a richer taste.
- Cupcakes: Divide batter into a lined cupcake pan and bake 18–20 minutes.
- Gluten-Free: Use a 1:1 gluten-free flour blend.
- Mini Cakes: Bake in ramekins for individual servings.
- Berry Layered: Add fresh raspberries or strawberry compote between layers.
FAQ’s
Q1. Can I make this cake without food coloring?
Yes, it will still taste great the color just won’t be red. Try beet powder for a natural option.
Q2. What frosting works best with red velvet?
Cream cheese frosting is the classic, but ermine frosting is also traditional and a bit lighter.
Q3. Can I use natural cocoa powder instead of Dutch-processed?
Yes, natural cocoa is preferred here due to its acidity, which works well with baking soda and vinegar.
Q4. How do I prevent my cake from doming?
Use cake strips around the pan or bake at a slightly lower temperature for a flatter top.
Q5. How long can the cake sit out?
Unfrosted, it can sit at room temp for a day. Once frosted with cream cheese, keep it refrigerated.
Q6. Can I double the recipe for a larger crowd?
Absolutely, just divide between more pans and adjust the baking time as needed.
Q7. What if I don’t have buttermilk?
Use 1 cup of milk mixed with 1 tablespoon lemon juice or vinegar as a substitute.
Q8. Can I freeze the frosted cake?
Yes, freeze it uncovered to firm it up, then wrap tightly. Thaw overnight in the fridge.
Q9. Why is my cake dry?
Most likely overbaking. Always check a few minutes early and use a toothpick test.
Q10. What’s the best way to store leftovers?
Wrap in plastic or keep in an airtight container in the fridge for up to 5 days.
Conclusion
This red velvet cake is more than just a treat it’s a celebration in every slice. With its deep color, light chocolate notes, and cloud-like frosting, it’s a cake you’ll come back to again and again. Trust me, you’re going to love this.
Print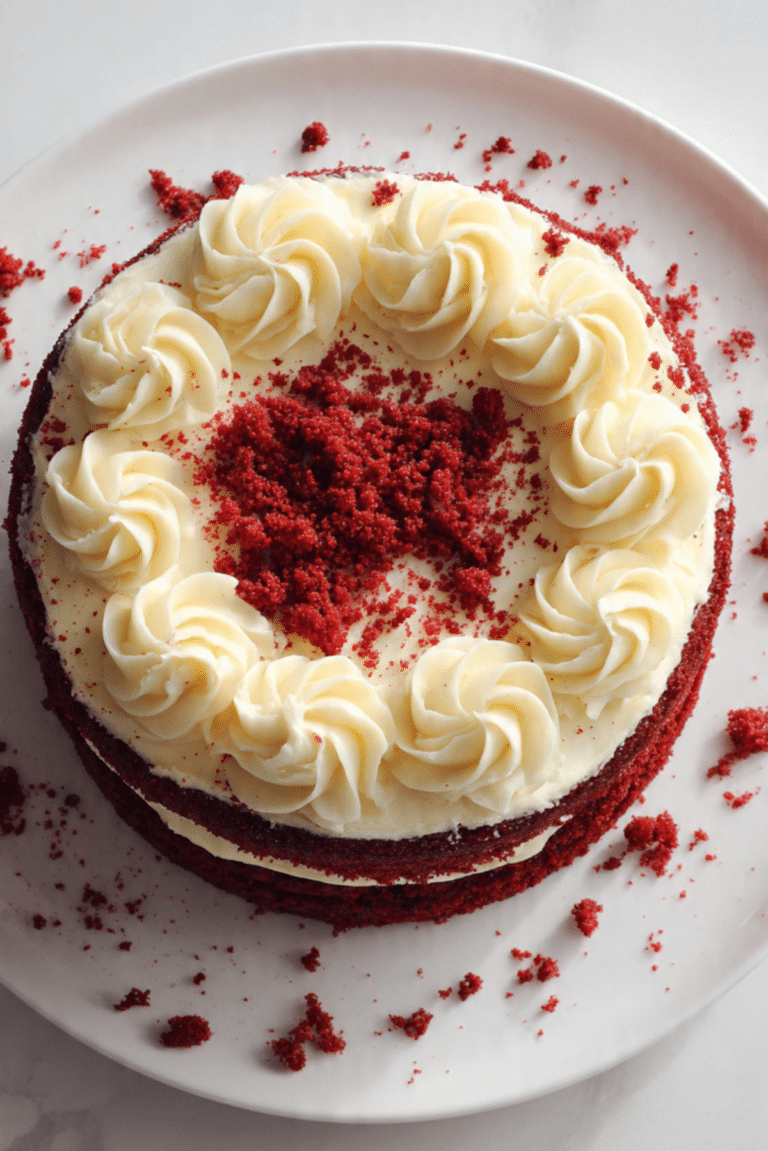
Red Velvet Cake
This classic red velvet cake is moist, tender, and lightly chocolatey with a rich cream cheese frosting. Perfect for any celebration or sweet craving.
- Total Time: 1 hour
- Yield: 12 servings 1x
Ingredients
- 2 ½ cups all-purpose flour
- 1 ½ cups granulated sugar
- 2 tablespoons cocoa powder
- 1 teaspoon baking soda
- ½ teaspoon salt
- 1 cup buttermilk
- 1 cup vegetable oil
- 2 large eggs
- 1 teaspoon white vinegar
- 2 teaspoons vanilla extract
- 2 tablespoons red food coloring
- 16 ounces cream cheese
- ½ cup unsalted butter
- 4 cups powdered sugar
- 2–3 tablespoons milk or cream
Instructions
- Preheat oven to 350°F (175°C). Grease and line two 8-inch round cake pans with parchment paper.
- In a bowl, whisk together flour, cocoa powder, baking soda, and salt.
- In another bowl, beat sugar and oil until smooth. Add eggs one at a time, then mix in buttermilk, vanilla, vinegar, and food coloring.
- Slowly add dry ingredients to the wet ingredients, mixing just until combined.
- Divide the batter evenly between pans. Bake for 30–35 minutes, or until a toothpick comes out clean.
- Cool in pans for 10 minutes, then transfer to a wire rack to cool completely.
- For frosting, beat cream cheese and butter until fluffy. Add powdered sugar gradually. Mix in milk or cream until desired consistency is reached.
- Frost and decorate the cooled cake as desired.
Notes
- Chill cake layers before frosting for easier assembly.
- Use gel food coloring for more vibrant color with less liquid.
- Let frosted cake sit out for 20 minutes before serving for best texture.
- Prep Time: 25 minutes
- Cook Time: 35 minutes
- Category: Dessert
- Method: Baking
- Cuisine: American
- Diet: Vegetarian
Nutrition
- Serving Size: 1 slice
- Calories: 480
- Sugar: 42g
- Sodium: 310mg
- Fat: 25g
- Saturated Fat: 10g
- Unsaturated Fat: 13g
- Trans Fat: 0g
- Carbohydrates: 58g
- Fiber: 1g
- Protein: 5g
- Cholesterol: 65mg
Keywords: red velvet cake, cream cheese frosting, classic cake recipe, homemade dessert, moist red velvet