Walnut Brownie Cookies
There is something a little magical about a cookie that behaves like a brownie. You get that crisp, delicate edge when you bite in, then the center gives way to a soft, fudgy chocolate middle with toasted walnuts tucked into every cozy bite. The tops crackle just enough to look rustic and bakery-style, while a tiny dusting of powdered sugar makes them feel special without trying too hard.
These Walnut Brownie Cookies are the kind of treat you make when you want chocolate to feel bold, warm, and a little nostalgic. Trust me, you’re going to love this, especially if you like desserts that taste rich but still feel simple enough for an afternoon baking mood.
Why These Fudgy Chocolate Cookies Feel So Special
The charm here is all in the contrast. The outside bakes into a thin, lightly crisp shell, while the inside stays dense and soft, almost like the center of your favorite brownie. Then the walnuts come in with their buttery crunch, balancing all that chocolate in the nicest way.
And now let’s lean into the best part, these cookies look impressive, but the process is friendly. You melt, mix, scoop, bake, and suddenly your kitchen smells like a chocolate shop on a rainy day.
A Little Brownie Cookie Story From the Dessert World
Brownies have been loved in American baking for over a century, and cookies have always been the grab-and-go sweetheart of the dessert table. Somewhere along the way, bakers realized they did not have to choose between the two.
That is how brownie-style cookies became such a fun favorite. They borrow the deep cocoa richness of brownies and the easy portioned shape of cookies. Add walnuts, and you get a nod to classic brownie flavors, the kind many people remember from family gatherings, bake sales, and weekend kitchen experiments.
Why This Recipe Earns a Spot in Your Baking Rotation
Once you make these, they become one of those recipes you remember when you need something chocolatey fast. They feel elegant enough for a dessert tray, but casual enough to eat with a glass of milk while standing at the counter.
Versatile: Serve them plain, dust them with powdered sugar, or add a drizzle of melted chocolate. They fit birthday trays, lunchbox treats, cozy weekends, and holiday cookie boxes.
Budget-Friendly: The ingredients are simple pantry staples like flour, cocoa, sugar, eggs, and walnuts. You get a bakery-style cookie without needing expensive specialty items.
Quick and Easy: The dough comes together in one mixing session, and the baking time is short. This one’s a total game-changer when you want dessert without a long project.
Customizable: You can adjust the walnut amount, add chocolate chips, or swap in another nut if needed. The base stays rich and fudgy either way.
Crowd-Pleasing: Chocolate cookies with brownie texture tend to disappear quickly. The flavor is familiar, comforting, and just indulgent enough.
Make-Ahead Friendly: The dough can rest in the fridge before baking, which makes it helpful for busy days. You can also bake them ahead and store them for later.
Great for Leftovers: These cookies stay delicious after cooling and can be turned into ice cream sandwiches, crumbled toppings, or quick dessert parfait layers.
Baker’s Notes for That Perfect Fudgy Bite
Before we start mixing, let me tell you what really makes the texture shine. The secret is not overbaking and giving the melted chocolate mixture a moment to settle before adding the dry ingredients.
- Use room temperature eggs so they blend smoothly into the chocolate mixture.
- Do not overmix once the flour goes in, because too much mixing can make the cookies tough.
- Scoop the dough evenly so every cookie bakes at the same pace.
- Pull them from the oven while the centers still look slightly soft.
- Let them cool on the baking sheet for a few minutes so they set without drying out.
Tools That Make Baking Easier
You do not need fancy equipment here, just a few dependable kitchen basics. Each one helps keep the process smooth, neat, and stress-free.
Mixing Bowls: Use one medium bowl for dry ingredients and one larger bowl for the chocolate mixture.
Whisk: A whisk helps combine the eggs, sugars, and melted chocolate until glossy.
Rubber Spatula: This is perfect for folding in flour and walnuts without overworking the dough.
Cookie Scoop: A scoop keeps the cookies evenly sized and gives them a tidy shape.
Baking Sheet: A sturdy baking sheet helps the cookies bake evenly.
Parchment Paper: It prevents sticking and makes cleanup much easier.
Cooling Rack: This lets air circulate around the cookies so the bottoms do not steam.
Ingredients You Will Need for Rich Chocolate Walnut Cookies
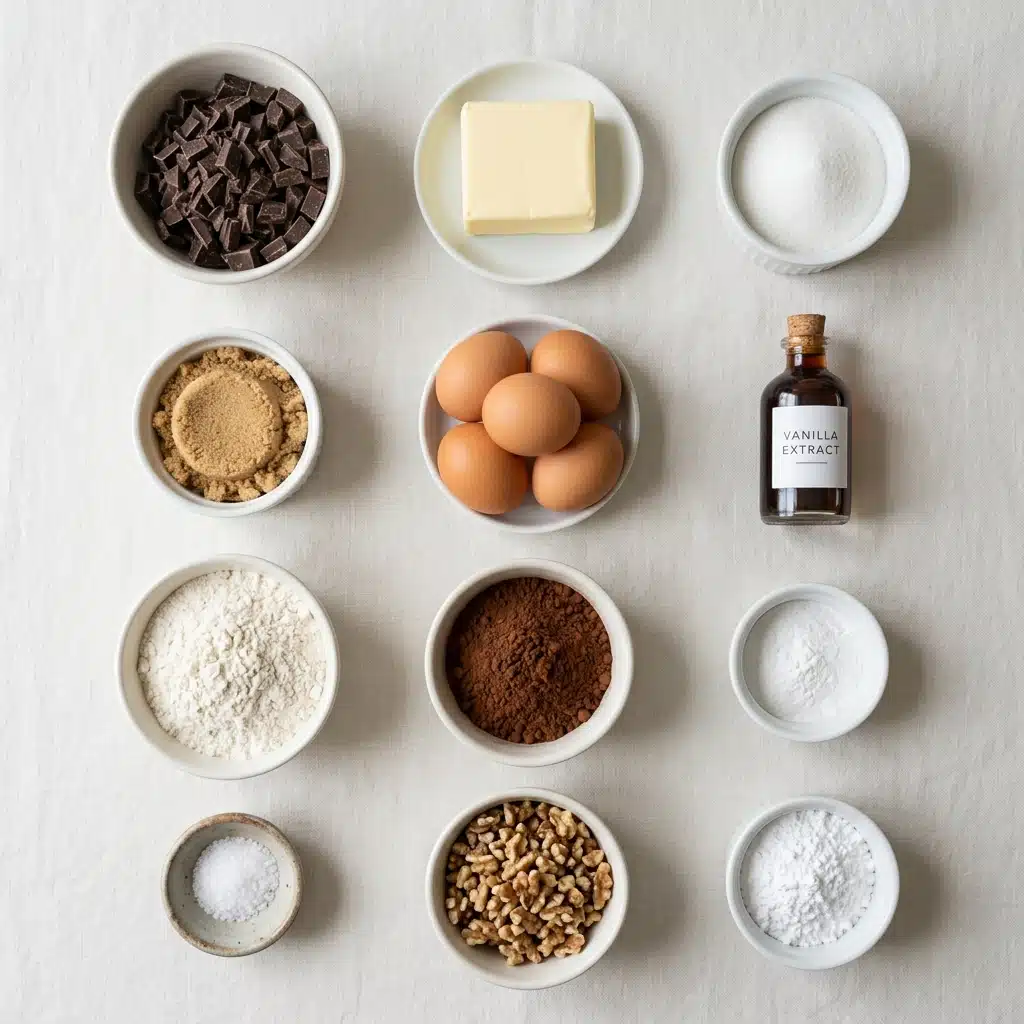
Now that the tools are ready, let’s look at the ingredients. Each one plays a small but important part in creating that brownie-like center, crackly top, and nutty finish.
- Semi-Sweet Chocolate: 6 ounces, chopped, gives the cookies their deep fudgy base and rich melted texture.
- Unsalted Butter: 1/4 cup, adds richness and helps the chocolate melt into a silky mixture.
- Granulated Sugar: 1/2 cup, helps create sweetness and encourages that delicate crackled top.
- Light Brown Sugar: 1/3 cup, adds moisture and a soft caramel-like depth.
- Large Eggs: 2, bind the dough and help create a chewy brownie-style center.
- Vanilla Extract: 1 teaspoon, rounds out the chocolate flavor and adds warmth.
- All-Purpose Flour: 3/4 cup, gives structure while keeping the cookies tender.
- Unsweetened Cocoa Powder: 1/4 cup, boosts the chocolate flavor and deepens the color.
- Baking Powder: 1/2 teaspoon, helps the cookies lift slightly without turning cakey.
- Salt: 1/4 teaspoon, balances the sweetness and sharpens the chocolate flavor.
- Chopped Walnuts: 3/4 cup, add buttery crunch and a classic brownie-style finish.
- Powdered Sugar: 2 tablespoons, for a light dusting after baking.
Easy Ingredient Swaps for Your Kitchen
Sometimes the pantry has its own plans, and that is completely fine. These swaps keep the spirit of the cookie while giving you room to work with what you have.
Semi-Sweet Chocolate: Dark chocolate can be used for a stronger cocoa flavor.
Unsalted Butter: Salted butter works too, but reduce the added salt slightly.
Light Brown Sugar: Dark brown sugar gives a deeper molasses flavor and slightly chewier texture.
All-Purpose Flour: A 1 to 1 gluten-free baking flour can work for a gluten-free version.
Chopped Walnuts: Pecans make a buttery alternative with a slightly softer crunch.
Powdered Sugar: Leave it off or use a light cocoa dusting instead.
The Two Ingredients That Make the Magic Happen
Before we start baking, it is worth pausing on the pair that gives this recipe its personality. Chocolate and walnuts are simple, but together they feel rich, cozy, and timeless.
Semi-Sweet Chocolate: This is the heart of the cookie. It melts into the batter, giving the center that soft brownie feel and making each bite taste deep and satisfying.
Chopped Walnuts: Walnuts bring contrast. Their earthy crunch cuts through the richness and makes the cookie taste layered instead of just sweet.
Let’s Bake These Chocolatey Beauties
Here are the steps you’re going to follow, and the rhythm is easy. Melt the chocolate, build the batter, scoop it onto the tray, and let the oven do the rest.
- Preheat Your Equipment: Preheat the oven to 350°F. Line a baking sheet with parchment paper and set a cooling rack nearby.
- Combine Ingredients: Melt the chopped chocolate and butter together in a heat-safe bowl, stirring until smooth. Let it cool for a few minutes, then whisk in granulated sugar, brown sugar, eggs, and vanilla until glossy.
- Prepare Your Cooking Vessel: In a separate bowl, whisk together flour, cocoa powder, baking powder, and salt. Keep the lined baking sheet ready so the dough can go straight from mixing to scooping.
- Assemble the Dish: Fold the dry ingredients into the chocolate mixture with a rubber spatula. Stir just until no dry streaks remain, then fold in the chopped walnuts.
- Cook to Perfection: Scoop the dough into 2 tablespoon portions and place them about 2 inches apart on the prepared baking sheet. Bake for 9 to 11 minutes, until the tops look crackled and the centers still appear slightly soft.
- Finishing Touches: Let the cookies rest on the baking sheet for 5 minutes, then move them to a cooling rack. Once cooled, dust lightly with powdered sugar.
- Serve and Enjoy: Serve warm for the softest center, or let them cool fully for a chewier bite. Let me tell you, it’s worth every bite.
How Texture and Flavor Build in Every Bite
The first thing you notice is the crackled top, thin and delicate, almost like the surface of a brownie pan. Then comes the soft center, rich with melted chocolate and cocoa, followed by the gentle crunch of walnuts.
As the cookies cool, the flavor deepens. The chocolate becomes smoother, the brown sugar adds a faint caramel note, and the walnuts taste warmer and toastier. That little powdered sugar finish keeps everything looking charming and adds a soft sweetness without overpowering the cocoa.
Helpful Tips for Better Cookies Every Time
A few small moves can make these cookies taste like they came from a bakery case. Nothing complicated, just smart little habits.
- Chill if the dough feels loose: A 15 minute chill can help the dough scoop more neatly.
- Use chopped chocolate, not only chips: Chopped chocolate melts smoother and gives better fudgy texture.
- Leave space between scoops: These cookies spread a little, so spacing helps them bake evenly.
- Cool before dusting: Powdered sugar looks prettiest when the cookies are no longer hot.
Mistakes to Skip for the Best Batch
This recipe is forgiving, but a few common baking habits can change the final texture. Keep these in mind and your cookies will stay soft, rich, and beautiful.
- Overbaking: Take them out while the centers look slightly underdone. They continue setting as they cool.
- Overmixing the dough: Fold gently after adding flour so the texture stays tender.
- Skipping parchment paper: The fudgy centers can stick, so parchment keeps everything neat.
- Using hot chocolate mixture with eggs: Let the melted chocolate cool slightly so the eggs blend smoothly.
Nutrition Facts for a Sweet Little Treat
Servings: 18 cookies
Calories per serving: 165
Note: These are approximate values.
Time Needed Before You Take That First Bite
Prep Time: 15 minutes
Cook Time: 10 minutes
Total Time: 25 minutes
Make-Ahead and Storage Tips for Busy Bakers
These cookies fit beautifully into a make-ahead plan. You can prepare the dough earlier in the day, cover it, and refrigerate it until you are ready to bake.
Store baked cookies in an airtight container at room temperature for up to 4 days. For longer storage, freeze them in a freezer-safe bag for up to 2 months. To enjoy again, let them thaw at room temperature, or warm one cookie in the microwave for about 8 to 10 seconds for that soft, fudgy center.
How to Serve Them Beautifully
Serve these cookies with cold milk, hot coffee, or a cozy mug of cocoa. They also look lovely stacked on a white plate with a light snowy dusting of powdered sugar.
For dessert trays, pair them with vanilla cookies, fruit, or small bowls of berries. The dark chocolate color makes them stand out, and the walnuts give them that homemade, slightly rustic charm.
Fun Ways to Use Leftovers
If you somehow have leftovers, they can turn into something new with almost no effort. Crumble one over vanilla ice cream, layer pieces into a yogurt parfait, or tuck a cookie into a lunchbox for a midday treat.
You can also sandwich two cookies with a little vanilla frosting or softened ice cream. It feels playful, rich, and just a little over the top in the best way.
Extra Little Baking Advice
For a deeper flavor, toast the walnuts for a few minutes before folding them into the dough. Let them cool first so they do not warm the batter.
If you want the cookies to look extra polished, press a few walnut pieces gently onto the tops right after scooping. This keeps the nutty topping visible after baking and gives each cookie that pretty bakery-style finish.
Make Them Look Like a Dessert Tray Star
Presentation does not need to be fussy. Place the cookies in a loose circle on a simple plate, dust them lightly with powdered sugar, and let the cracked tops show.
For a cozy look, serve them on parchment with a small bowl of extra walnuts nearby. Keep the background simple so the dark chocolate color and pale sugar dusting really pop.
Variations to Try Next Time
- Double Chocolate Style: Fold in 1/2 cup chocolate chips with the walnuts for extra melty pockets.
- Espresso Chocolate: Add 1 teaspoon instant espresso powder to the dry ingredients for a deeper chocolate flavor.
- Orange Walnut: Add 1 teaspoon orange zest to the batter for a bright citrus note.
- Salted Finish: Sprinkle a tiny pinch of flaky salt on each cookie before baking.
- Pecan Brownie Cookies: Swap walnuts for chopped pecans for a sweeter, buttery crunch.
FAQ’s
Q1: Can I make the dough ahead of time?
A1: Yes, you can chill the dough for up to 24 hours. Let it sit at room temperature for a few minutes before scooping if it becomes too firm.
Q2: Why did my cookies turn cakey?
A2: They may have been overbaked or mixed too much after adding the flour. Keep the mixing gentle and pull them out while the centers still look soft.
Q3: Can I skip the walnuts?
A3: Yes, the cookies will still be rich and fudgy without them. You can leave them plain or add chocolate chips instead.
Q4: Can I use cocoa powder only instead of melted chocolate?
A4: Melted chocolate is important for the fudgy brownie texture. Cocoa alone will make the cookie less rich and less dense.
Q5: How do I get crackly tops?
A5: Whisk the sugars well into the melted chocolate mixture with the eggs. That glossy mixture helps create the pretty crackled surface.
Q6: Can I freeze the baked cookies?
A6: Yes, freeze them in a sealed container for up to 2 months. Thaw at room temperature before serving.
Q7: Should I toast the walnuts first?
A7: You can, and it makes the flavor even better. Toasting brings out their buttery, nutty aroma.
Q8: Can I make them gluten-free?
A8: Yes, use a 1 to 1 gluten-free baking flour. The texture may be slightly different, but still delicious.
Q9: Why are my cookies spreading too much?
A9: The dough may be too warm. Chill it for 15 to 20 minutes before baking.
Q10: Are these better warm or cooled?
A10: Warm cookies are softer and gooier, while cooled cookies become chewier. Honestly, both are lovely.
Conclusion
Walnut Brownie Cookies bring together everything that makes chocolate baking so comforting, a crackly top, a fudgy center, and that cozy walnut crunch. They are simple enough for a casual afternoon and pretty enough for sharing, which is exactly the kind of recipe worth keeping close.
So grab a bowl, melt that chocolate, and enjoy the sweet little moment when your kitchen starts smelling like brownies and cookies at the same time.
Print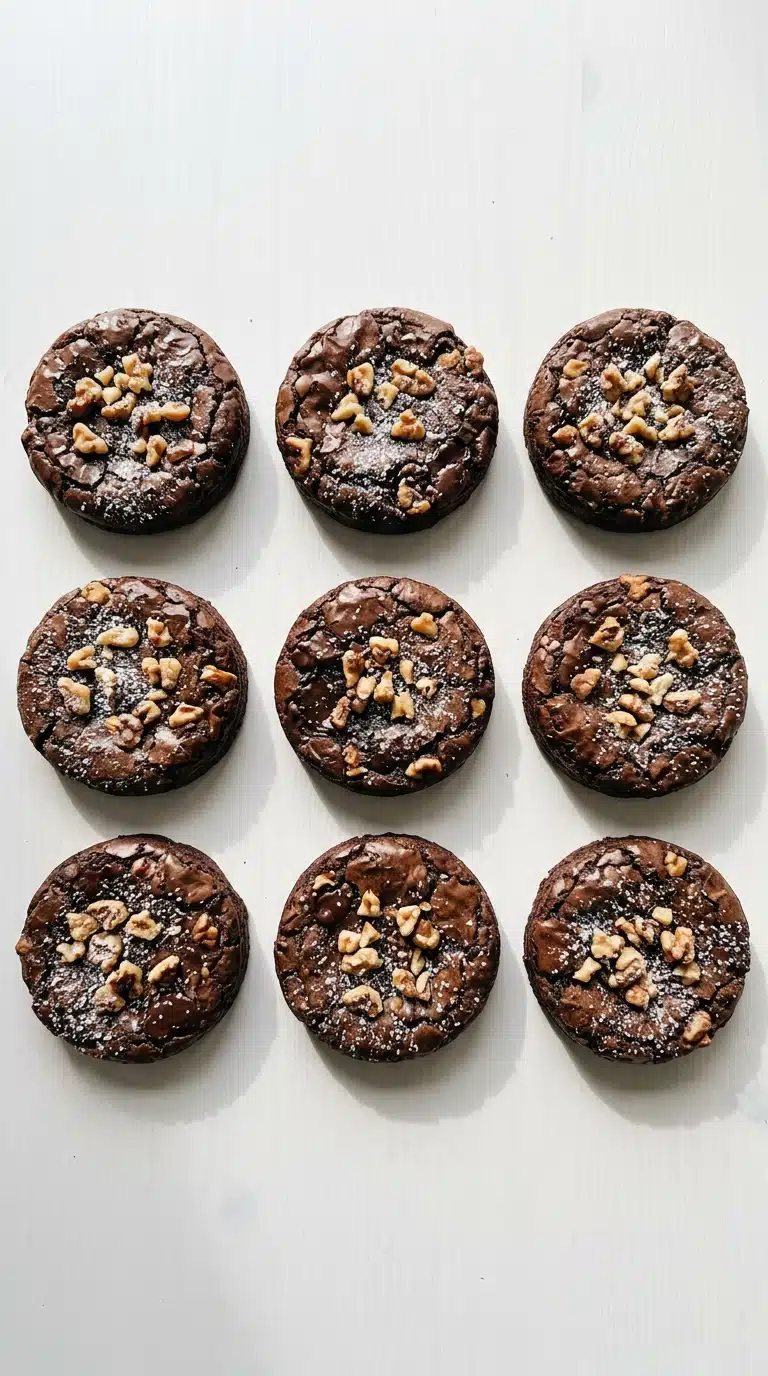
Walnut Brownie Cookies
Rich, fudgy chocolate cookies with crackled brownie-style tops, chopped walnuts, and a light powdered sugar finish.
- Total Time: 25 minutes
- Yield: 18 cookies 1x
Ingredients
- 6 ounces semi-sweet chocolate, chopped
- 1/4 cup unsalted butter
- 1/2 cup granulated sugar
- 1/3 cup light brown sugar
- 2 large eggs
- 1 teaspoon vanilla extract
- 3/4 cup all-purpose flour
- 1/4 cup unsweetened cocoa powder
- 1/2 teaspoon baking powder
- 1/4 teaspoon salt
- 3/4 cup chopped walnuts
- 2 tablespoons powdered sugar, for dusting
Instructions
- Preheat the oven to 350°F and line a baking sheet with parchment paper.
- Melt the chopped chocolate and butter together in a heat-safe bowl, stirring until smooth. Let cool for a few minutes.
- Whisk granulated sugar, brown sugar, eggs, and vanilla into the melted chocolate mixture until glossy.
- In a separate bowl, whisk together flour, cocoa powder, baking powder, and salt.
- Fold the dry ingredients into the chocolate mixture just until combined, then fold in the chopped walnuts.
- Scoop the dough into 2 tablespoon portions and place them about 2 inches apart on the prepared baking sheet.
- Bake for 9 to 11 minutes, until the tops look crackled and the centers still look slightly soft.
- Let the cookies rest on the baking sheet for 5 minutes, then transfer to a cooling rack.
- Dust lightly with powdered sugar once cooled and serve.
Notes
- Do not overbake, the cookies continue setting as they cool.
- Chill the dough for 15 minutes if it feels too soft to scoop.
- Toast the walnuts before adding them for a deeper nutty flavor.
- Store in an airtight container at room temperature for up to 4 days.
- Prep Time: 15 minutes
- Cook Time: 10 minutes
- Category: Dessert
- Method: Baking
- Cuisine: American
- Diet: Vegetarian
Nutrition
- Serving Size: 1 cookie
- Calories: 165
- Sugar: 12g
- Sodium: 45mg
- Fat: 9g
- Saturated Fat: 4g
- Unsaturated Fat: 5g
- Trans Fat: 0g
- Carbohydrates: 20g
- Fiber: 2g
- Protein: 3g
- Cholesterol: 30mg
Keywords: walnut brownie cookies, fudgy chocolate cookies, brownie cookies, walnut dessert, chocolate walnut cookies